As much as I would like to think I could get away from talking about the basement office / workout / mudroom project, I never covered how I decided to cover the removable basement ceiling. I’m not even a little sorry about the double cover in that intro.

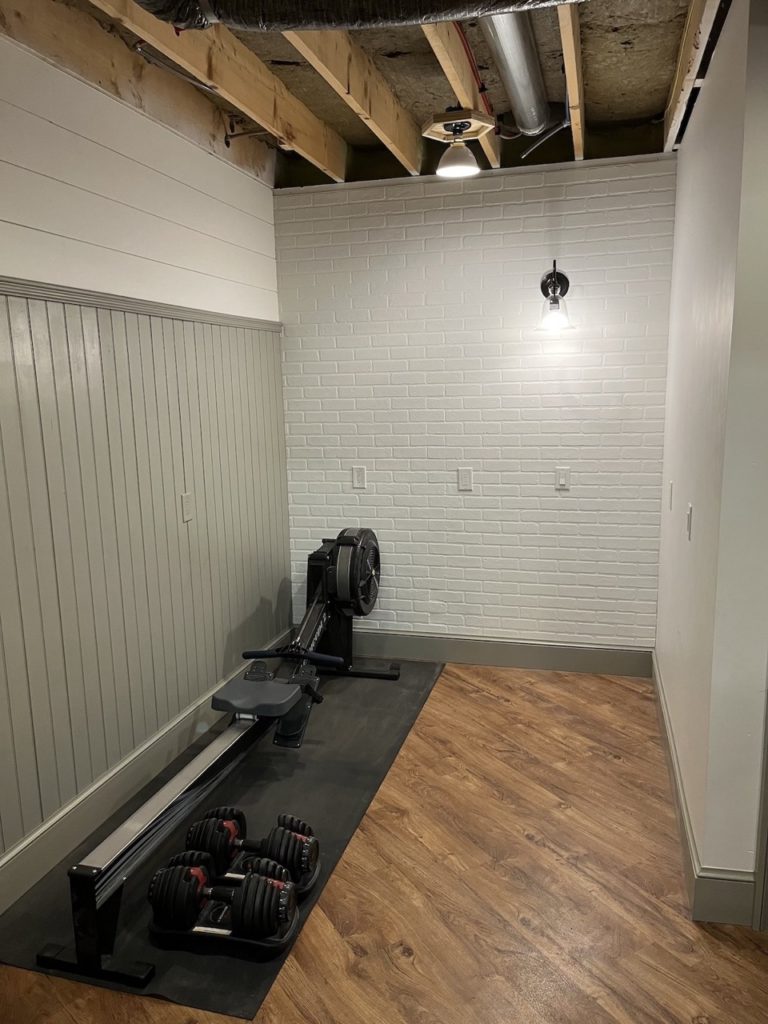
Going back to where I started off, the ceiling was looking a little homely down here. It had a mix of wires, pex supply pipes, heating vents and a saggy fresh air return. I knew I wanted to cover it but the thought of putting up sheetrock filled me with deep loathing for a few reasons.
Why would you want a removable basement ceiling?
- I really hope to never again sheetrock anything if I can help it. I abhor taping and sanding and the thought of doing it overhead sounds like a stress dream.*
- There is a near 100% chance I will have to access this ceiling at some point. It might be a leak, a new pipe or wire or whatever, there is no shot I won’t need access in the future.
- Because of the possibility of leaks and how poorly water and sheetrock mix, even some sort of non taped sheetrock panel situation was out.
- Basically I’m anti-sheetrock and it would take a lot to move me off that position
* My actual recurring stress dream is not taping and sanding a sheetrock ceiling. It’s walking out on stage to preform in the opening night of a play that I have never rehearsed and don’t know the lines for. Blame high school and college drama for that. I don’t think I’ve ever had a stress dream about a test, but that’s probably because I was am a giant nerd.
What other basement ceiling options did I consider?
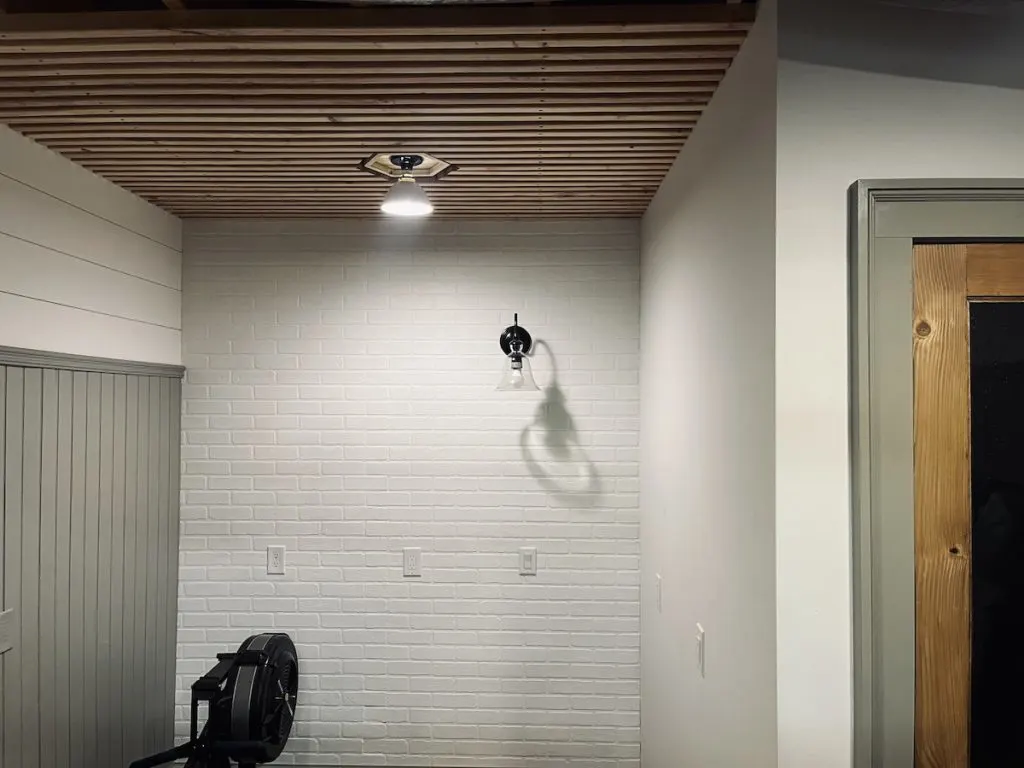
The easiest way to deal with a basement ceiling is to just paint it. We did this in the playroom and I really love it. The walls and ceiling are painted the same color as all of our trim (Benjamin Moore Oxford White). I’m just as happy now as when we initially painted it. One of the only downside is that we have added some wires and pipes since then and it needs a touch up so that everything blends in.

We considered painting it dark because there are a lot of great examples of gray or black ceilings out there. Seeing it on other blogs like This DIY Life made it a very tempting option. They even have a fun faux exposed brick wall to go with it, similar to the one I did.
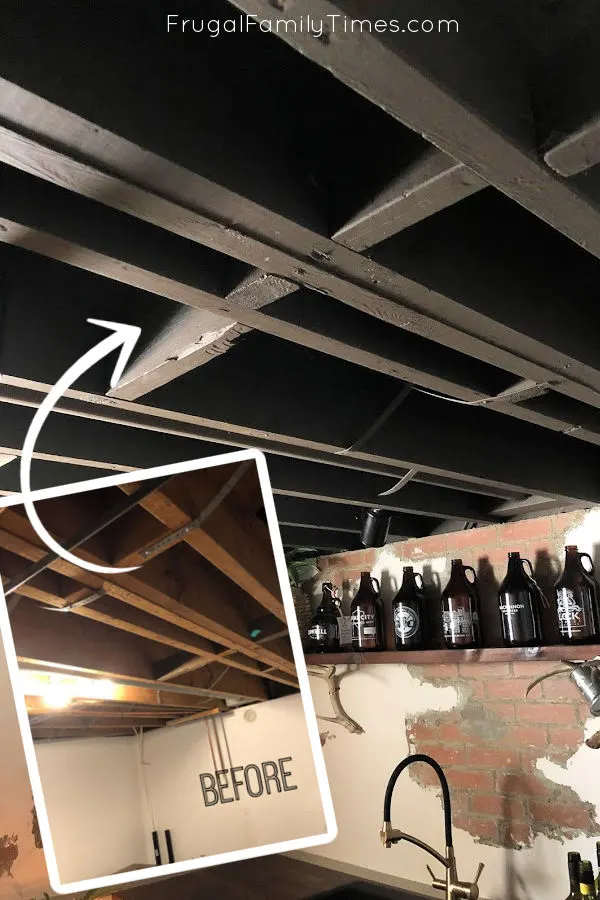
Ultimately the lack of windows in this room and the wonky hanging air return lead me away from the black ceiling.
I looked into a lot of options and read a bunch of “ceiling idea” posts which I won’t link because most of them are well, not for me. In the end I decided to go with a modern looking slate ceiling.
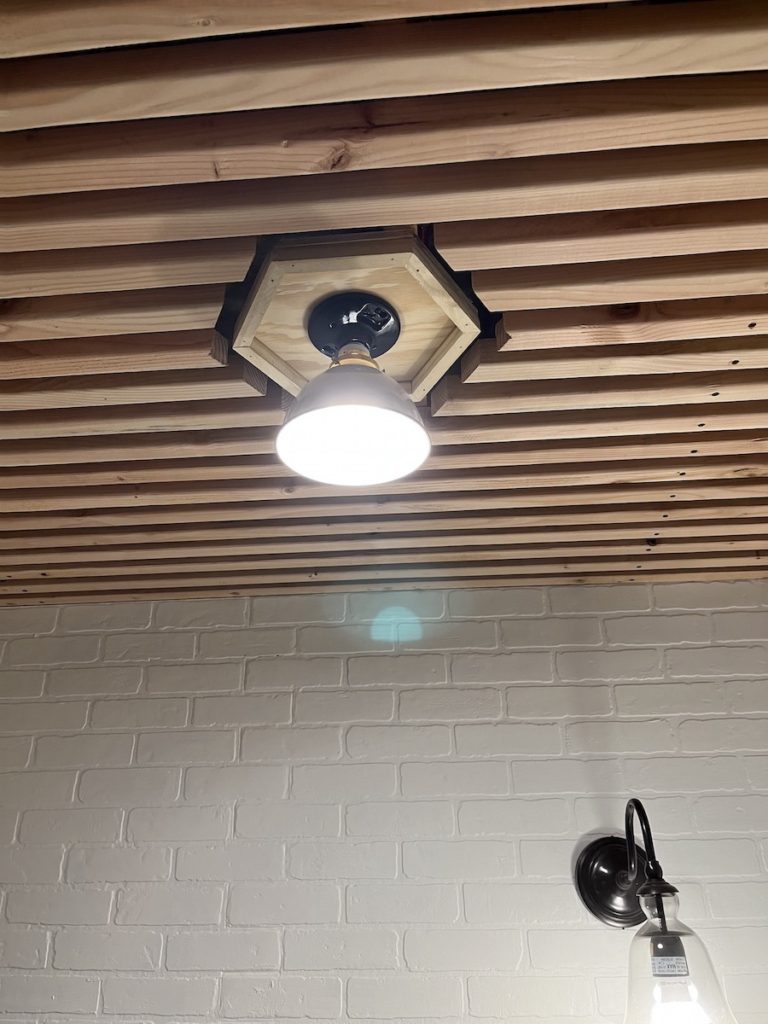
Why did I go with a slats for a removable basement ceiling?
- Removable – The number one reason was so that I could take it down when needed.*
- Cheap – I knew I could make a good looking slat ceiling out of 2×4 lumber. I often use it for unexpected projects (my shed doors for example) and a basement ceiling is a great place to use a cheap material.
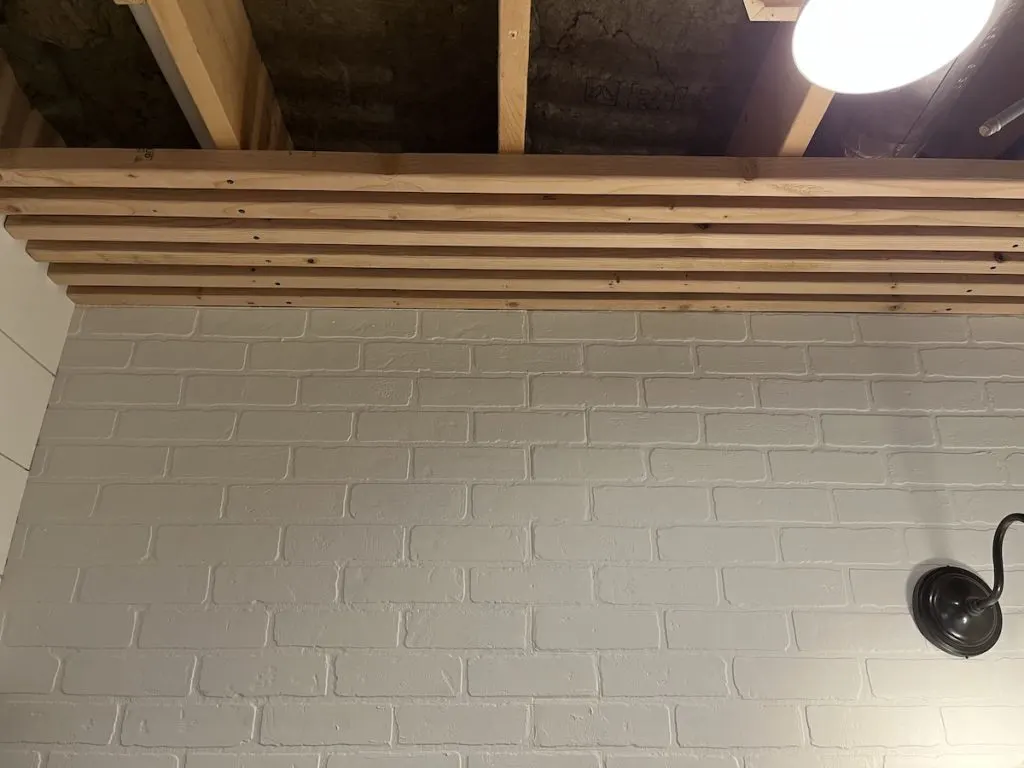
- Clean look – The repeating linear pattern covers and hides all the clutter.
- Natural – The natural wood tone helps break up the painted faux brick panel wall and painted paneling.
- Visibility – It’s really nice to be able to see the pipes, wires and if there is a leak without taking down the ceiling, but not enough that it looks clutter.


What materials and tools are need for this removable basement ceiling?
Materials needed:
- 2×4 lumber
- 2 1/2″ #10 black screws
- Scrap lumber for making a spacer
Tools needed:
- 18V Drill
- 18V Driver
- Finish nail gun
- Clamps
How do you install a slat removable basement ceiling?
I almost feel embarassed writing this section but maybe it will be helpful?
The only “trick” that I can offer to this project is that I ripped my 2x4s in half getting roughly 1 1/2″ x 1 5/8″ boards. I could have used 2x2s but my box stores offer 2x4s in longer lengths and I wanted all to match.
You want to place the cut edge against the joists and screwed into the same two joists for each board in the narrow section. The narrow section is just under 7′ wide and two screws is plenty for these to feel secure.
In reality, I should have pre-marked all of boards so that the screw holes lined up more perfectly. Because I wanted to cut them to width for the wonky walls, I skipped that step. Thus, I have a janky screw line that will haunt me whenever I do a workout that involves watching the ceiling waiting for a timer to run out.

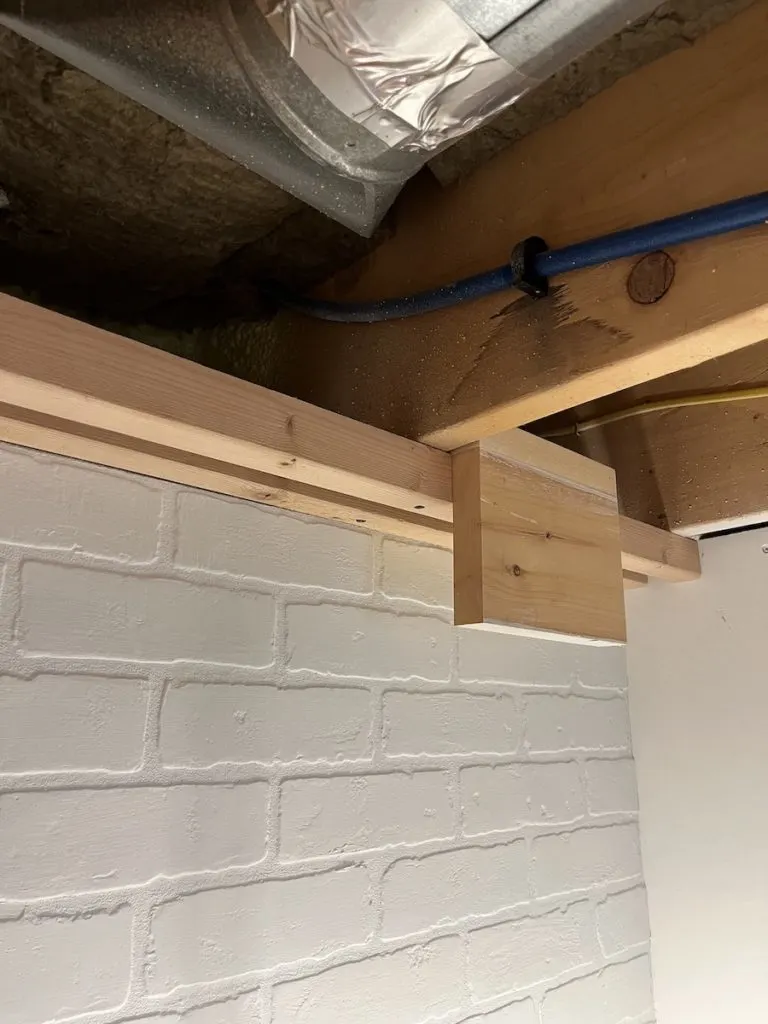

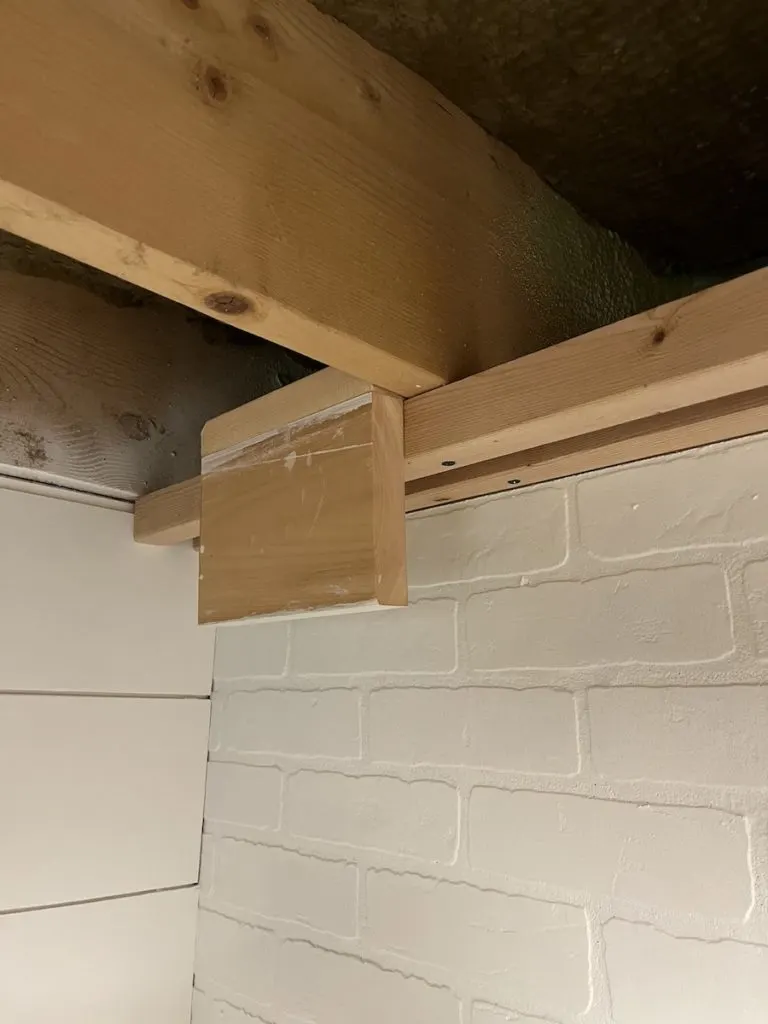
To keep the spaceing as even as possible I nailed up some scrap wood that is 1 1/8″ thick. I added a little cap so that it could hang off the previous slat. I used a spacer on each side close to where the screws were to have the most effect.

What about noise?
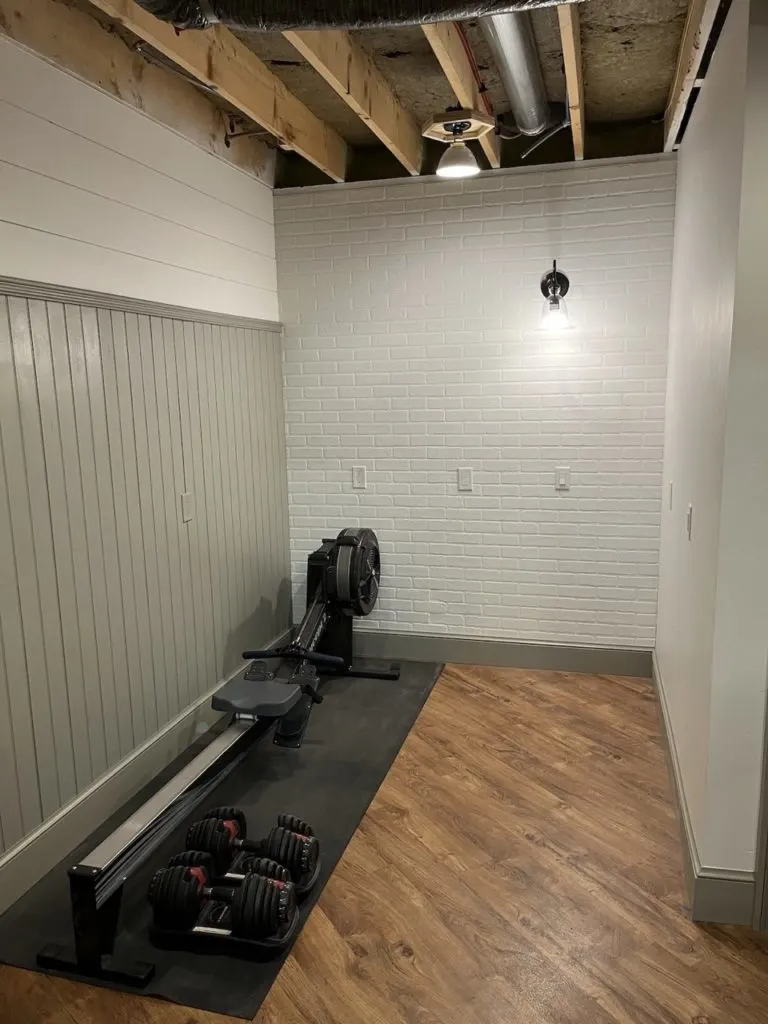
Before I put up the slats I did add insulation for noise. This is both my gym and might occassionally be my home office. I do not need my family hearing me gasp for breath on my rowing machine or the dead air when I crack jokes that my remote team just uncofomfortably smiles at.
I did some reading up on basement ceiling insulation options and since it was going to be open I used Rockwool instead of any fiberglass options.
I didn’t need to worry about vapor barriers or R-value since the basement is conditioned space. We spray foamed the walls when building and it makes it extremely comfortable down here.
What if you need to access the ceiling?
You just unscrew each slat. It’s highly recommend to label each board as you take it down, in case you have differing widths like I do. I was able to take down and put back up a section of the ceiling in really only a few minutes.
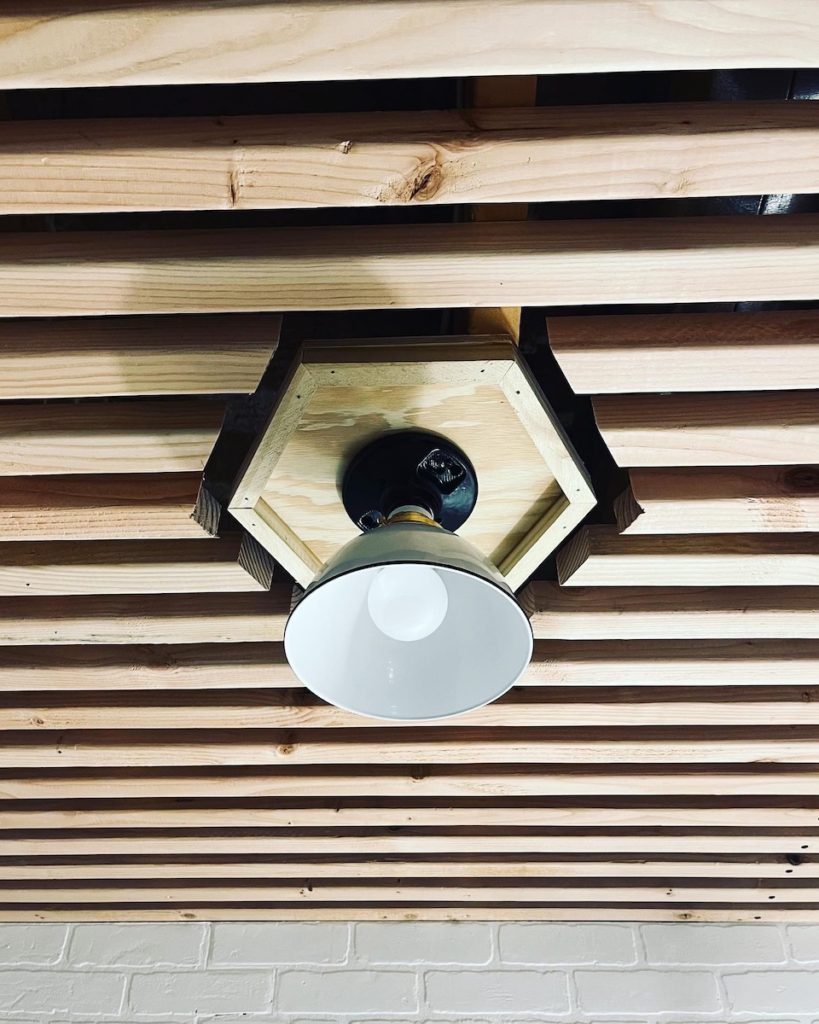
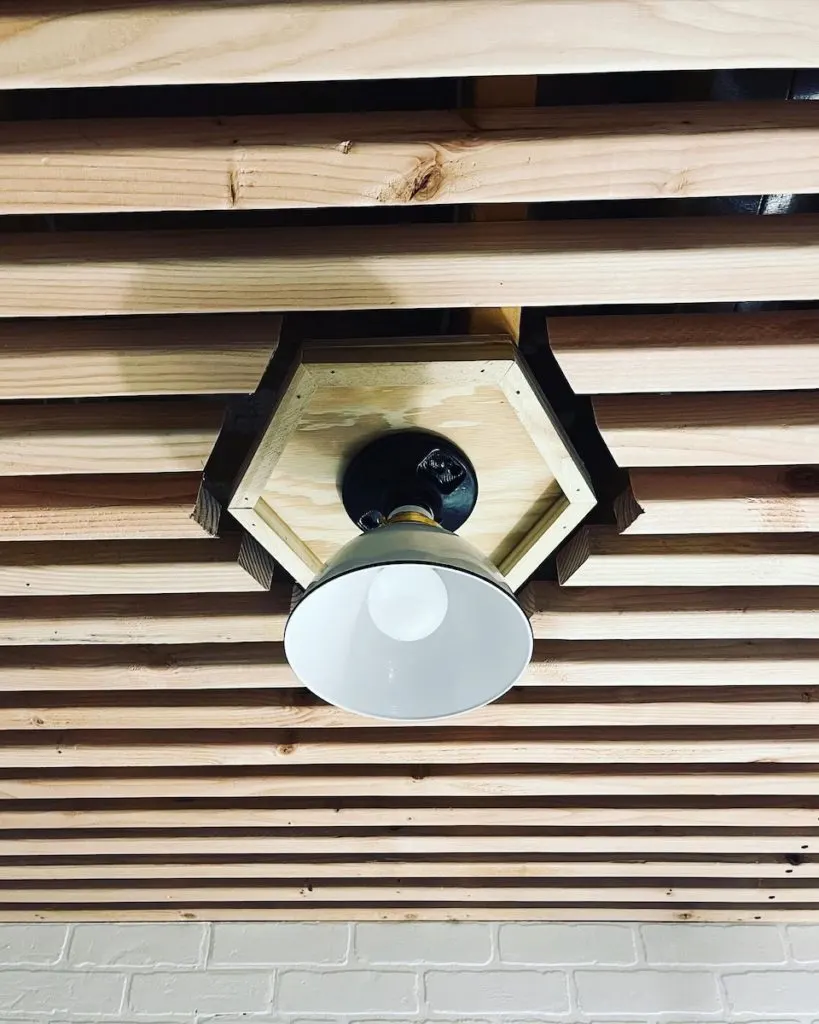
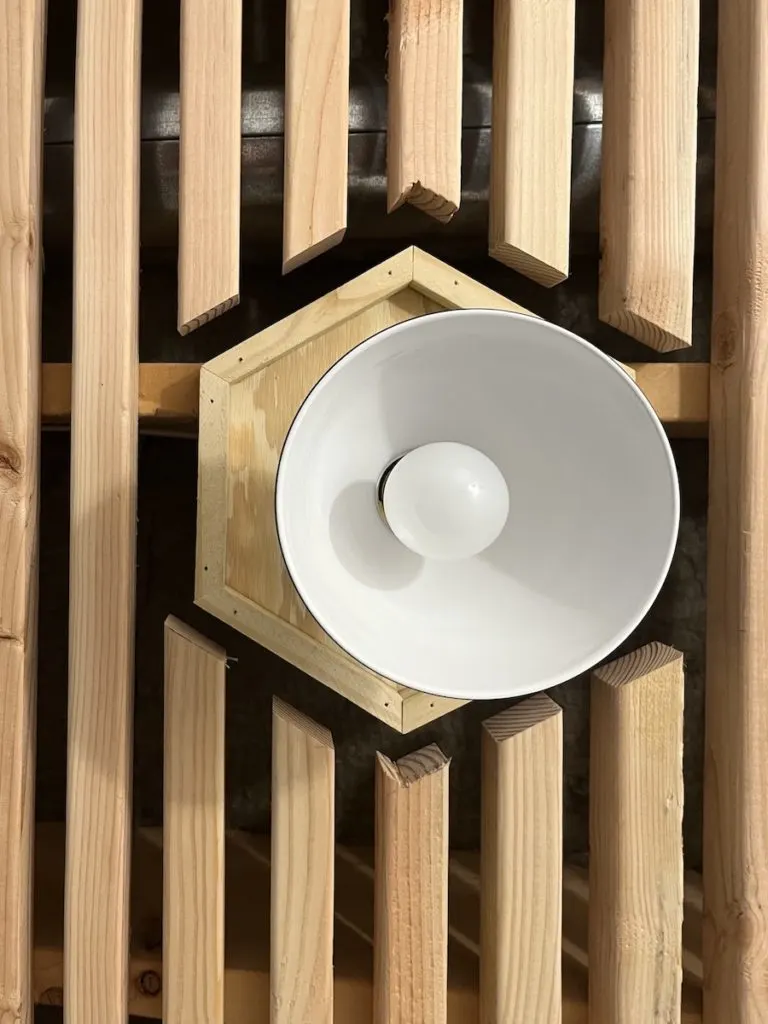
But why hexagon shaped light backers?
The short answer is hexagons are bestagons. But the probably more useful one is that I wanted to add some interest around the DIY industrial lights I built. Originally these were going to be some farmhouse lights that were a little meh so I figured some plywood backers would help make them more interesting.
I used the same spacer from installing the slats to mark the boards and cut around the hexagon giving it a very integrated look. In reality it’s not flawless and some sides didn’t work out perfectly, but it’s interesting and brings me joy.