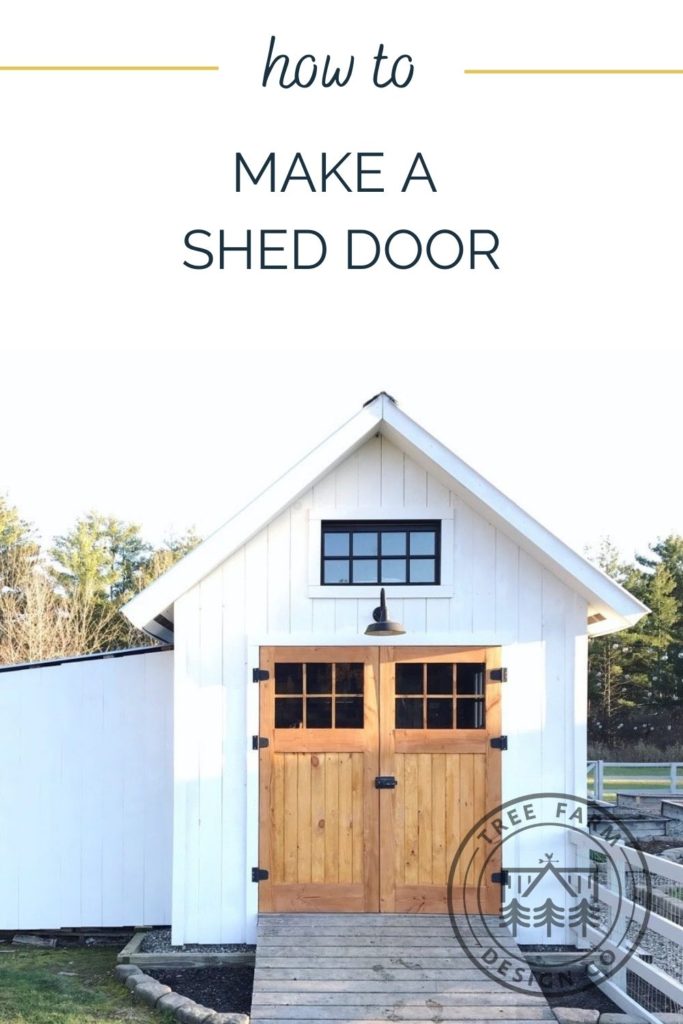
It is pretty straight forward to make a shed door. This is how I built a set of classic carriage house style doors with glass for our potting shed. If you want a basic functional door with a classic look, a piece of plywood with one-by trim over it works fine. This post is really about if you want to make something a little more complicated. For another option, I already covered how to make a round top shed door in another post.

I didn’t actually plan to build these doors for the shed. While in the middle of adding a fence around the garden I stopped to “quickly” tighten the handle on the existing shed doors. These shed doors were rather spartan repurposed sliding patio doors from my parents remodel. The tightened screw cracked the glass panel and it shattered a few minutes later.
Materials needs to make a shed door
I only bring up the spontaneous nature of the doors to explain the materials:
- 2×6 framing lumber for the styles (outside vertical members) and top rail (horizontal member)
- 2×8 framing lumber for the middle rail
- 2×10 framing lumber for the bottom rail
- v-groove tongue and groove pine for the panels
- panel trim (yes it’s for trimming the panel, surprise)
- 3/16″ thick tempered glass panel cut to size
- stain
Yes, I used framing lumber for roughly 1.5″ doors. If I had planned on the project and wanted to spend a little more money I could have used either 5/4 boards or glued up one by boards. My hesitation with the framing lumber was getting an even natural stain and dimensional stability but I’m happy on both accounts.
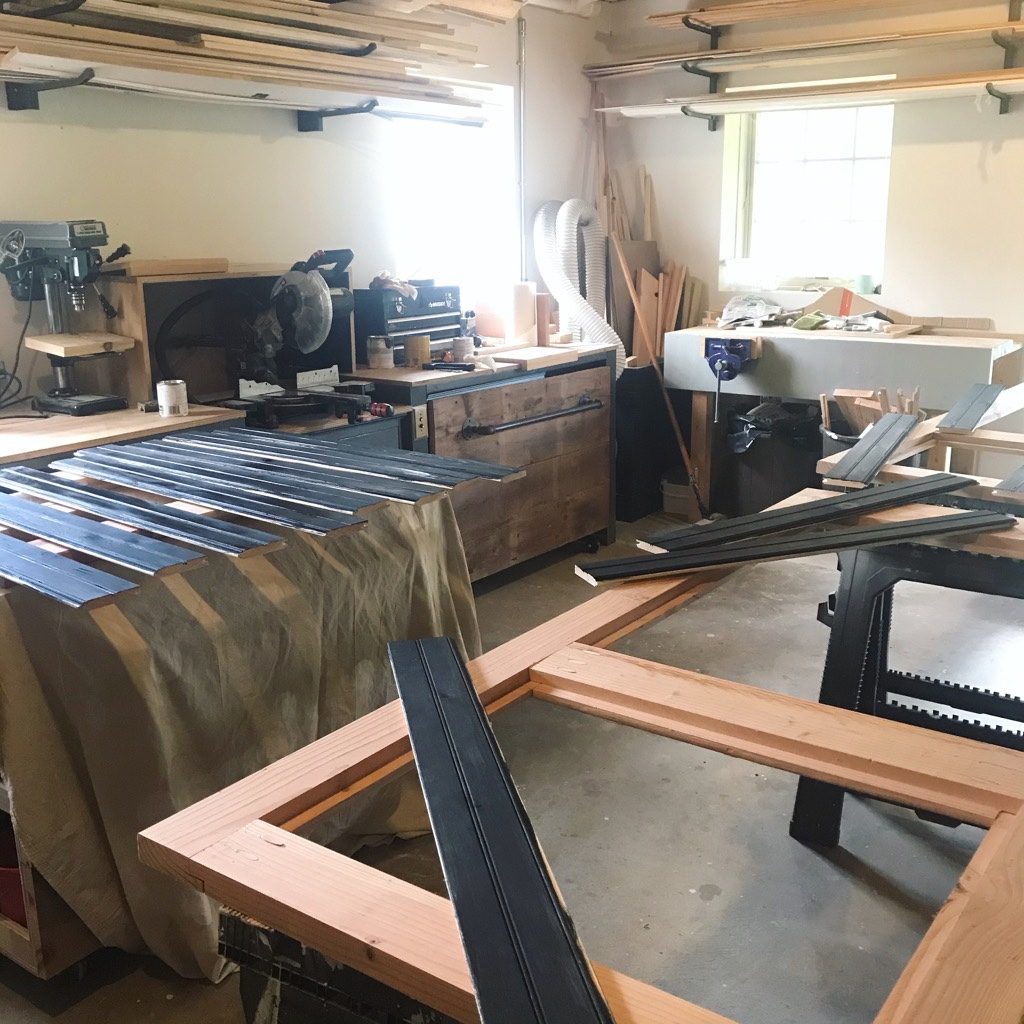
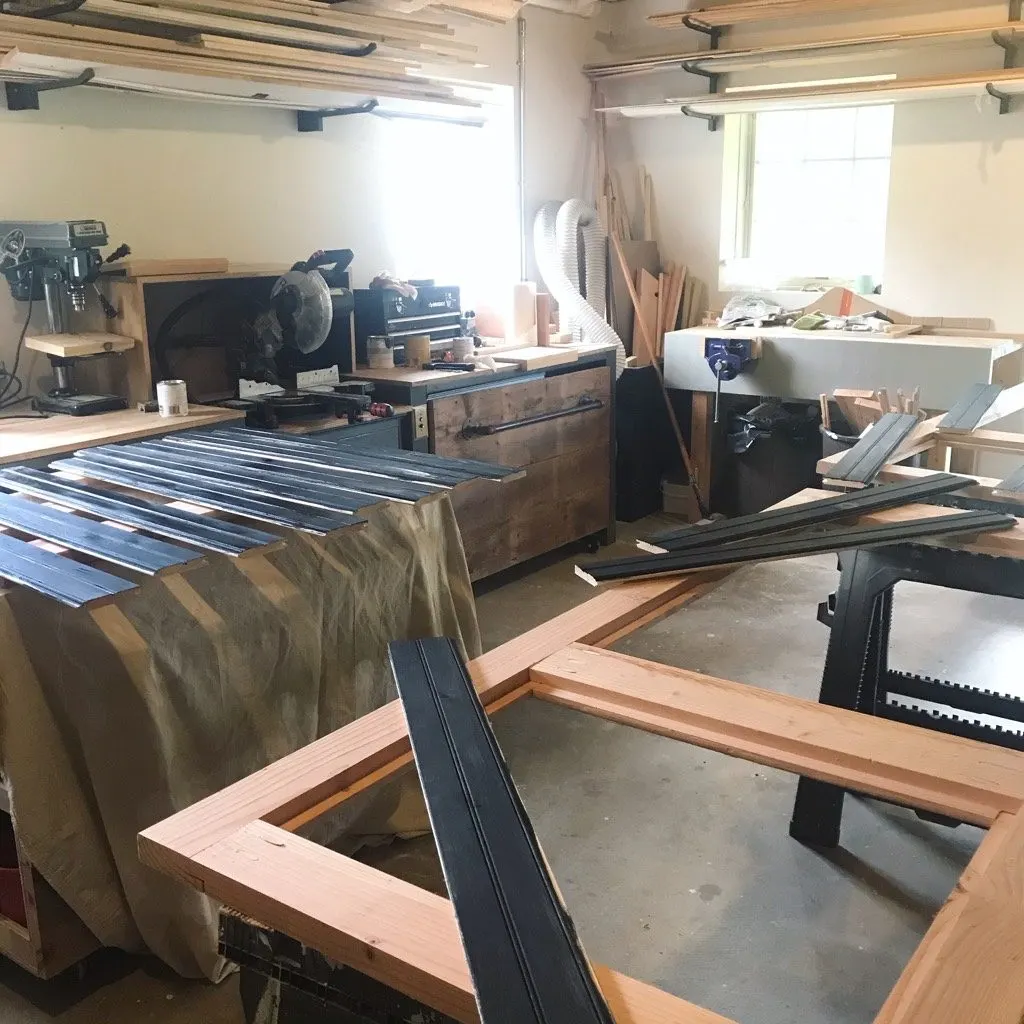
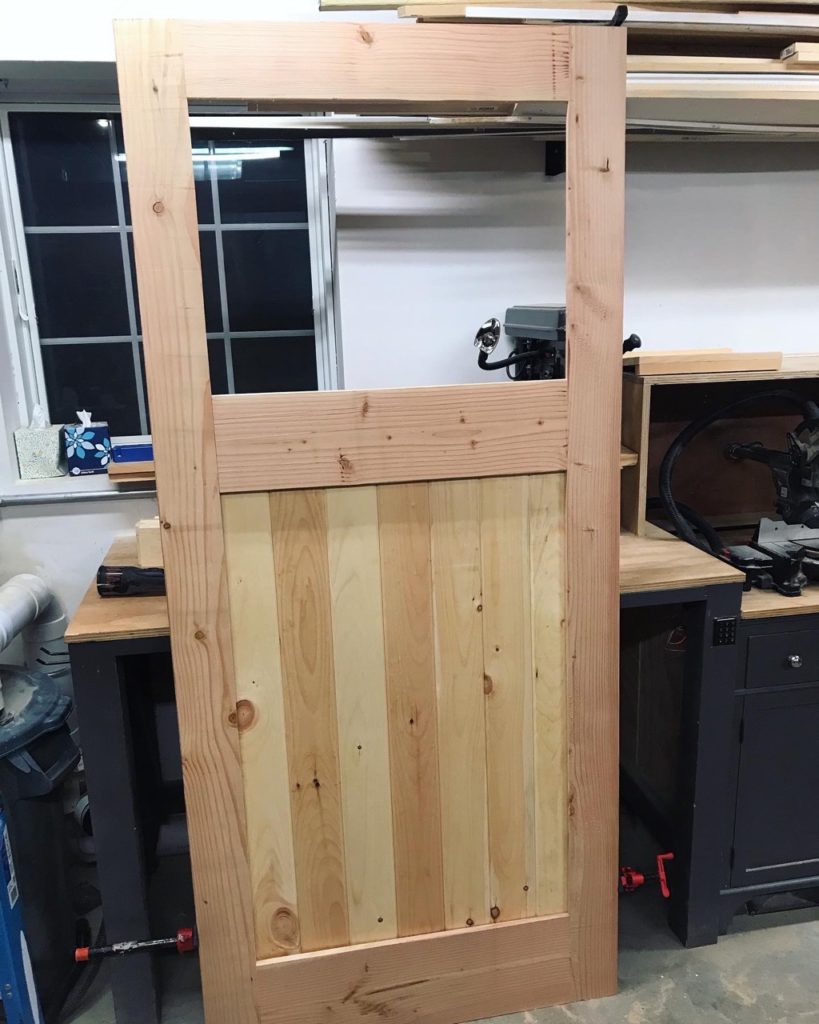
Make the shed door frame
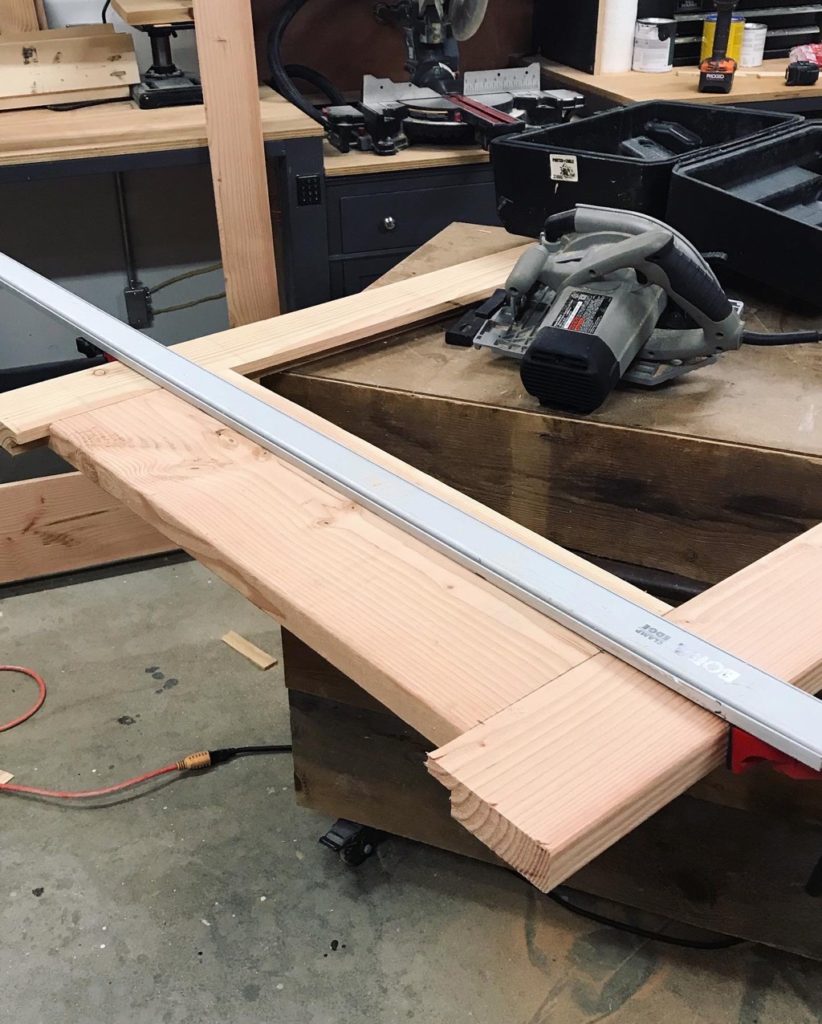
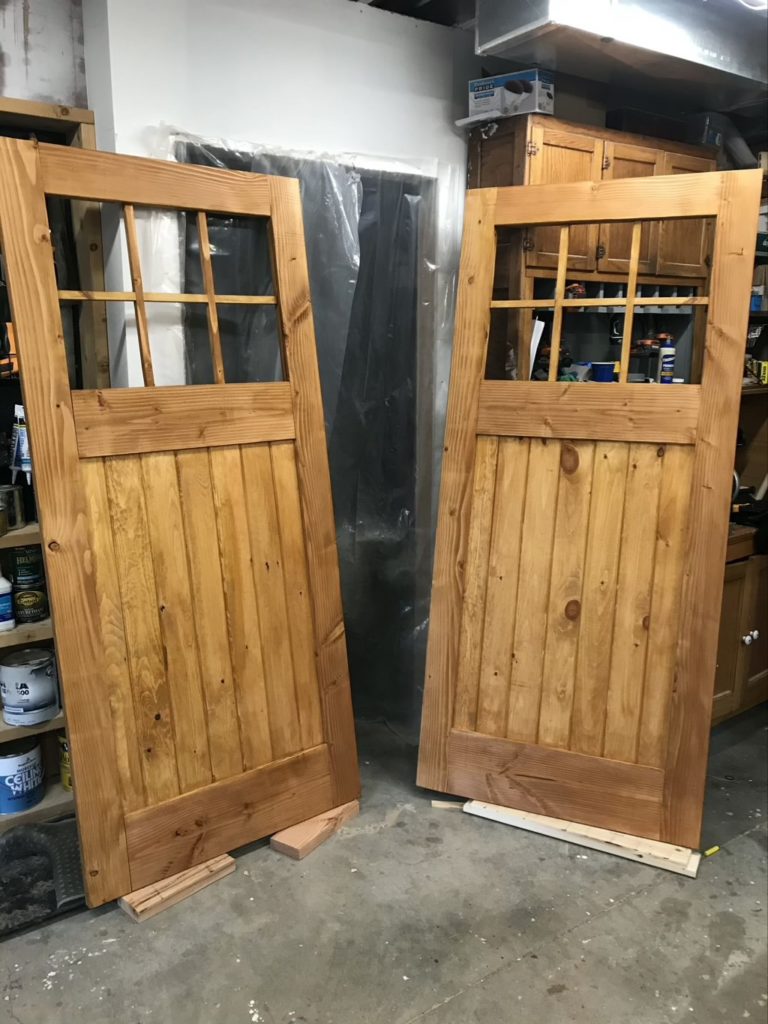
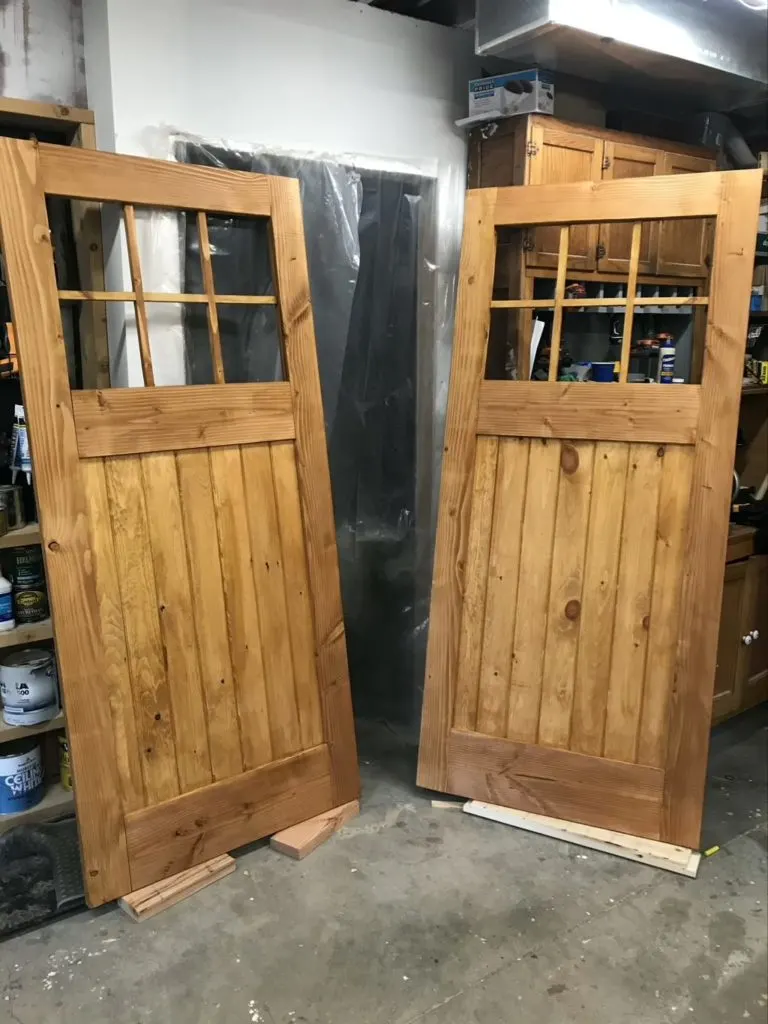
The main construction of the door lies in constructing the frame with a rabbet (groove) on the back to accept the glass and v-groove panel. The rails were made with half-lap joints that overlap the rabbet, to reinforce the door I also pocket-screwed these with three screws each. Since the back was being stained very dark (and on the inside of the shed) I didn’t worry too much about the pocket hole plugs showing.

When making the frames I left the styles extra long so that they could be trimmed down. This also meant taking a half inch or so off the top and bottom rails, which helped square them up as well.

You can see a little bit more of the rabbet on the styles here in this photo. The middle rail has a rabbet on the back on the top and bottom. However, on the top and bottom rails only have a rabbet on one side (the inside).
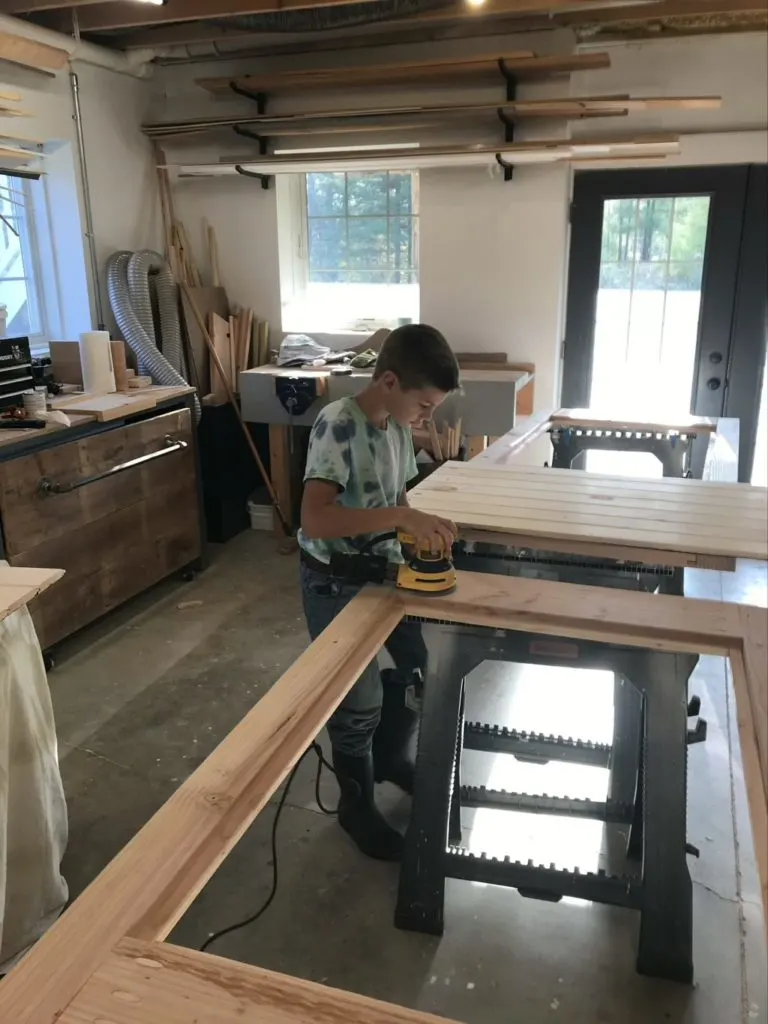
Making the panel
The panel is really just tongue and groove wood glue to the frame and attached with finishing nails. Before I attached it, I prestained all of the backside. The back of these pieces had a bead detail that was a lot easier to paint with the pieces separate.
To attach the panel I used some wood glue around the rabbet and more trim nails than technically necessary. I didn’t take a picture of the ragged ends but needless to say, it wasn’t looking very pretty. I left around 1/4″ for an expansion join all around the panel.
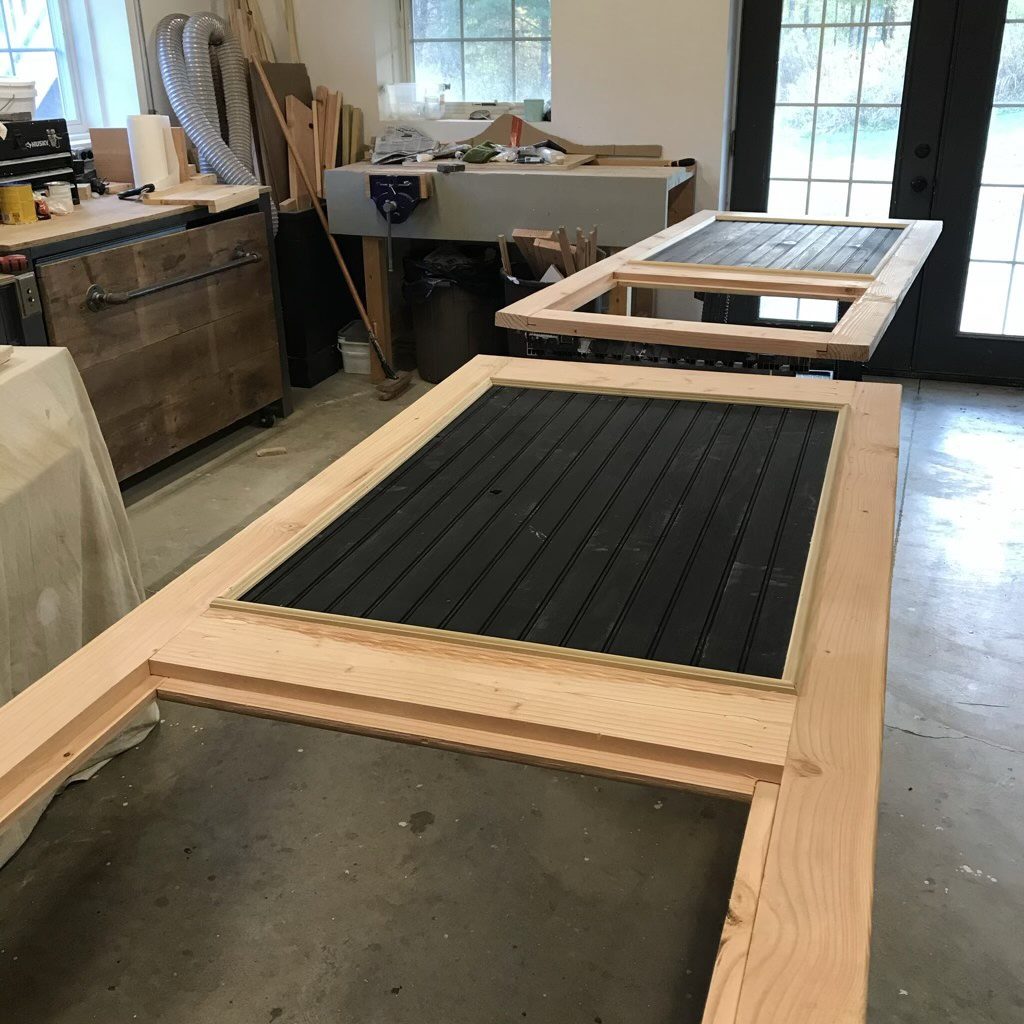

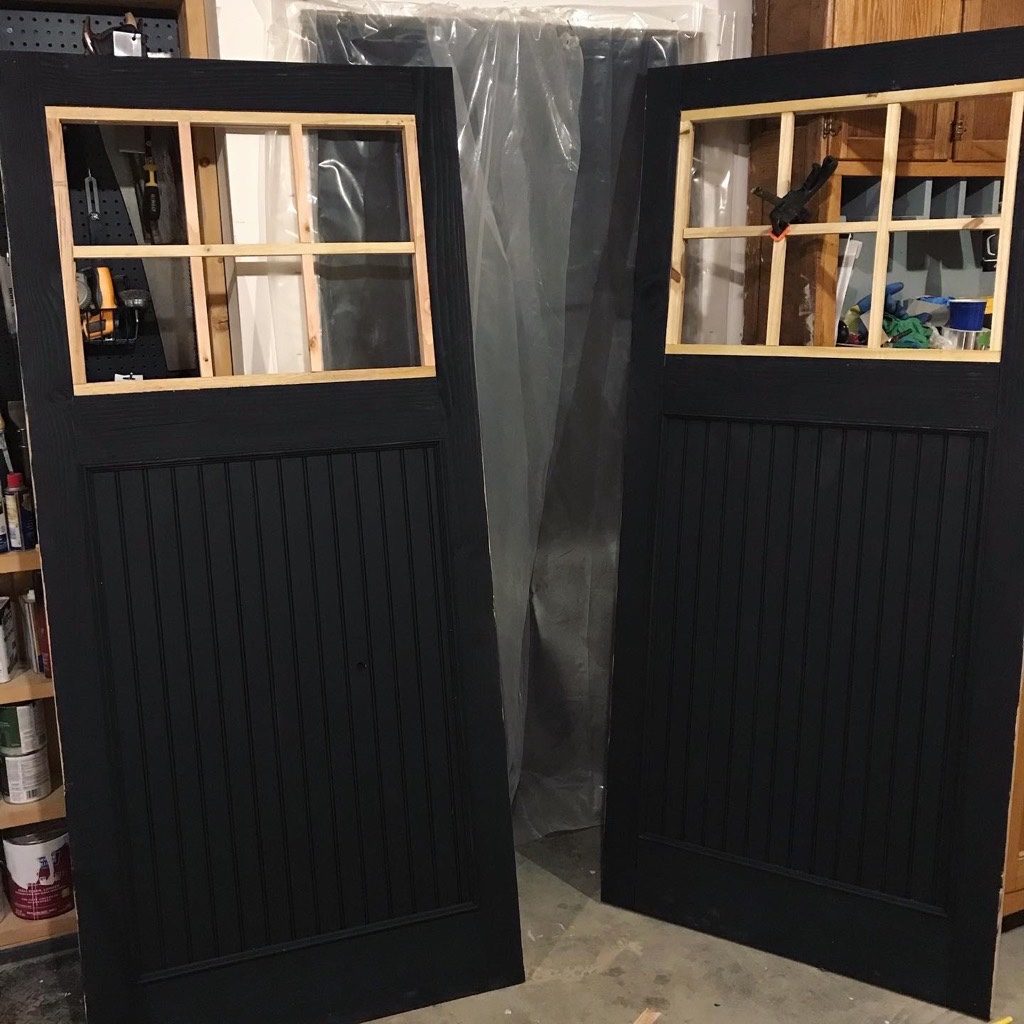
Adding the panel trim gives them a nice clean finished look. From the front everything looks nice, crisp and clean. After that I added some more Benjamin Moore Arborcoat in Midnight Dream which I used to test if I really wanted a black shed.
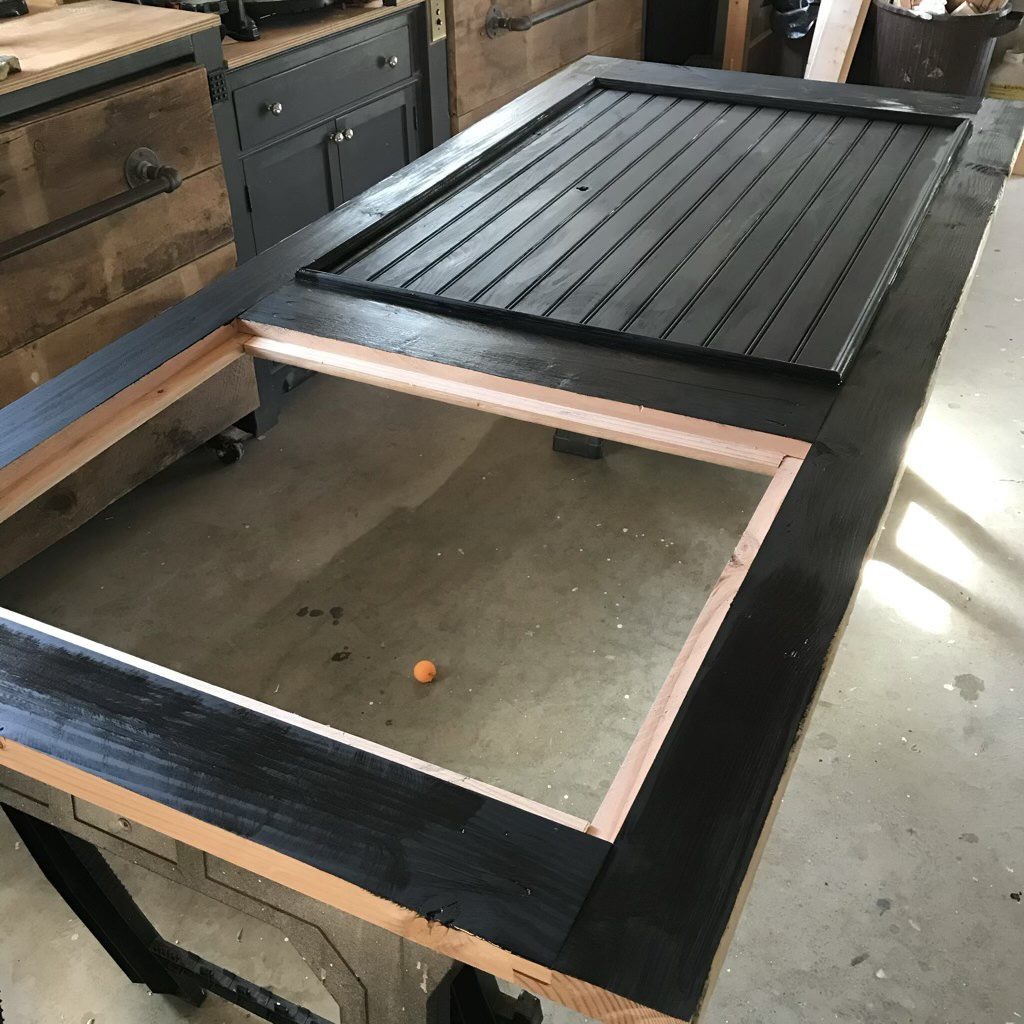


Making the glass insert
In order to attach the glass I made a frame that would sandwich it against the rabbet of the door frame. To make it as seamless as possible I made the width of the mullions and frame, the same width as the rabbet groove so it wouldn’t show from the front.
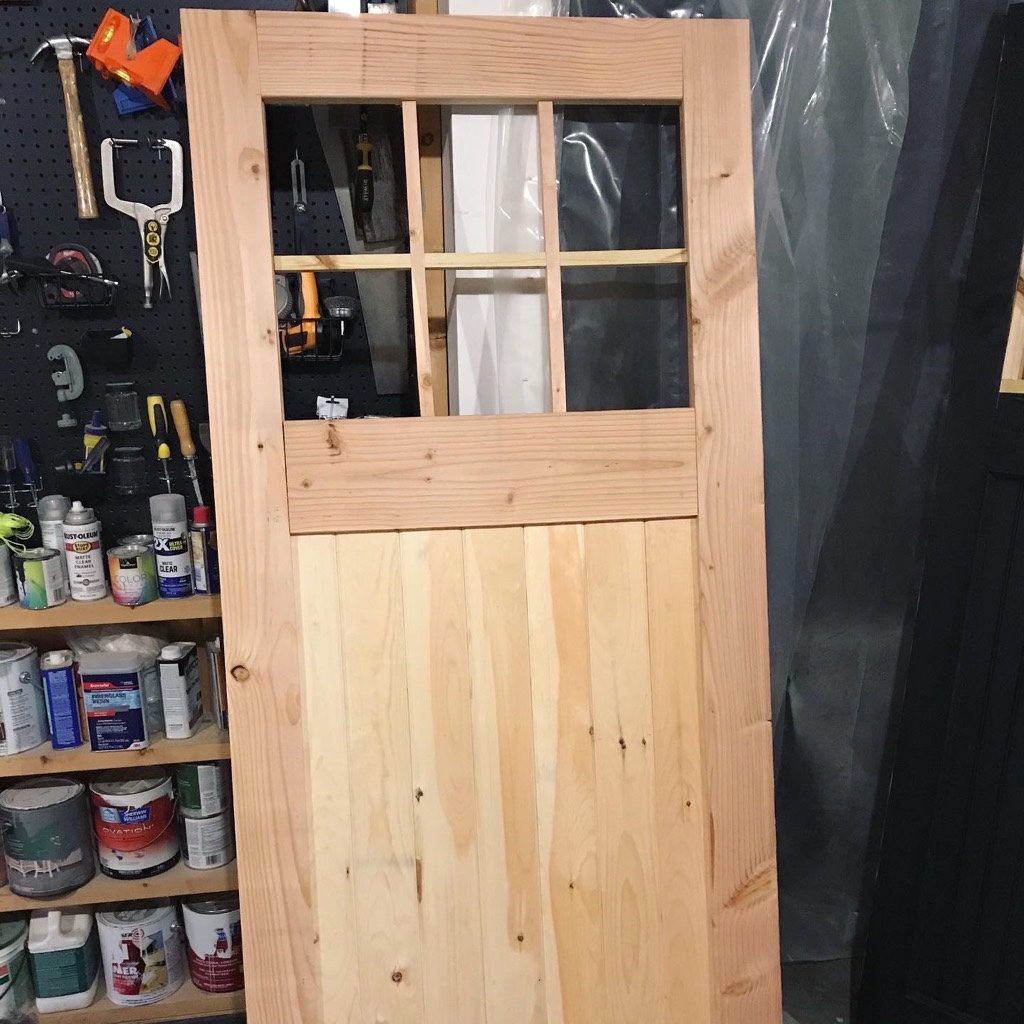
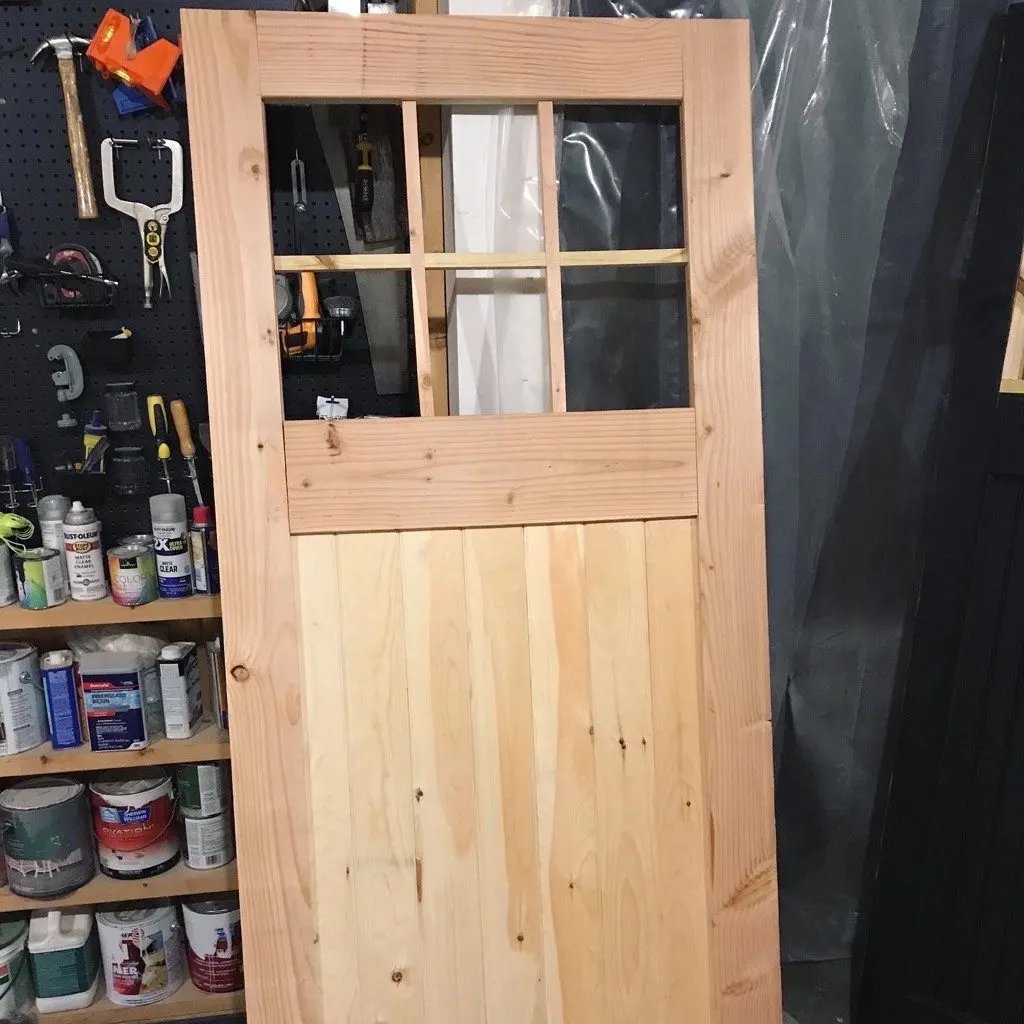
To make the grill, I did do some half-lap joints for the center mullions, but the outside frame is just glued and finish-nailed together. I also pre-stained the grill before I added the tempered glass. Always use tempered glass for DIY projects, it’s much safer when it breaks. It crumbles into a million useless bits instead of large dangerous shards. Unfortunately you can ask me how I know this… see why I built this door in the first place.

Finishing the Doors
The backside of the doors had pocket holes and panel trim (likely made of poplar) and generally needed something a little more opaque. I stained it with Benjamin Moore Arborcoat opaque stain in Midnight Dream. Shannon and I were already thinking about staining the sheep shed black and after seeing these doors, I was sold on the color.
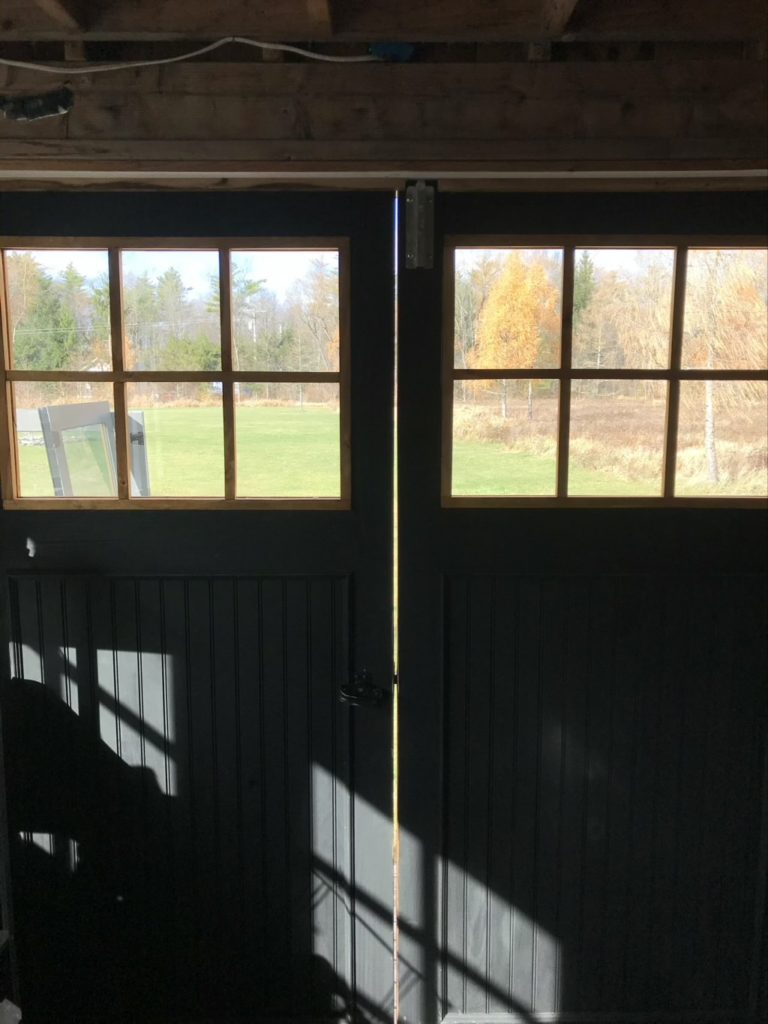

For the exterior side I used Cabot Timber Oil in Honey Teak. I stained both sides of the grill in this color so that they wouldn’t show any black when viewed from the outside.
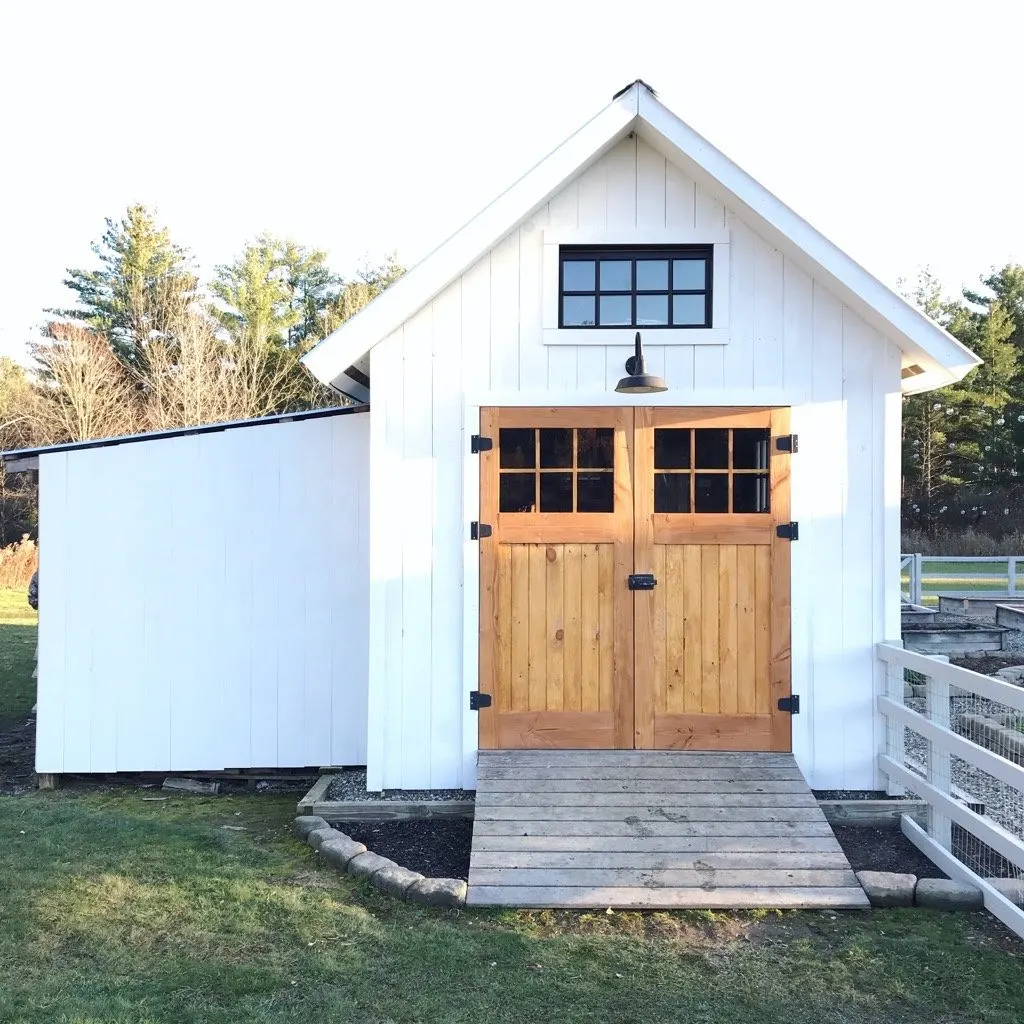
And one more shot from the outside.