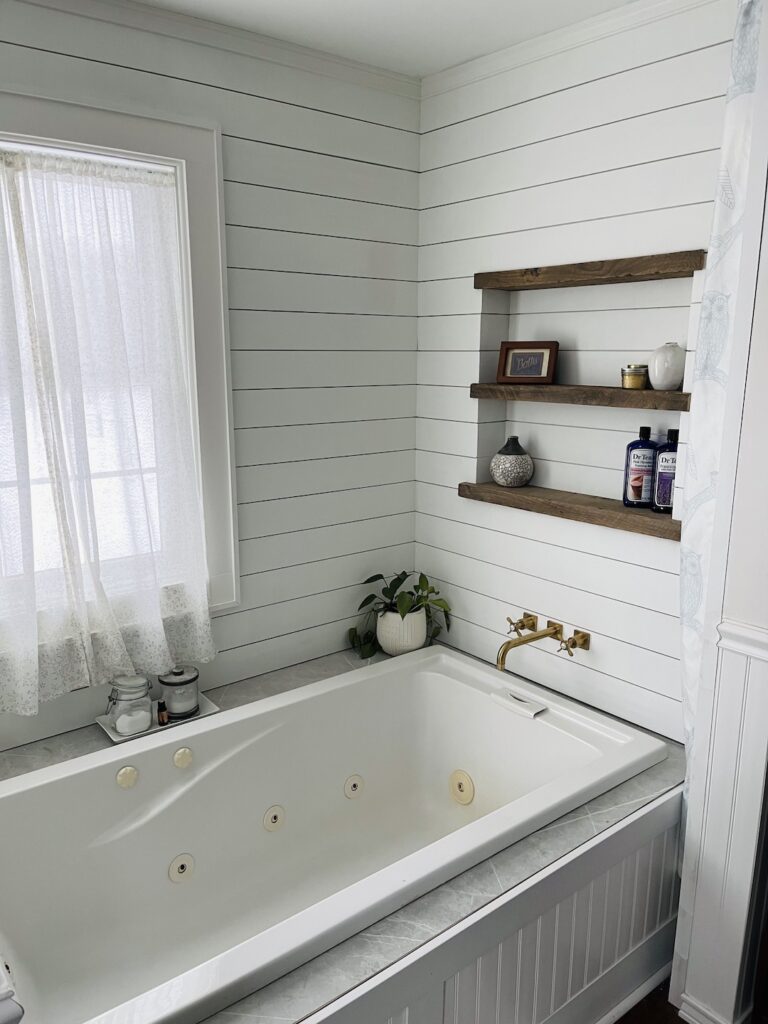
During the tub renovation I had originall planned to do some floating shelves but Shannon fell in love with some inspiration photos of recessed wall shelves instead. Thankfully we had just started demo so it was a very easy pivot. There were also a couple things about this project that made it the ideal place.
Materials and Tools for Recessed Wall Shelves
- pine boards for an interior frame
- reclaimed wood for shelves
- shiplap (or some other base material)
- miter saw
- tablesaw (for ripping shelves to size)
- jigsaw (for making tab cutouts)
- level (small enough to fit in the niche, in my case 24″)
- finish nail gun
How do you size recessed wall shelves?
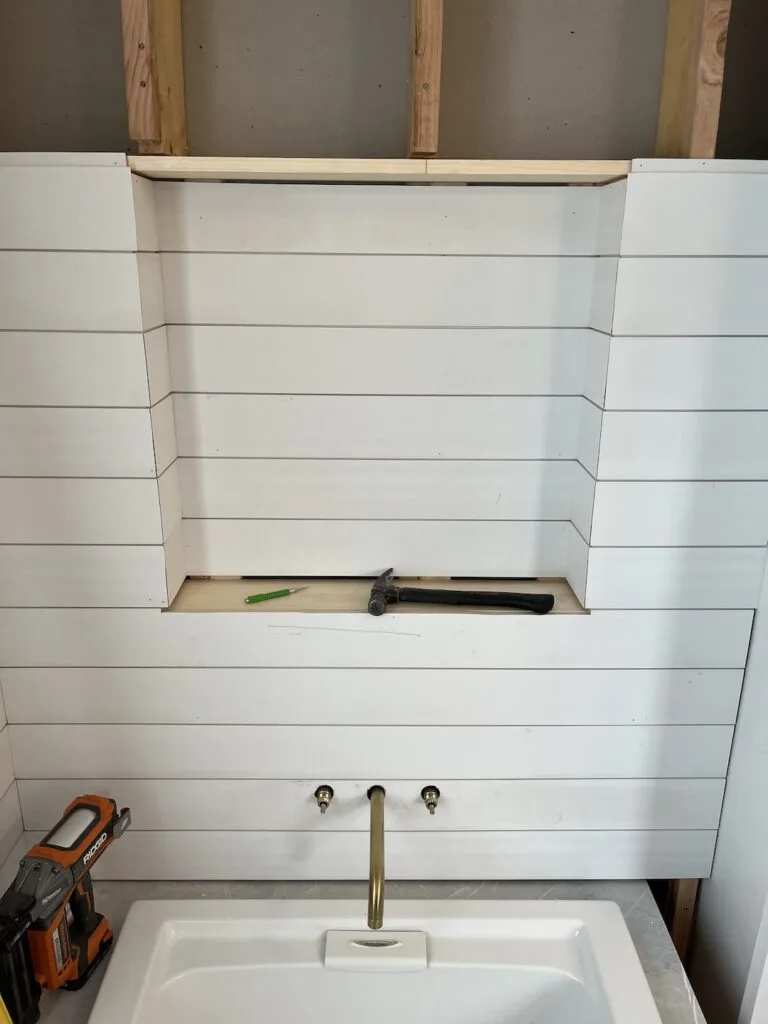
With a good idea of what we wanted them to look like we first had to determine how big they were going to be and exactly how high. We used the interior of the tub itself as the measurement for the finished width of the shelves so that it would line up visually.
For the height we measured the tallest bottles and vases we wanted to keep on the shelves to make sure we could fit two even shelves that could hold them. The other limiting factor was the lines of the shiplap, we wanted to roughly line up with the shiplap so we had to size up or down appropriately.
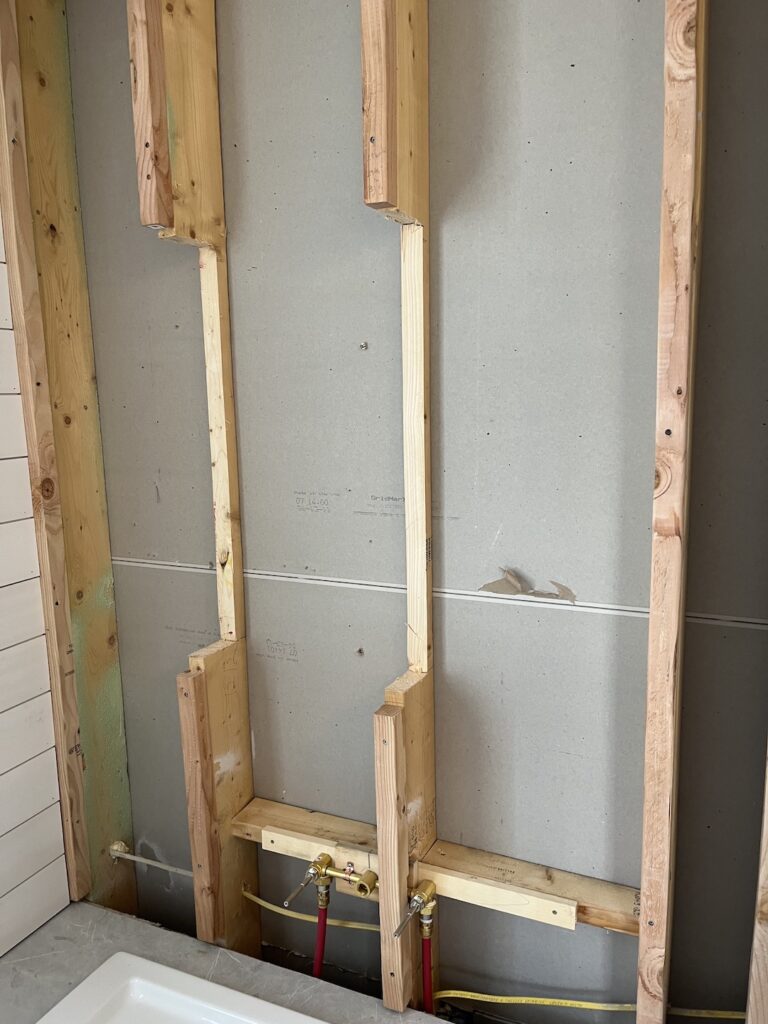

It just so happened that this wall between the bathrooom and a small nook bedroom was framed in 2x6s. And yes, I triple checked that they are not load bearing before gouging out nearly all of them.
Adding to that, we had to shim out the wall studs so that the faucet for the tub would reach far enough into the tub. All that to say, this is probably not super applicable to anyone else’s situation, sorry.
How do you start building recessed wall shelves?
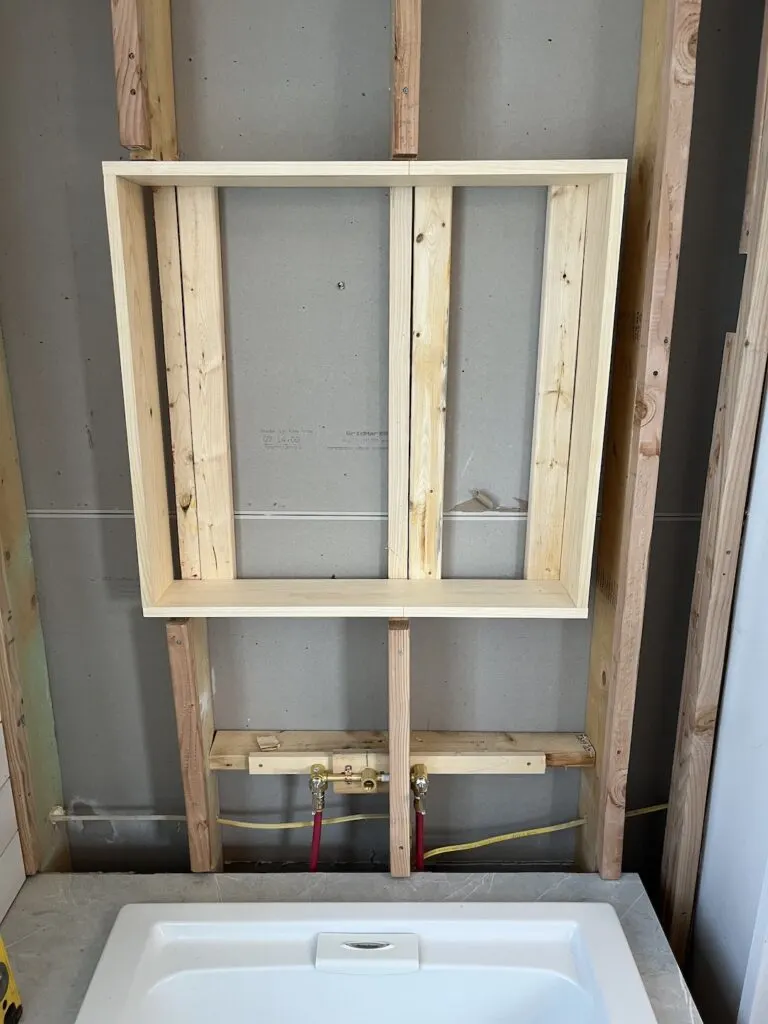
You start with a box. We built a box that would be flush with the spacers we layered on top of the studs. I added some ripped two by material on the back so that I could attach the sliver of wall studs in the back to that.
The placement of the box was determined by lines that I carried over from the first wall I already shiplapped.

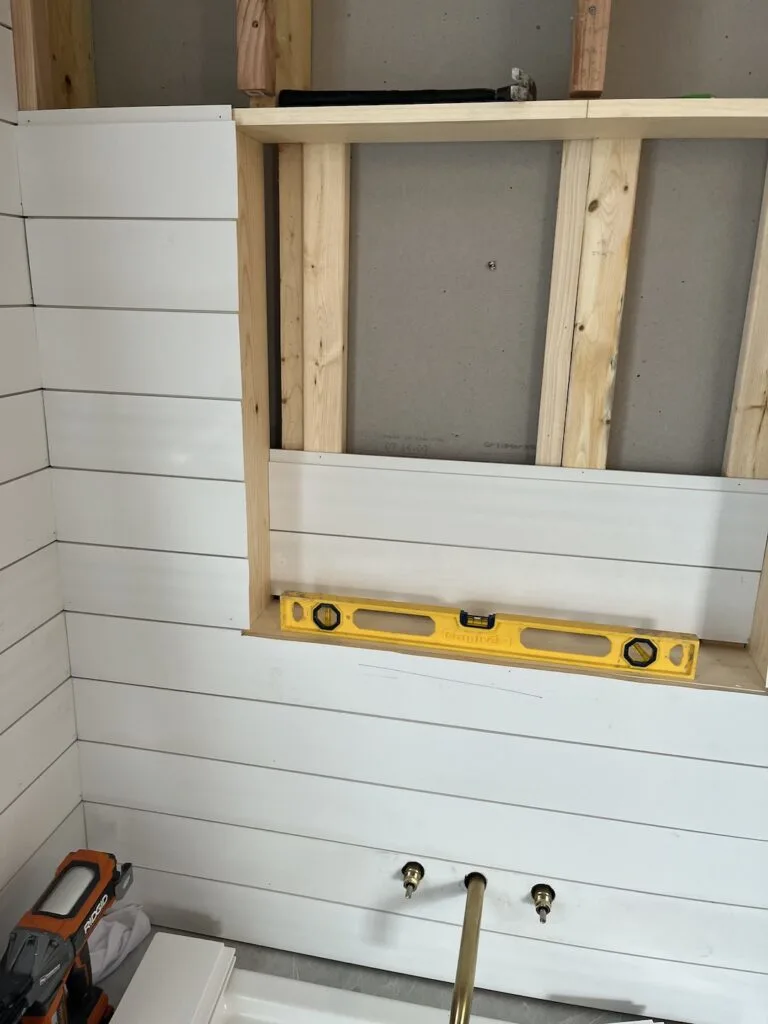
Because I’m shiplapping the whole niche, I needed to do that before I added any shelves or supports for those shelves. My hope was to avoid a frame and get some very nice clean miters on the corner. I was mildly successful.

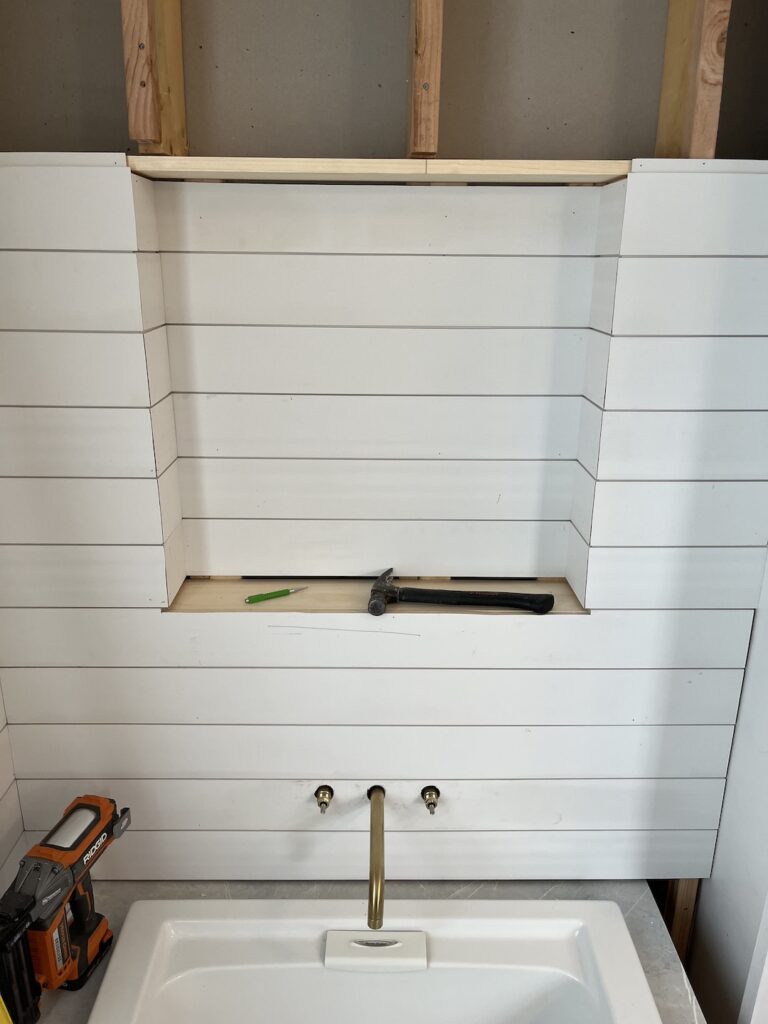
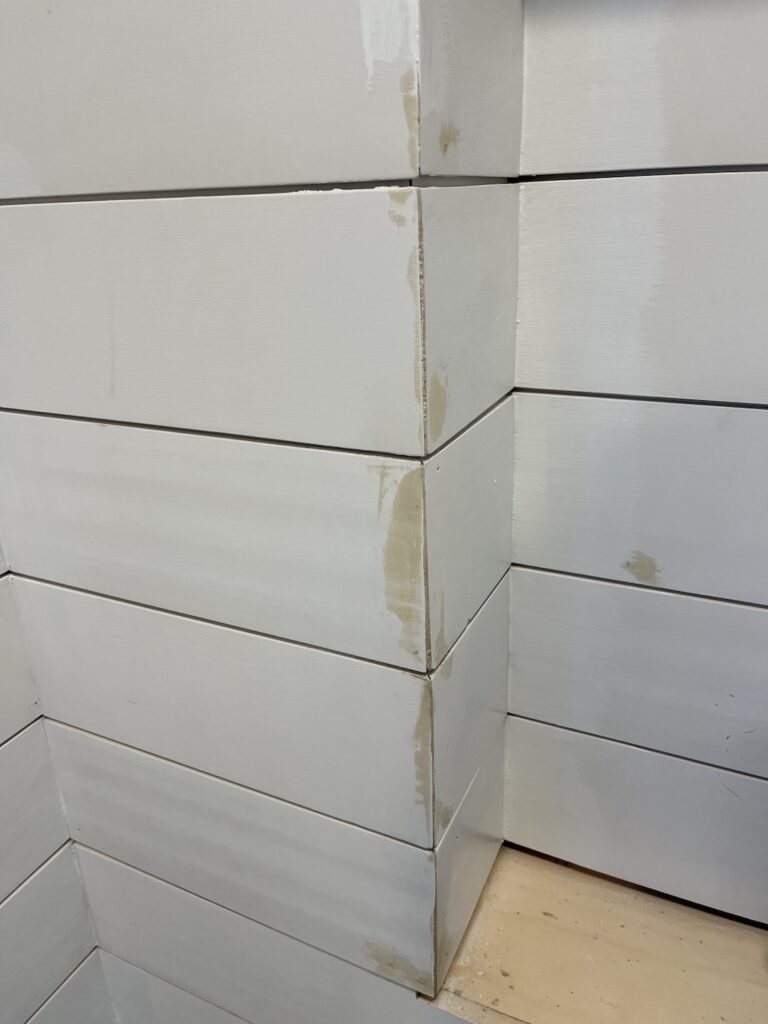
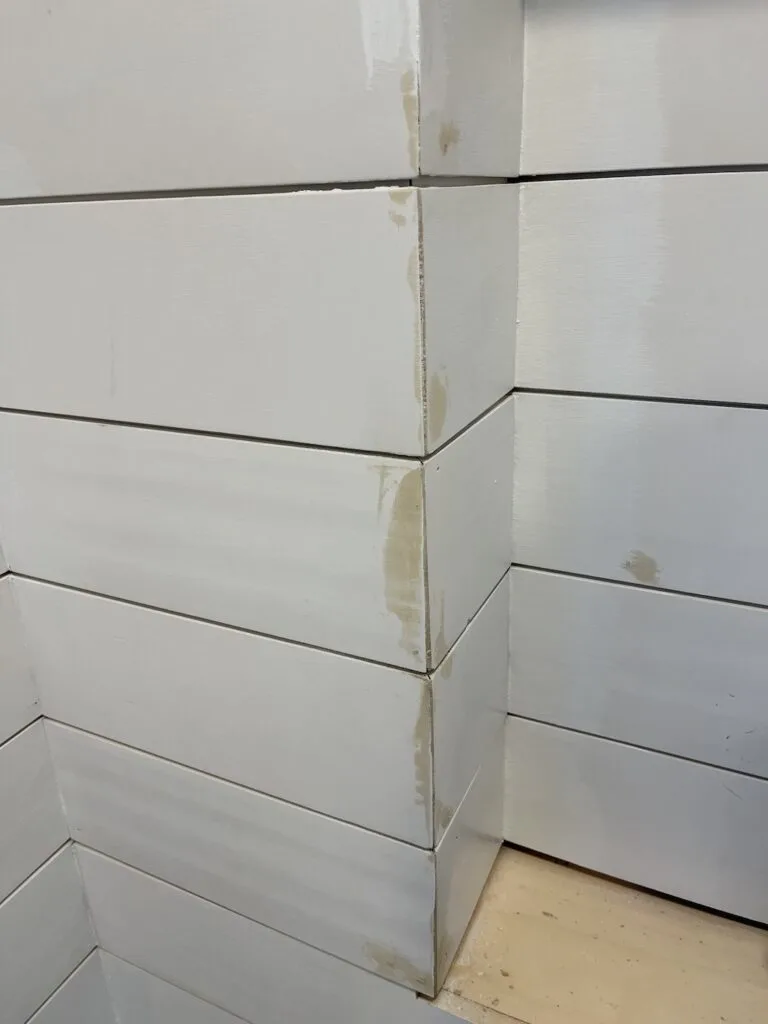
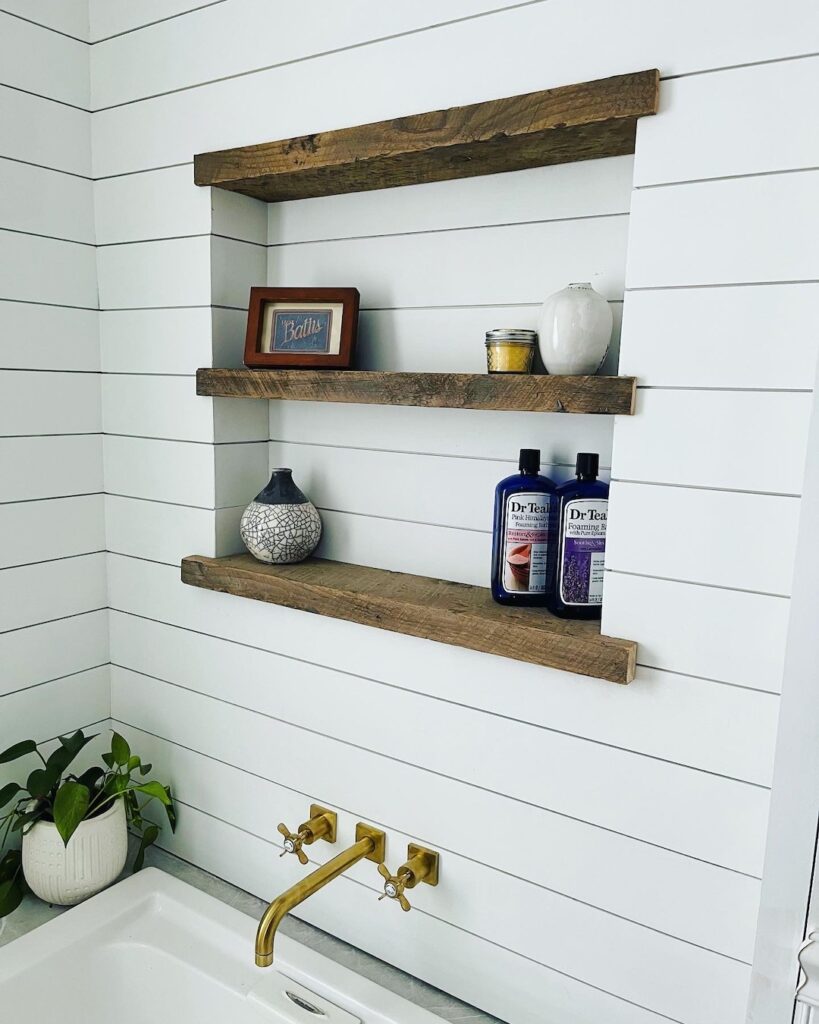
What do you do if your miters aren’t great?
I do not love the saying “Caulk and paint make a carpenter what he ain’t” because I do really strive to get better. However, it’s kind of true. In this case I used wood filler and sanded it down, I believe this was just the first coat. Most corners only needed a little bit, some were a little worse.
These outside corners made me realize I was subconsciously channeling this entertainment center design from Chris Loves Julia. I hadn’t thought about it in years, but it’s still a fantastic project.
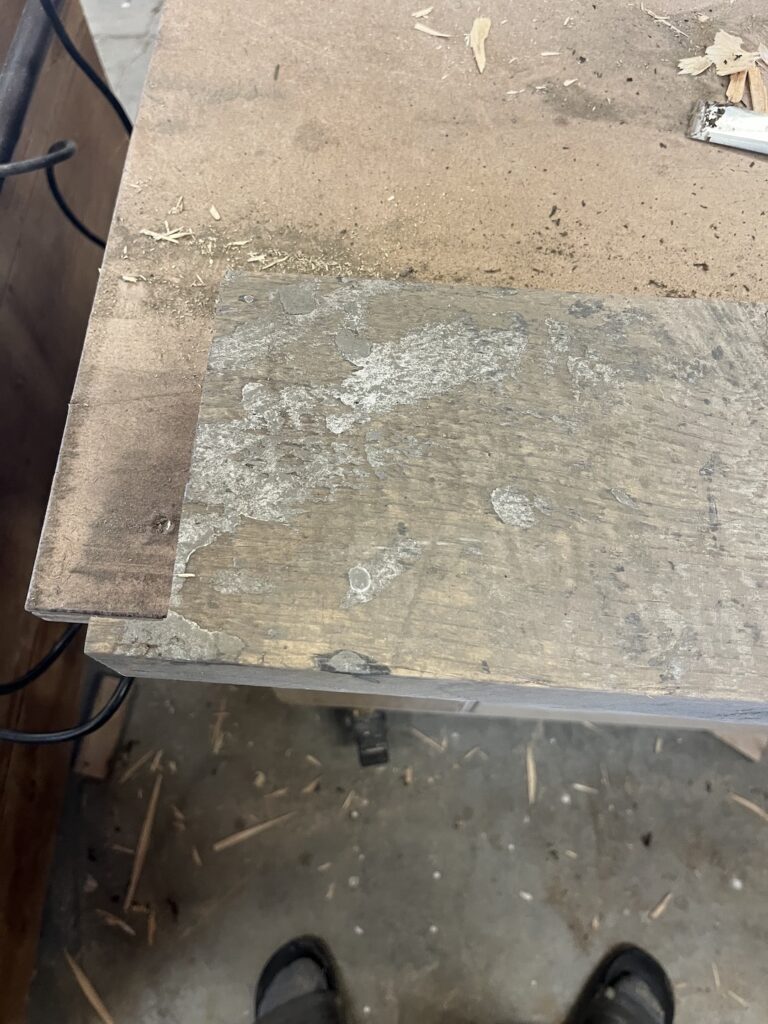
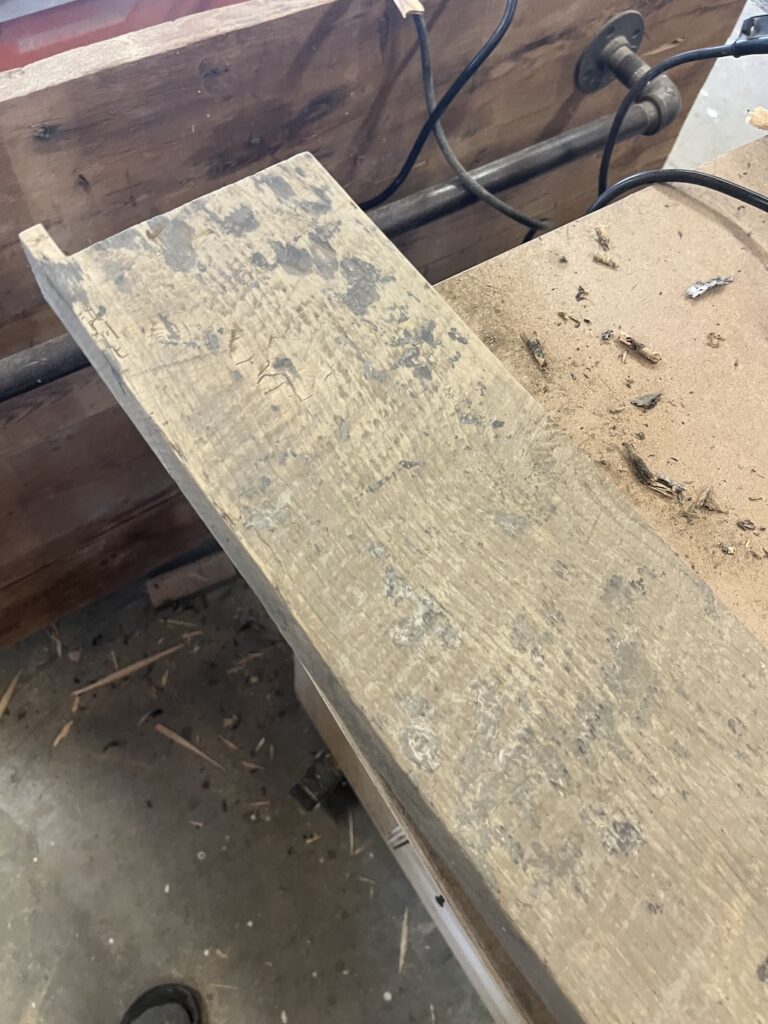
How do you prep reclaimed wood for recessed wall shelves?
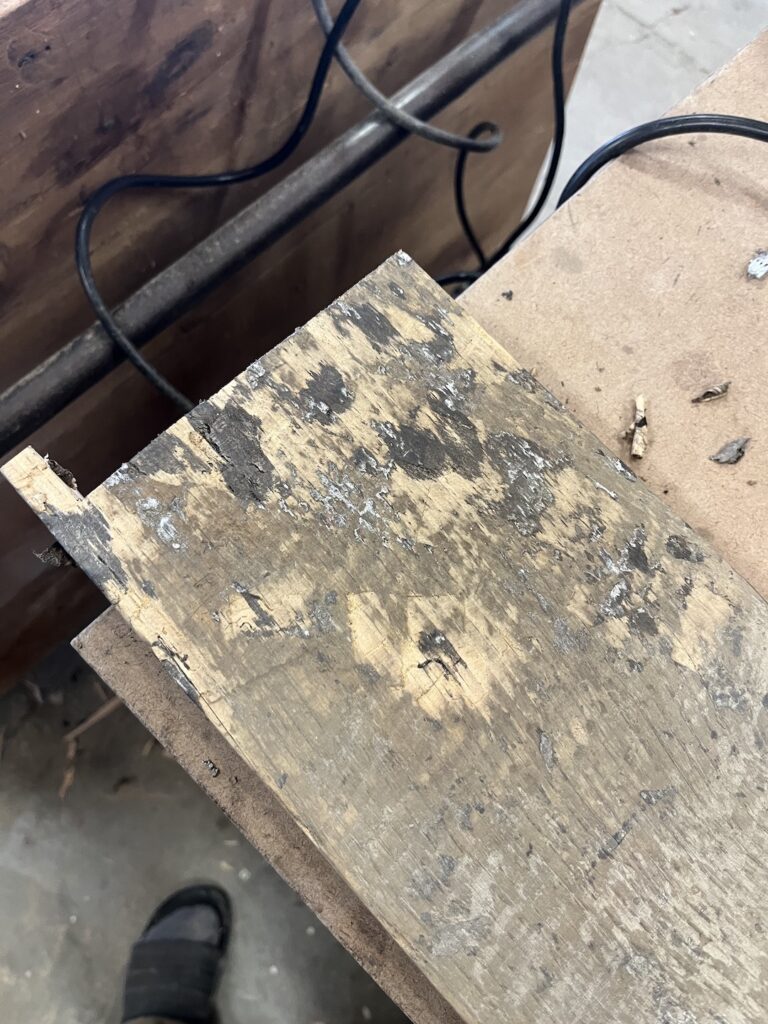
The wood for the shelves came once again from my father’s barn next door. The same wonderful place that yielded the fronts for the roll out cabinets in my workshop. The wood that I had in mind for these shelves was nice and thick (I can relate) but had some splotches of silver paint.
I first took some rough sandpaper and sanded down the shelves hoping the paint wouldn’t be too noticeable. Unfortunatley the more dust that came off the shelves the more sparkly and intense the paint looked.
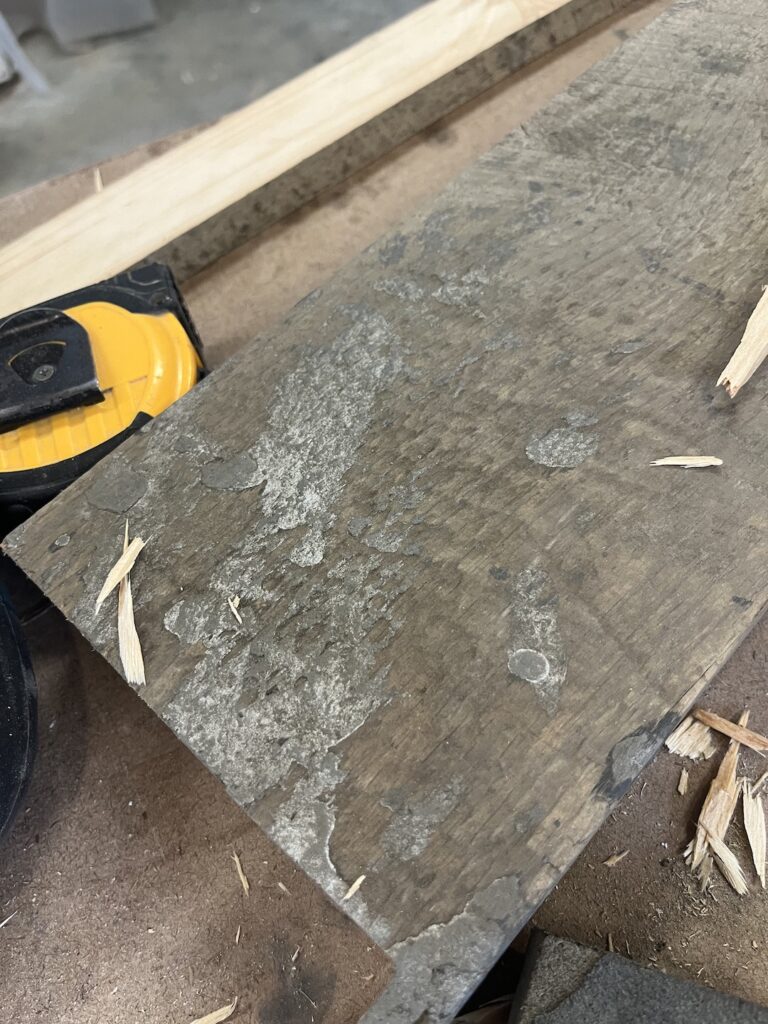


So after sanding and then trying to scrape the paint off, I moved on to the big guns. Well, kind of a little gun actually. The heat gun. I need to stop writing the word gun.
The heat gun bubbled the paint up to the surface and made it pretty easy to scrape off. Unfortunately that left pretty big dark spots on the wood and still had some paint.
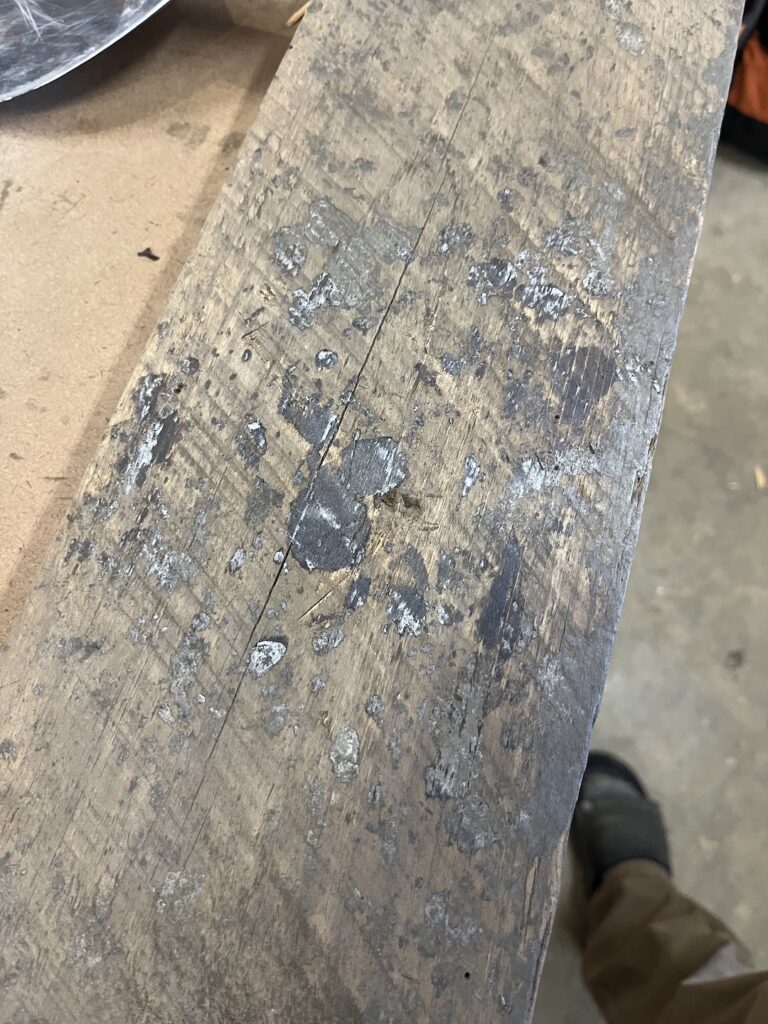
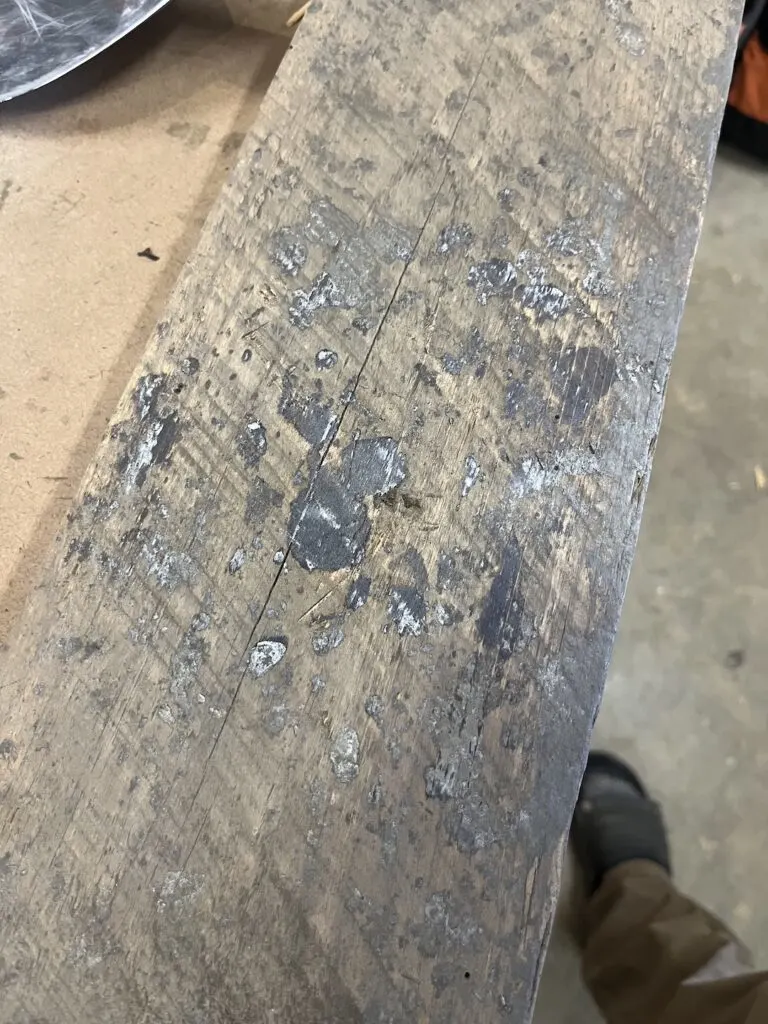
So I busted out my chisel to see what I could do with it. I was a little nervous that I was going to either destroy the wood or leave glaring fresh scrapes that would stick out as bad or worse than the paint or the dark spots.

And at first, yeah, it didn’t look so great. However, after a little bit more scraping of the dark areas and a little bit more sanding, I was really happy with the outcome.

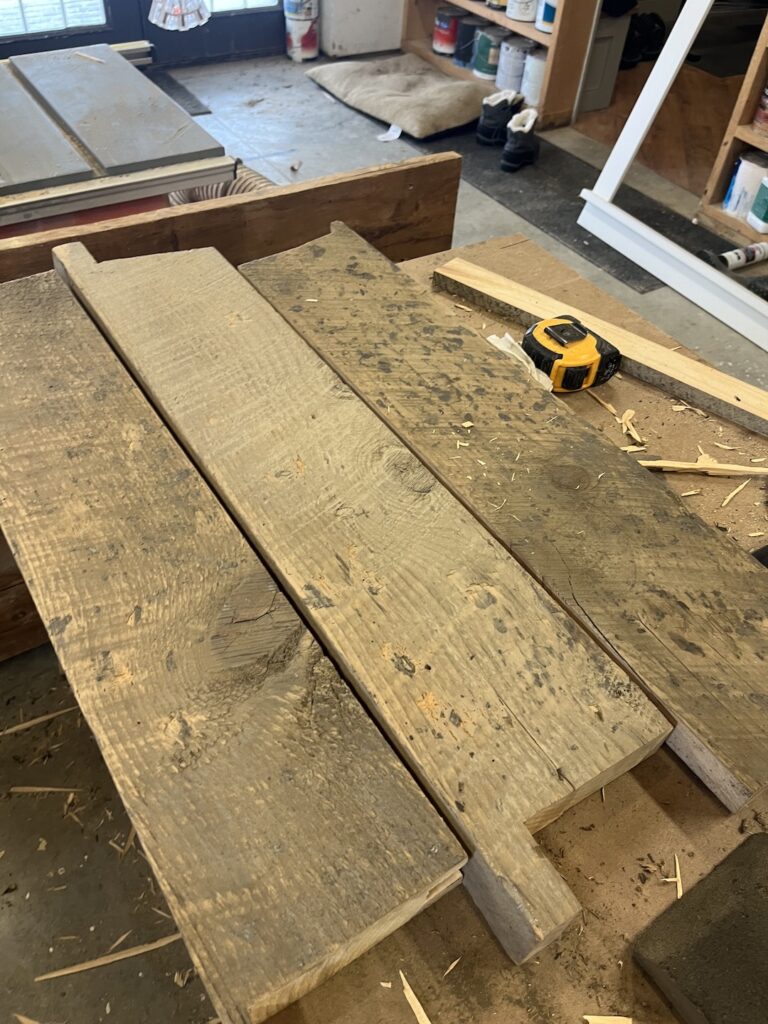

How do you attach the shelves in the niche?
The top and bottom shelves had their non-face side cut out so that they would overlap the edge. Sadly I didn’t do a good job of documenting what that looks like. I also didn’t document the groove I cut all along the back of the middle shelf.
But the groove size was determined based on some scrap oak hardwood flooring I cut down in my shop. I predrilled screws in that and then screwed into the shiplap and hopefully the stud supports behind.
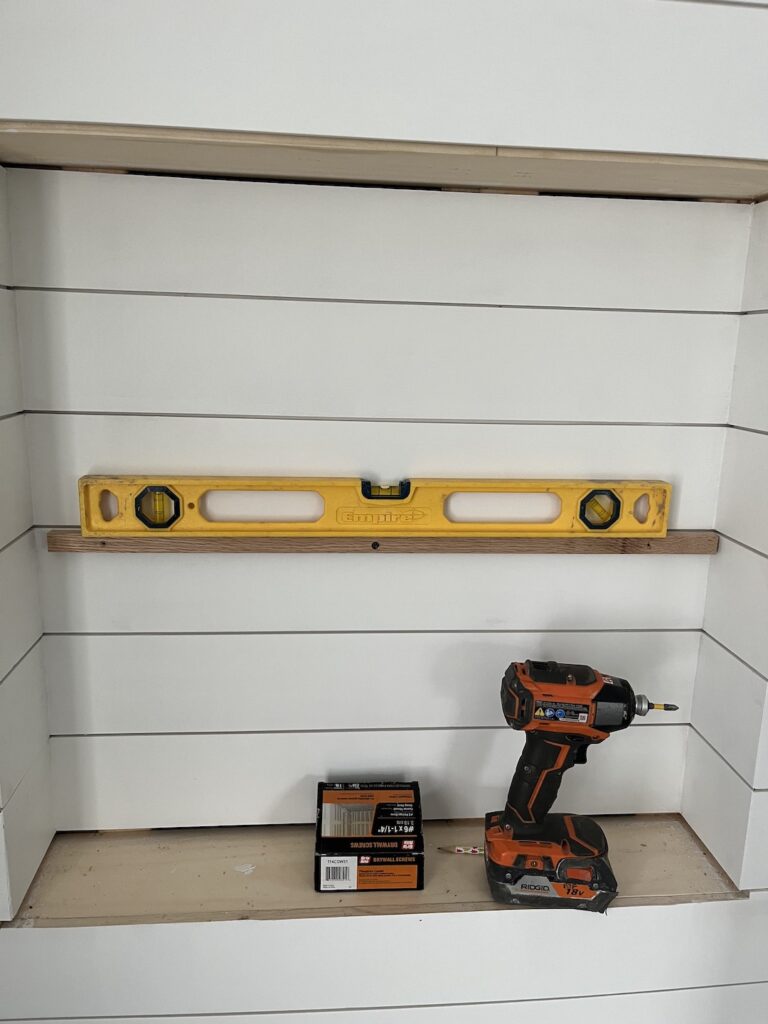
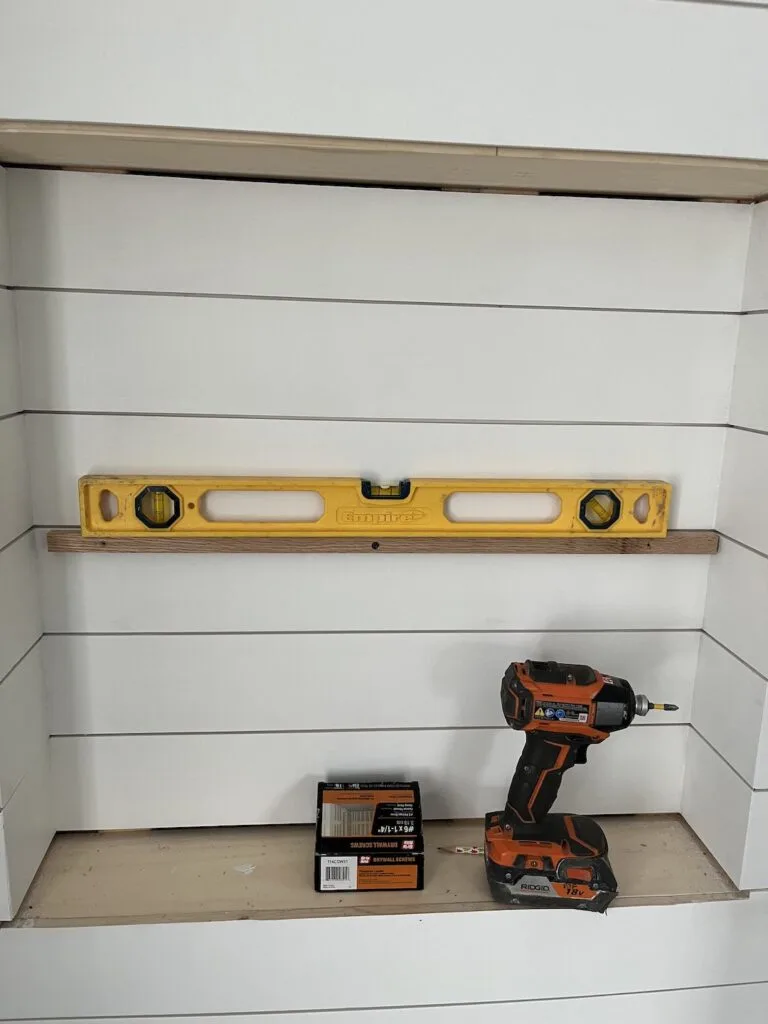
The shelf’s groove then slides over that and the shelf can be nailed to the support with finish nails. There were quite a few test fits and some trimming in there before I got all of the shelves to fit perfectly.
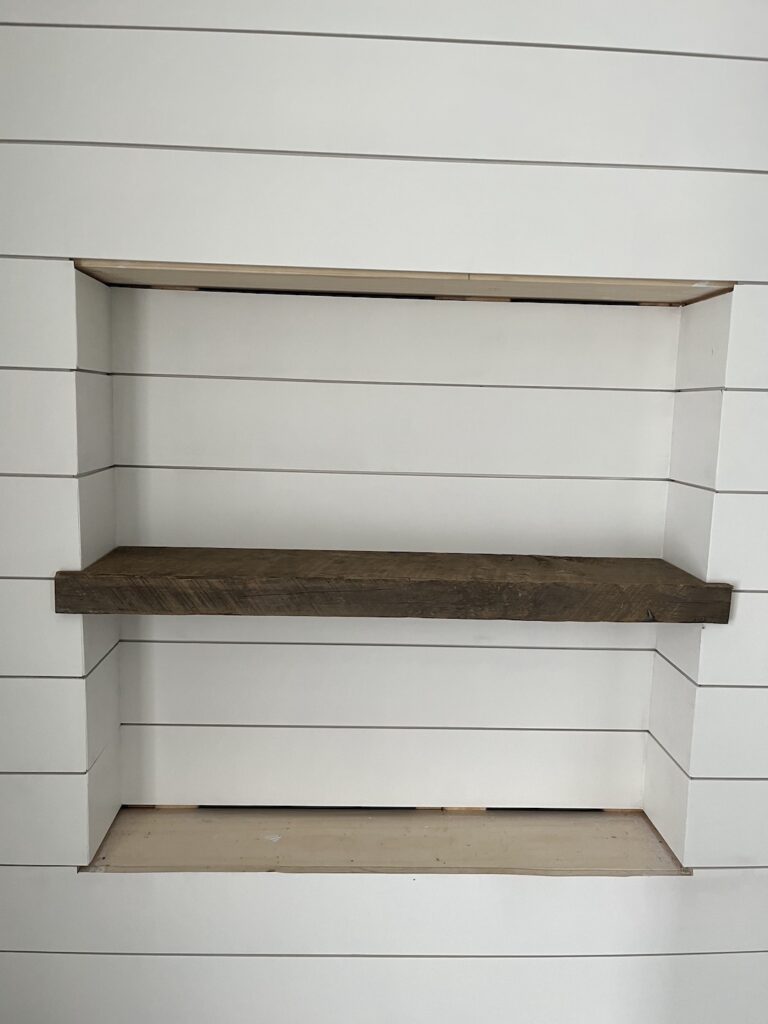
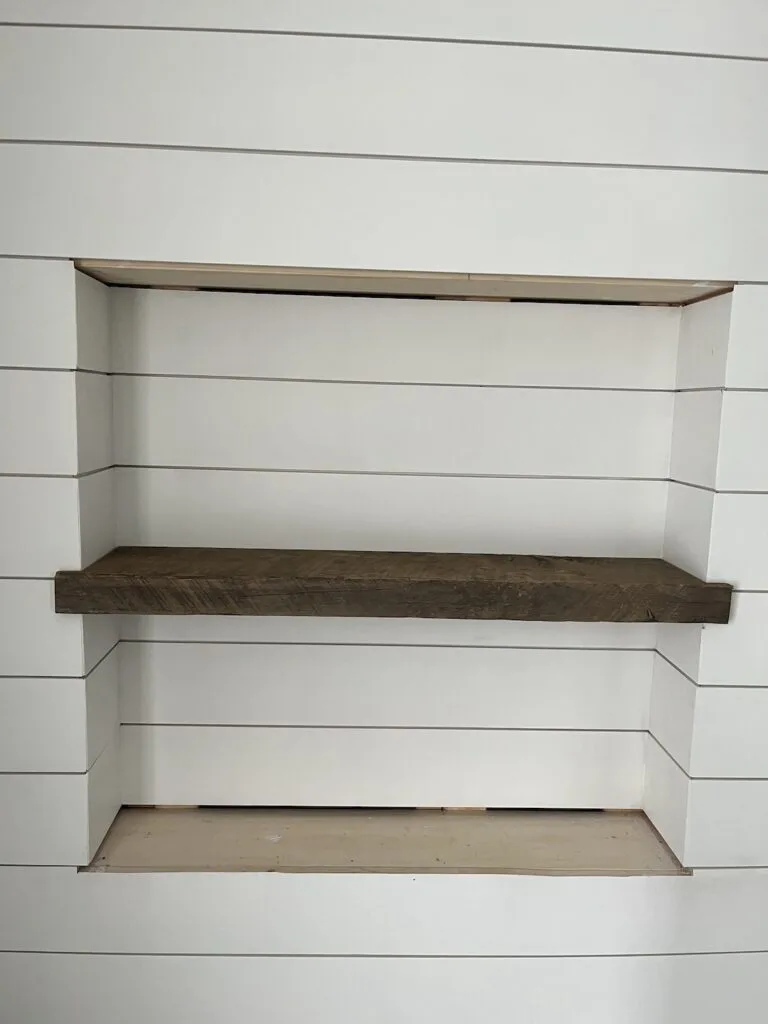
Once the middle shelf was in, then it was just an easy thing to pop on the top and bottom shelves. I didn’t mentioned it but I made the bottom shelf longer and wider than the other two. I wanted there to be a bit more sense of weight on the bottom, which I think comes through.