We have been doing chicken butchering with our friends for a few years now. While we don’t have any magic formula I still thought it might be helpful to share what we do to make it easier.
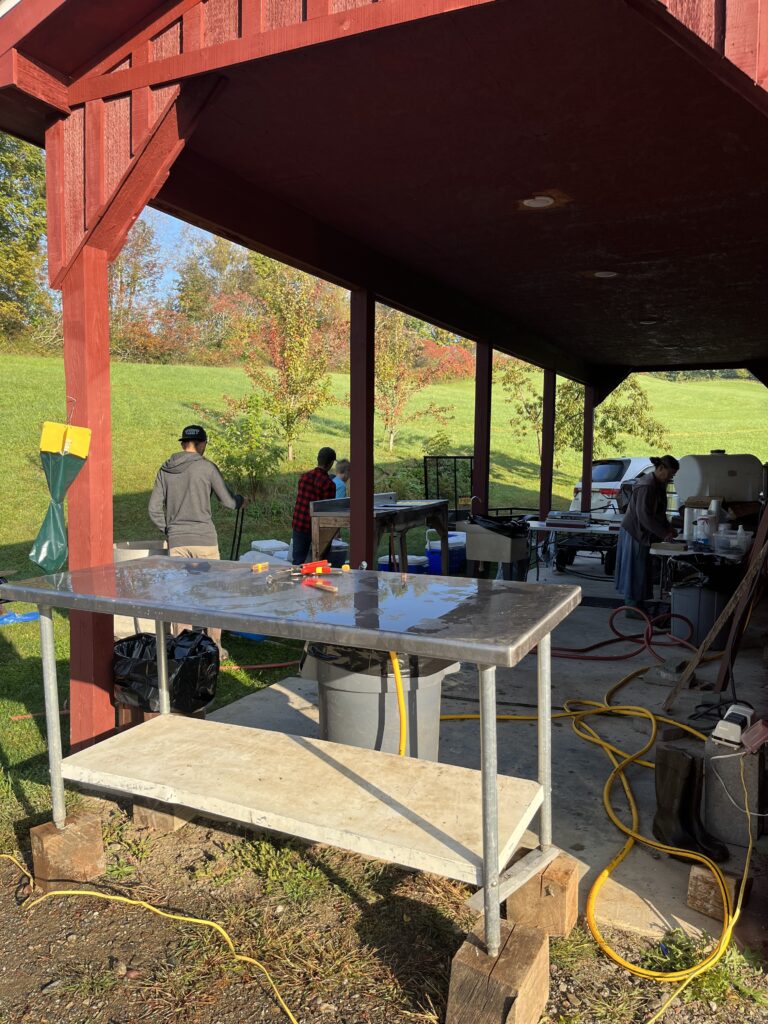
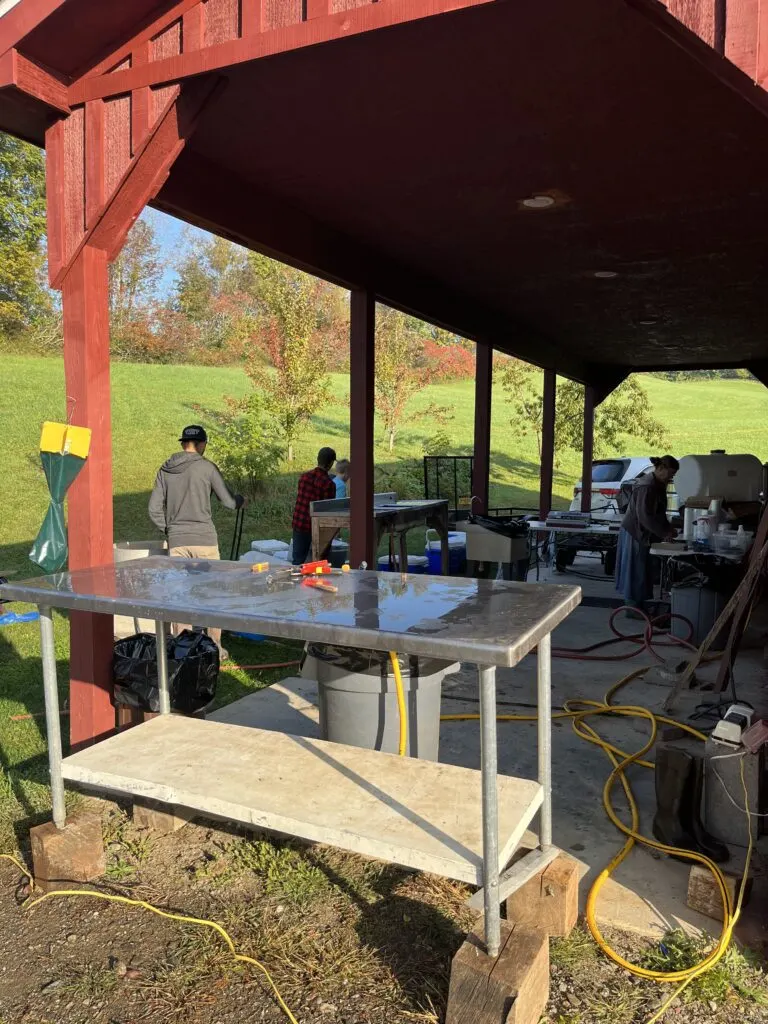
The number one thing that makes chicken butchering easier is that we do it with a group of families. We raise the birds at a friends house and do the processing there as a group. This means we can split the cost of feed, split the feeding, watering and rotating and maybe most importantly, the processing.
Many hands make light work or at the very least quicker work. We can now process around 80 birds from start to cooler in around 2 hours including cleanup.
What are the steps in chicken butchering?
- Separate the chickens
- Desanguinate (open the throats and remove fluids)*
- Dunk in hot water
- Remove feet
- Plucker
- Clean insides
- Inspect
- Bag
- Chill
*If you notice any weird language in this writeup, I apologize. I’m not squeamish but I am trying to avoid having this flagged as violence by the AI overlords who still can not distinguish contextual signals. There will be many euphemisms and analogies, hopefully it still makes sense.
How many people do you need to optimize chicken butchering?
There is definitely a limit to how many people will add efficiency to the process. In earlier years, when we had small children to look after instead of large teenagers helping, we covered multiple stations by a single person.
It’s reasonable for a person to man the cones (the reddest station if you will), the dunker, foot station and plucker. All of those things can be done by one person in succession and then have the birds staged in cool water for evisceration. It does go much faster to have individual people manning each of those stations or even multiple people rotating as helpers between.
What do you wear for chicken butchering?
It really depends on where you are in the process. To start though, don’t wear nice clothes, obviously. If you are in the latter half of the work, a simple kitchen apron is good enough.
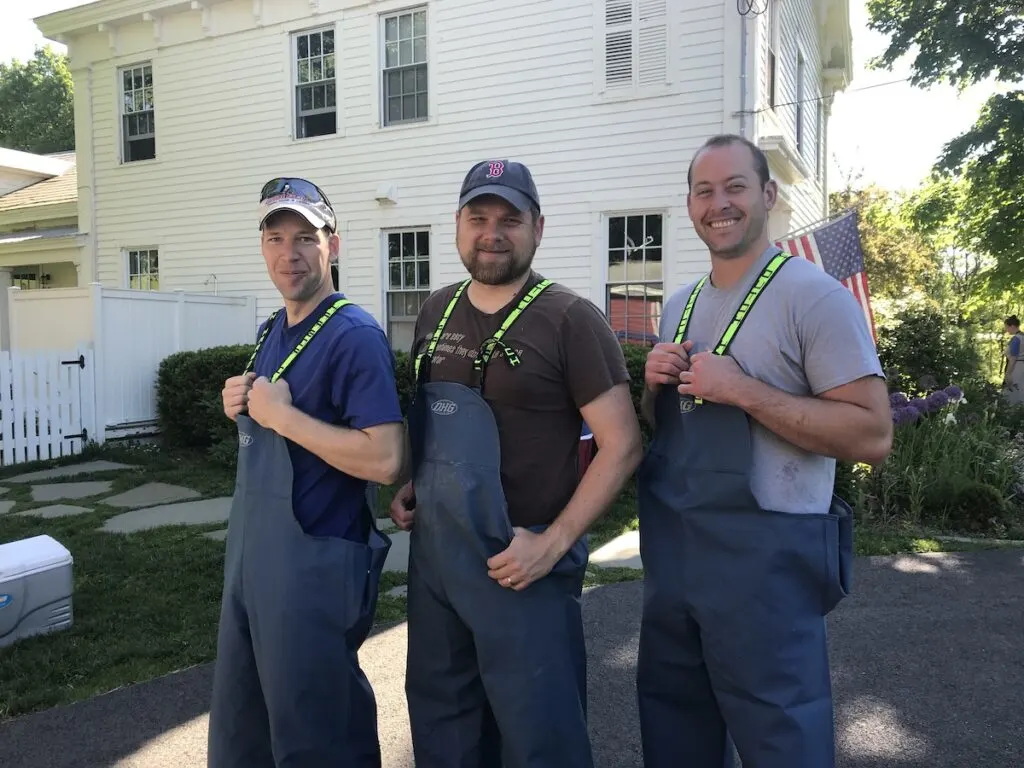
For those on the front side you will want more protection from fluids and viscera. We started with rain gear, but have all switched over to something more heavy duty. These Dutch Harbor blue bibs are now our standard. They are thick and cleanup well at the end of the day.

Why separate out the birds at first?
Our first step is to take a group of 10-15 birds out of the chicken tractors where they live and put them by the work area in a collapsible dog pen. The easiest way we’ve found to move birds is a wheel barrow with something light covering it, in this case I think we used a soccer goal?
We raise our meat chickens in tractors (the same ones I based my mobile sheep shelter on) and move them daily to keep them as healthy as possible.
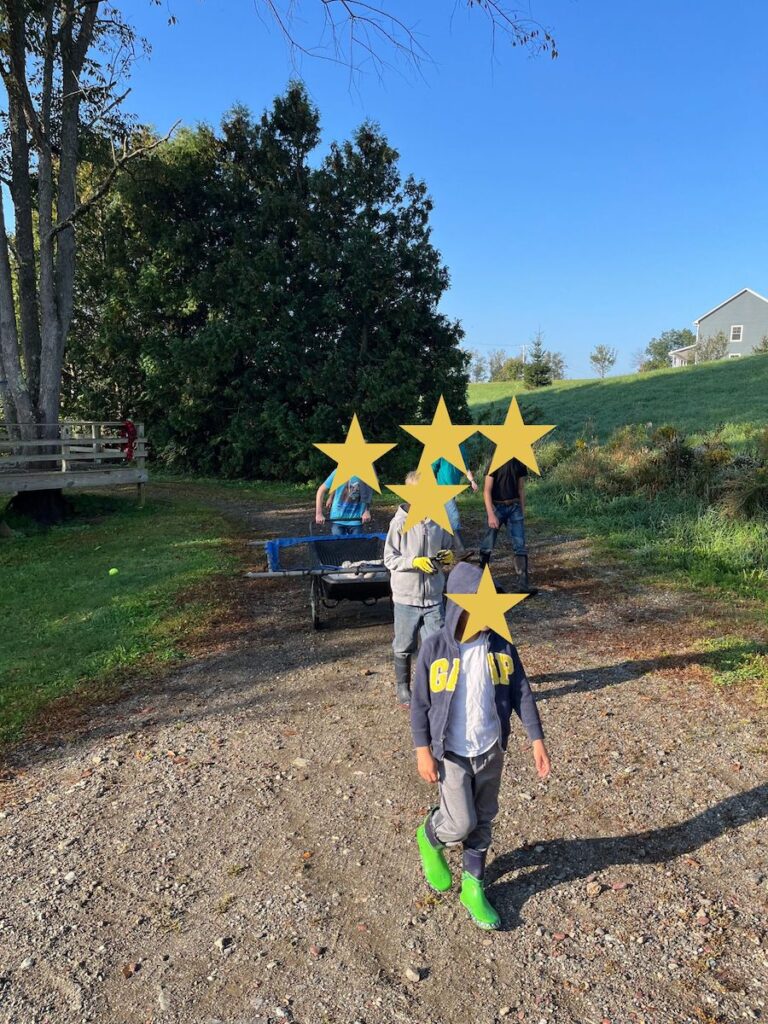

This is a great job for our youngest helpers. This is where they usually start with helping out on processing days. Please ignore the stars on their faces, they didn’t really want to get too famous too fast.
The cones of not so silence
This is by far the messiest part of chicken butchering and not for the squeamish. You will want to make sure that you sharpen your instrument before you begin. Always have an electric sharpener handy to start the day with. We pile wood chips below on a tarp to help make the mess easier to cleanup at the end.

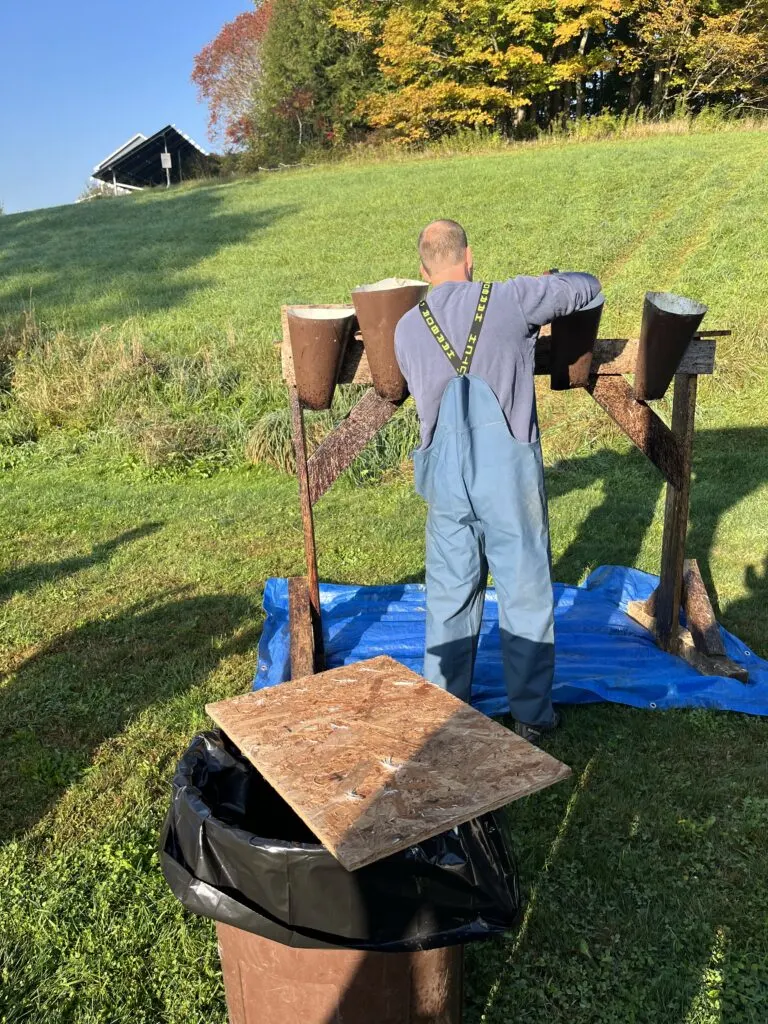
We try to balance having at least 2 birds ready to move on with not wanting birds to hang out too long in this phase. Having it be 2 birds is important when you get to the plucking stage.
Our super fancy cones are made out of roofing flashing that has been screwed to some very old plywood. We have some larger and some smaller to help promote body positivity for birds of all sizes.
How long do you dunk?
Dunking is an art, not a science. We started off using turkey fryers and trying to keep them a consistent temperature was a trial. Too hot and you risked cooking the bird prematurely. Not enough heat and good luck getting those feathers off. The water often spilled out over onto the open flame or a good wind blew them out.
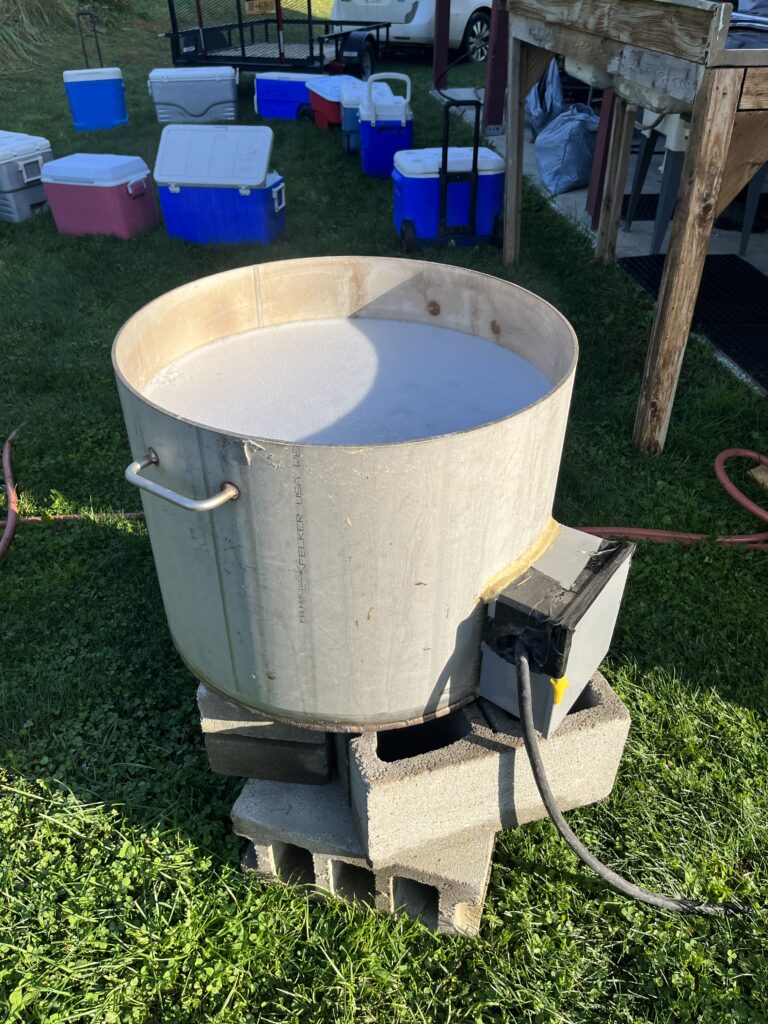
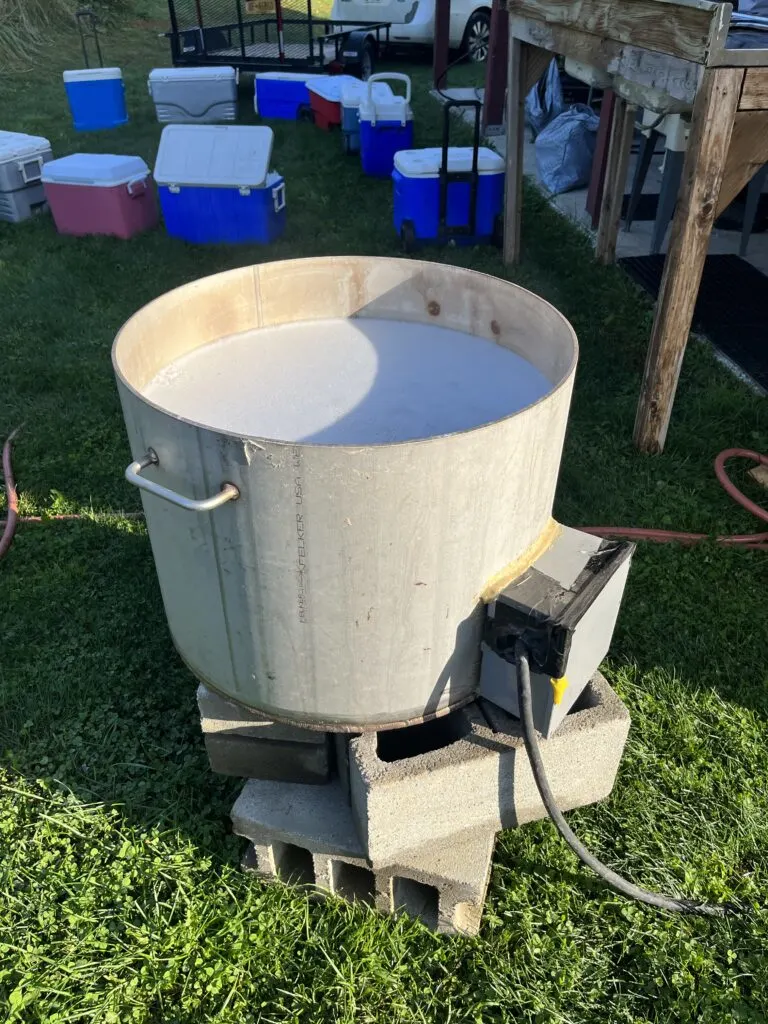
This beast can easily handle two birds at a time and holds a consistent temperature thanks to the regulate electrical element. It was a bit of an investment to have a friend weld and wire it up but it saves us a lot of time and headaches each time we do chicken butchering.

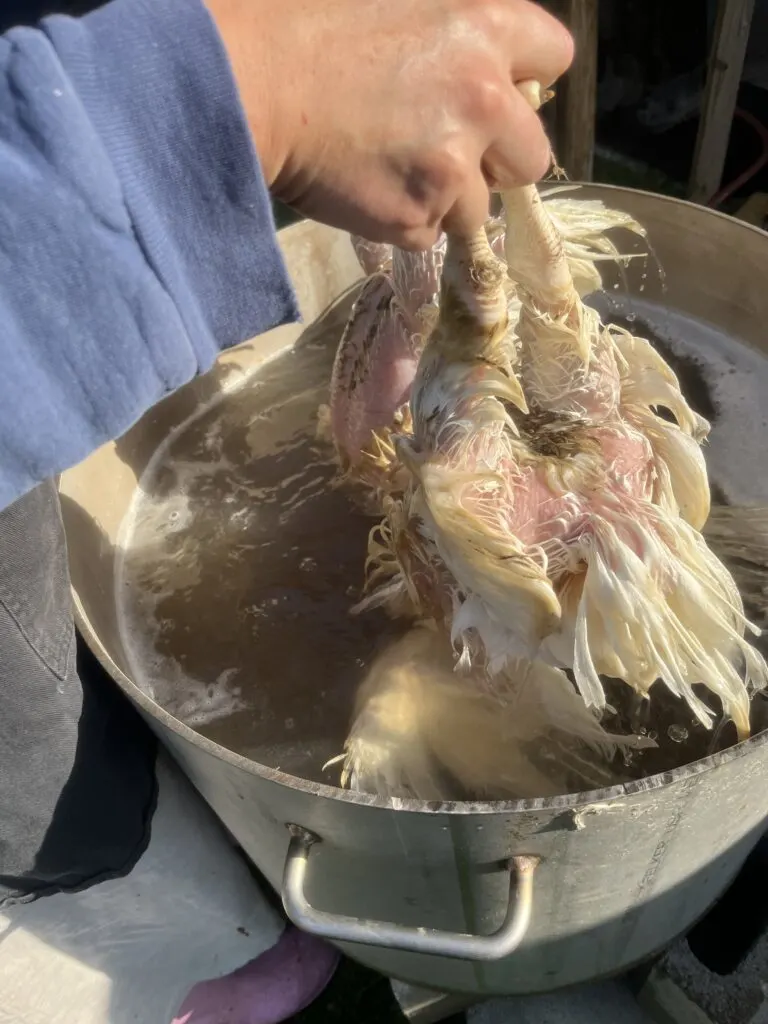
Making sure to get the chicken fully submerged and to lift up and down to get into all the feathers are really the only ‘tips’ for this station.
We aim for around one hundred and forty degrees and dunk for around a minute or so. The timing is never exact and mostly we go by how easy pulling a few wing feathers feels.
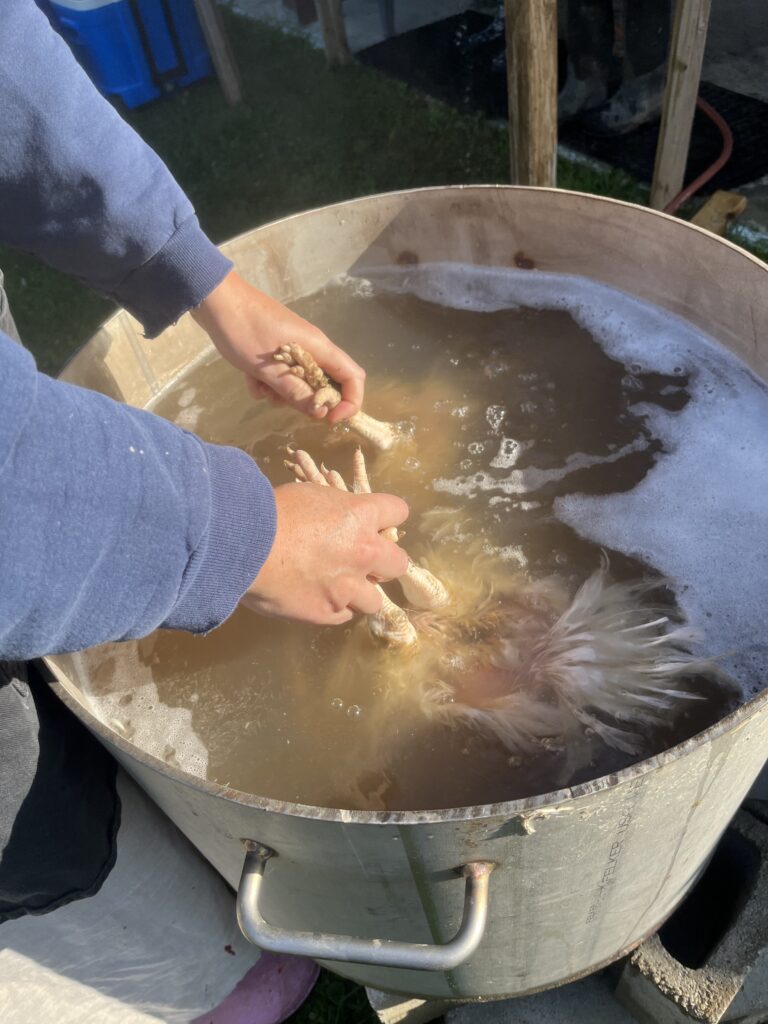
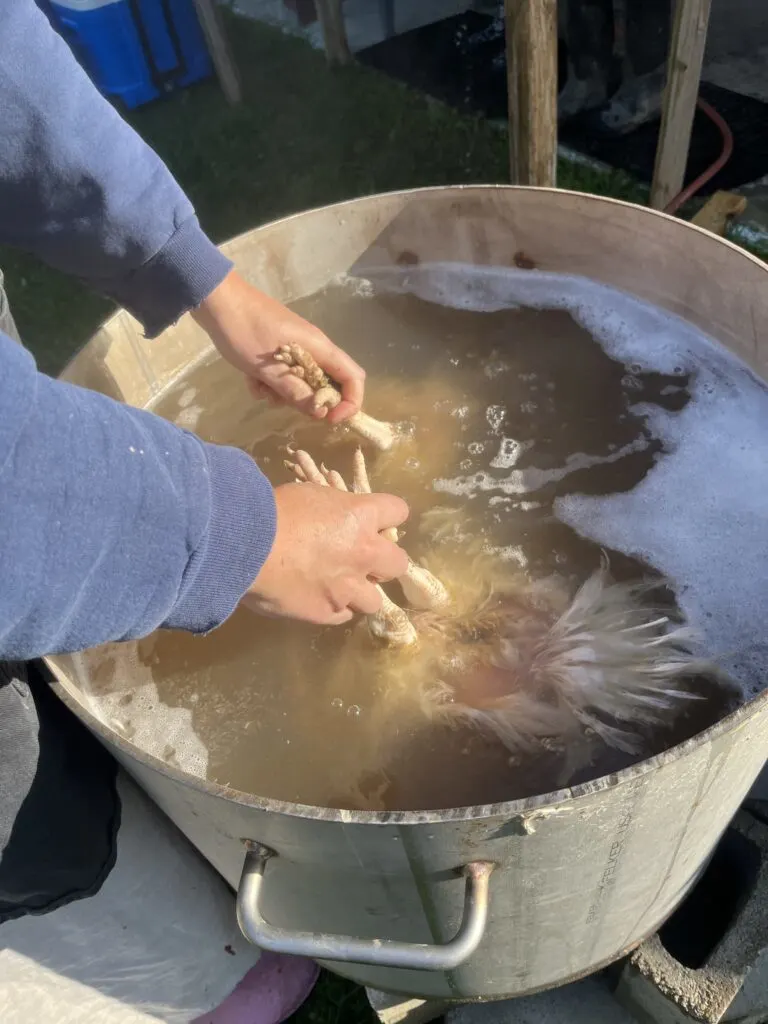
One of the jobs of the person manning the plucker is to let the dunker know if it’s too much or not enough. Too much usually means signs of scalding on the skin or cooking, thankfully with this custom dunker we haven’t had to deal with much of that at all.
Proper foot care and bad pedicures
This station is pretty straight forward. A block of plywood over a garbage can with a reasonable sharp tool and off you go. The technique of bending the leg back to find the knee joint takes a little time but soon enough its second nature. You can save the feet to use for a variety of reasons but often ours just goes with the rest of the composting.
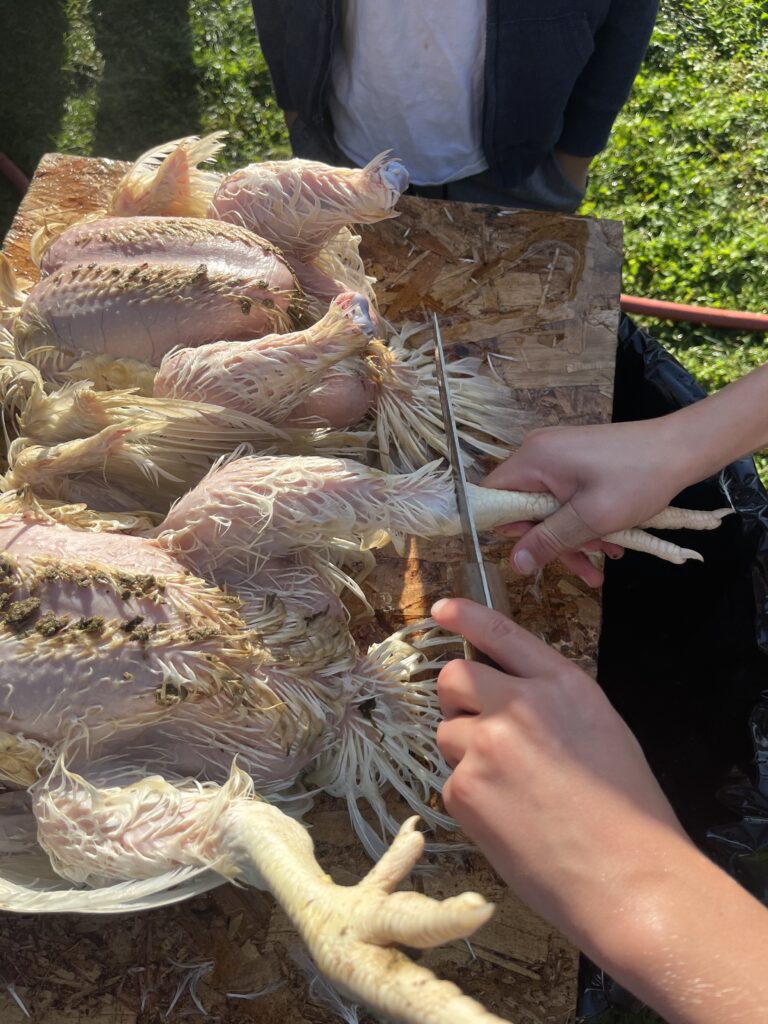

It’s important that the feet come off here before they move any farther because they would tear up the birds during the plucking if left on.
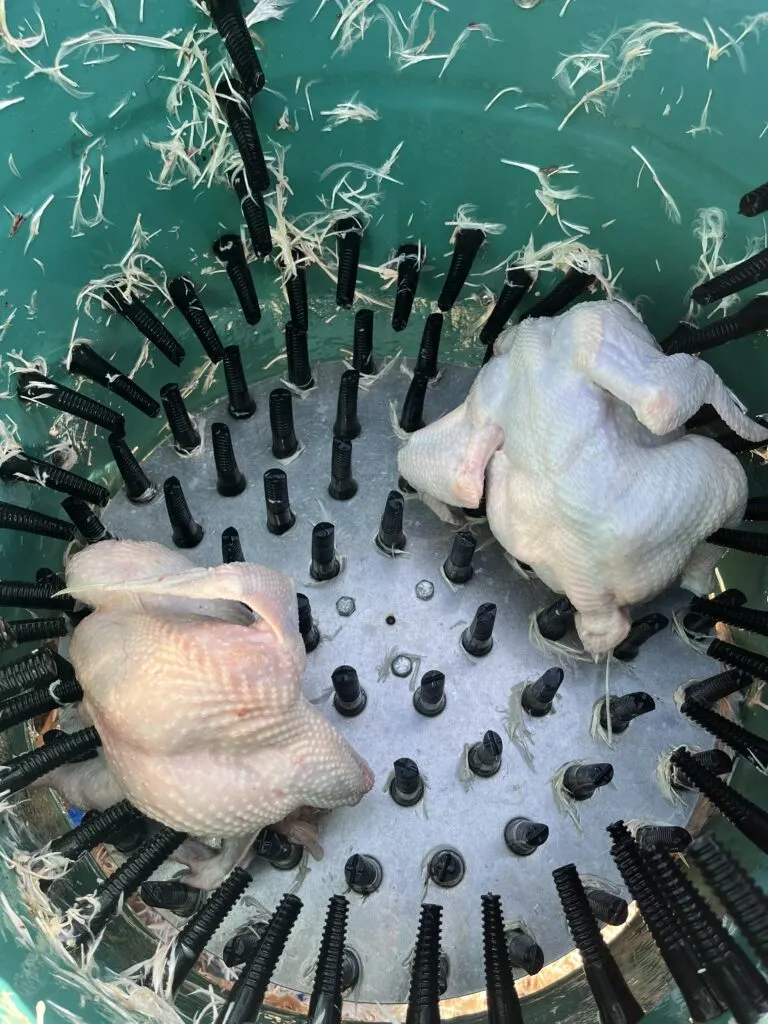
What about the plucking?
Hand plucking is terrible. I’ve read articles and people promise if you do x, y or z it’s really not that bad. Either they are liars or I’m a wimp. Either way, I do not recommend it.
Build a plucker. Buy a plucker. Rent one. Invent one of your own. Skin your chickens.
Do something other than hand pluck.

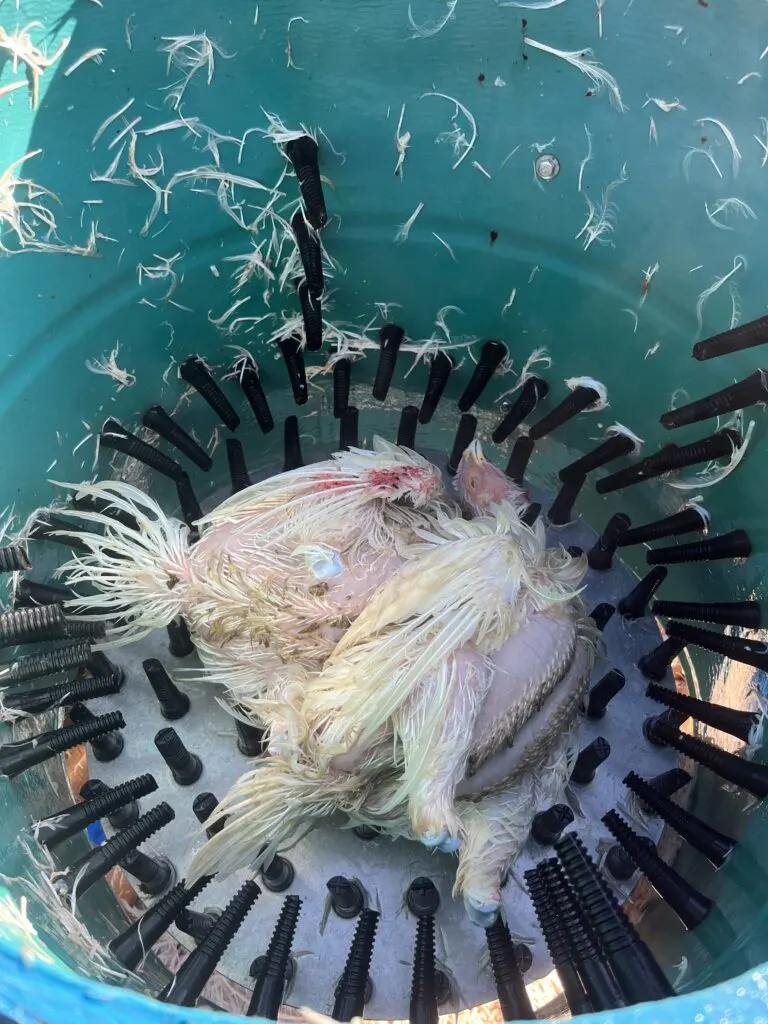
This one was built based on the Whizbang Plucker plans and has served us faithfully for many, many years. The only tips or tricks at this phase is to always have at least two birds in at one time and keep a nice gentle spray of water from the hose going while the plucker runs.
If you are down to your last bird or need to move one along, honestly the best roommate you can offer? A rubber chicken.
If you’ve done your scalding right the end result should be a nearly pristine looking set of birds.

It’s what’s on the inside that counts
At this point we put our birds into a bucket of cold water to rest until they are ready for the next step. This step is probably the most time consuming but once you’ve been doing it for a while that speeds up. I won’t go through the exact steps as I’m assuming that will cause all sorts of content warnings and no one will advertise on this page for fear I’m promoting something terrible.
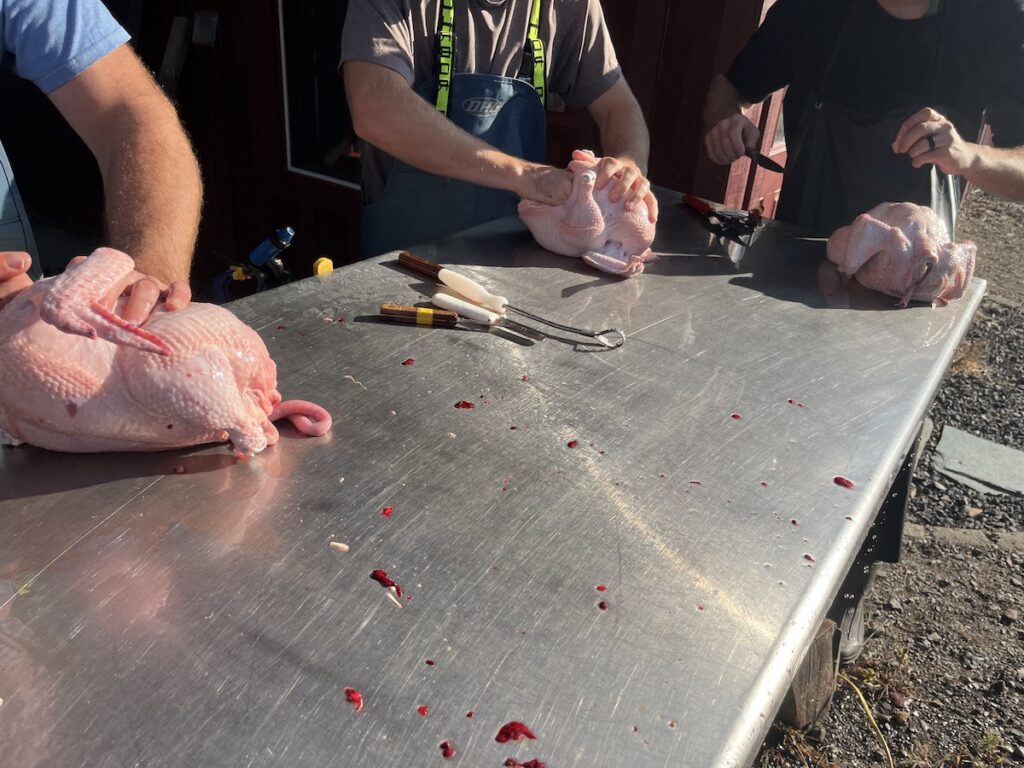

Having buckets ready for the parts that you are not using along with a hose make this easier. We use a clamp on the table to hang the hose handle on to keep it ready for use.
Once everything has been cleaned out, you are pretty much at the stage that the bird looks like something you would buy at the grocery store.
Keeping things to standard in chicken butchering
The next station is a much cleaner ordeal. This is where we do a final sweep for any feathers that didn’t get caught by the plucker and anything that may have been left inside on accident. Though this station consists of two sinks, really just another table would be fine. Again, a hose clipped nearby is a huge help.

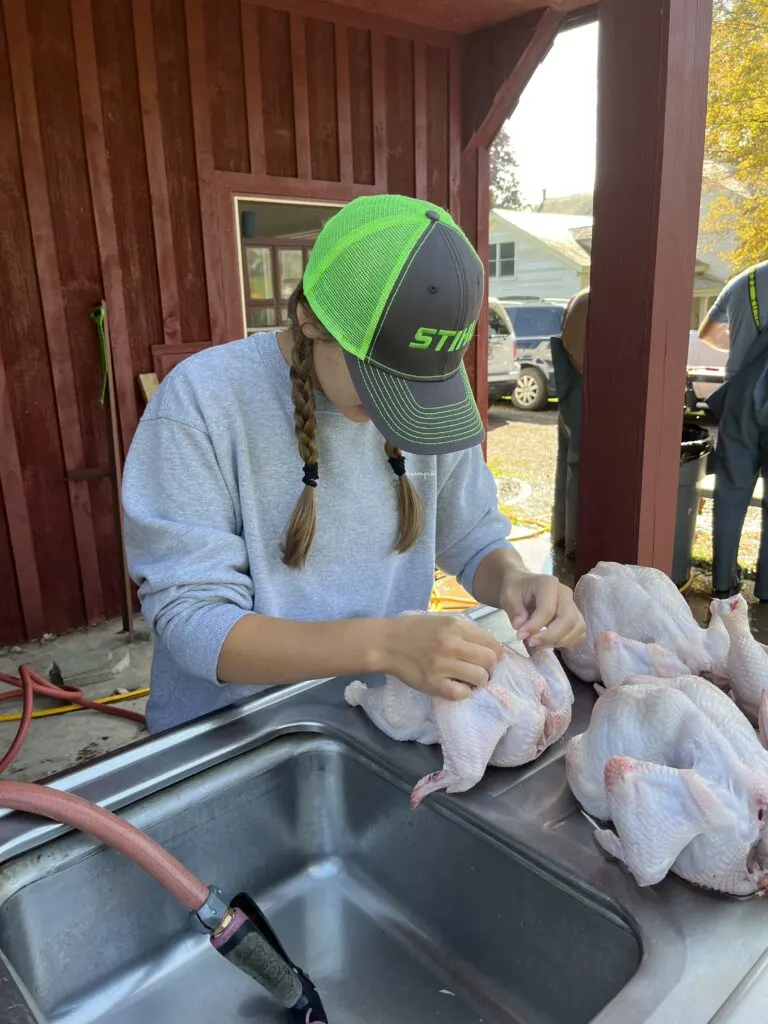
We’ve tried various scrapers and tools but usually go back to just using our hands in this phase. You want to make sure to get all the feathers out because otherwise you are going to ruin a good meal.
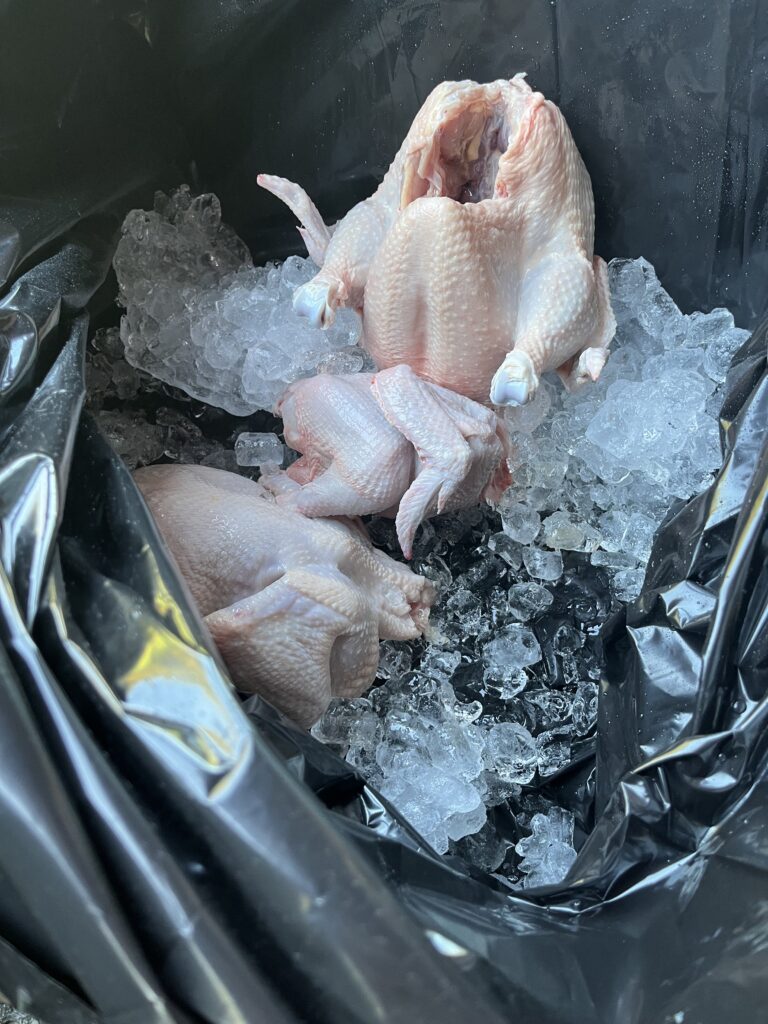
Bag it up
The last station we have is the bagging station. This is where we vacuum seal our birds, weigh them and put them in a freezer. We have someone keeping track of how many birds each family is getting.
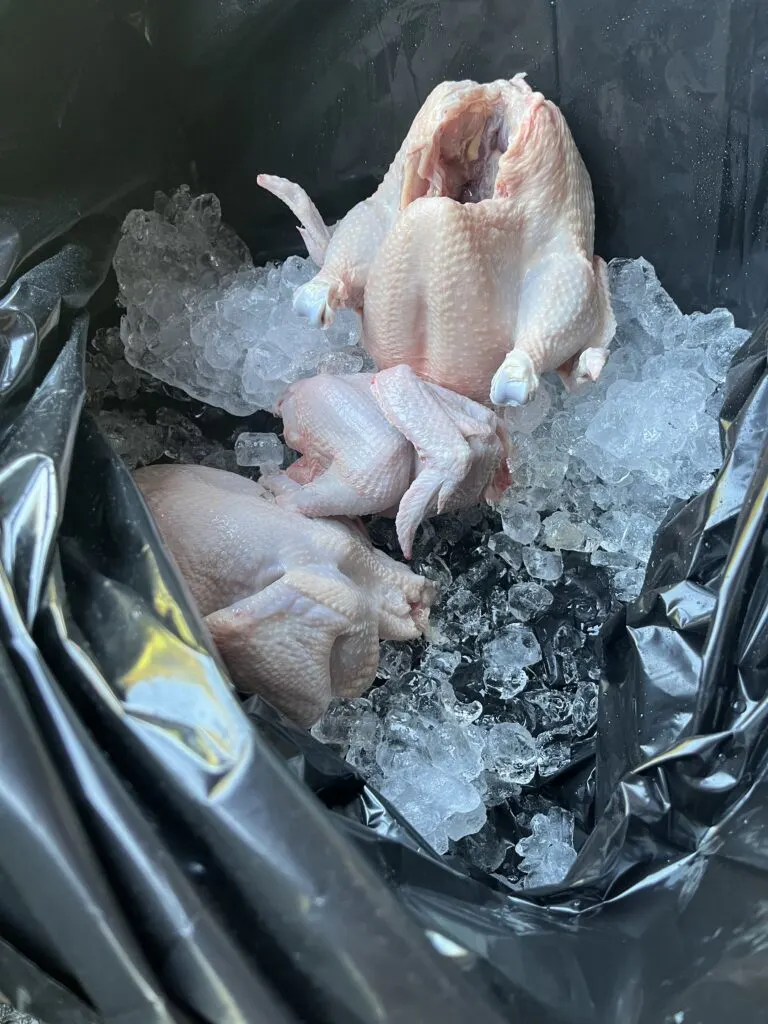
While they wait, they are once again kept chilled this time with ice instead of just cool water.
Often times we have different ‘goal’ numbers where people have pre-committed to a certain number of birds ahead of time. Because of loss due to sickness, predators or whatever we rarely come out with exactly the number we expect.
We have upgraded our vacuum sealers to professional grade and it’s made a big difference in how well the chickens keep in the freezer. Because families are getting 10-20 birds in a round it’s important that they can last well.

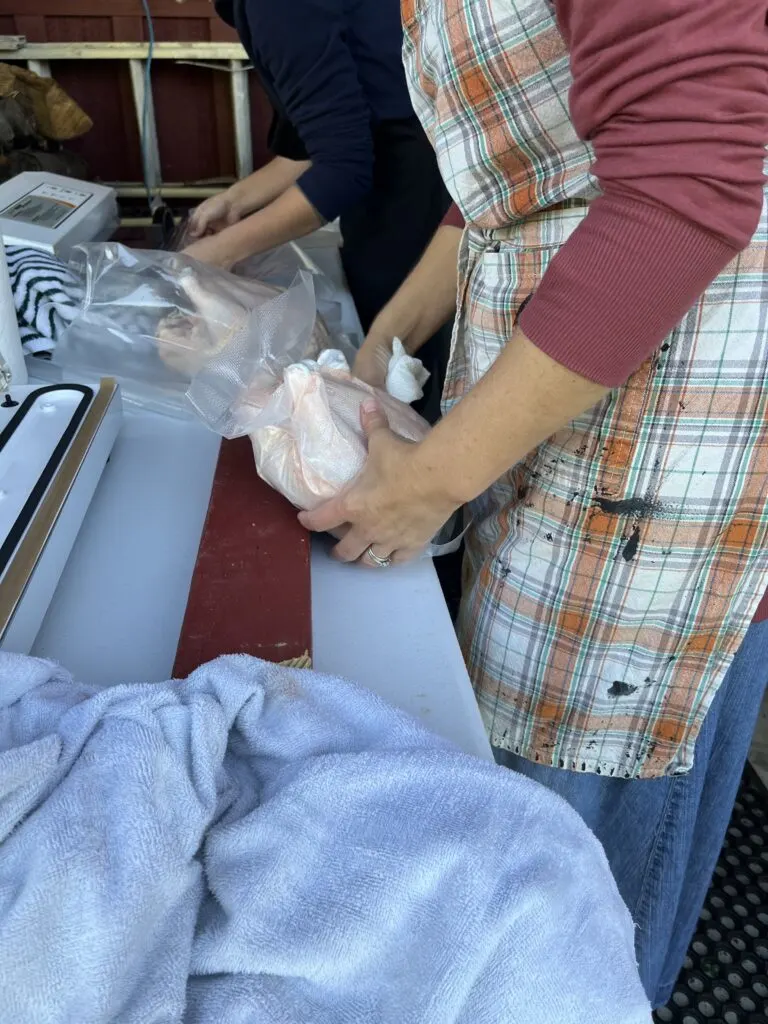
All the birds are thoroughly dried, sealed and weighed, with the weight and date written on the bag in sharpie before being placed in a cooler.
The coolers are all coded with a letter so that we know which family is getting how many birds.

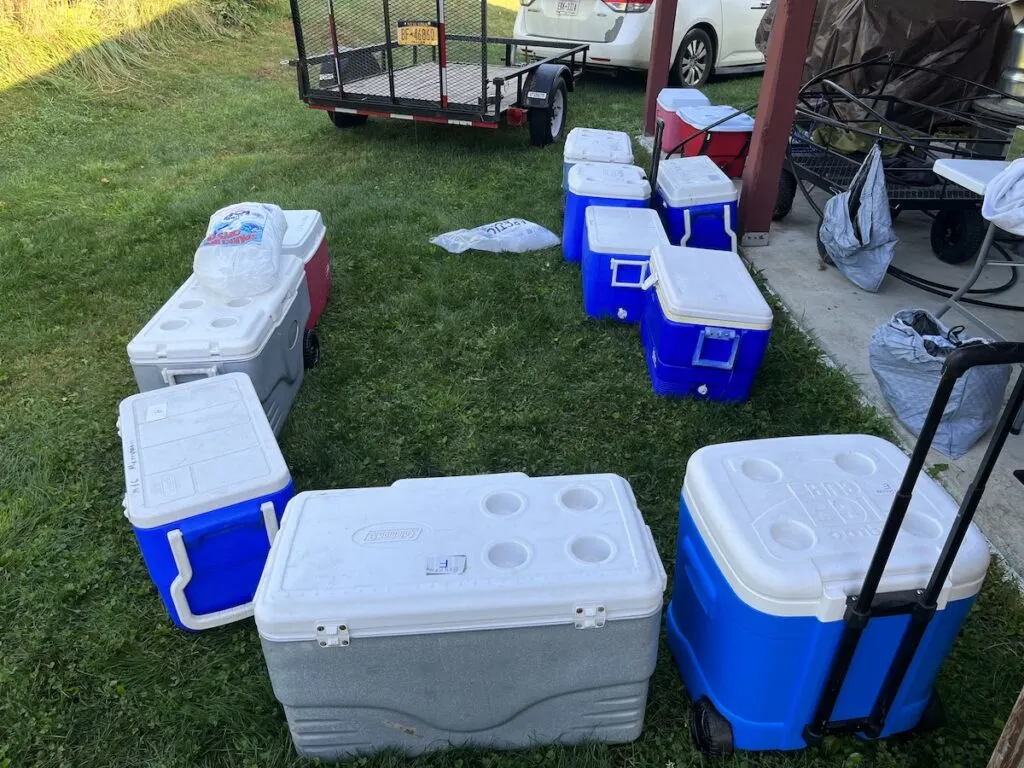
Besides coolers and aprons or bibs the only other thing we bring in the morning is two twenty pound bags of ice for each family. That goes into the coolers and the cooling stations along the way.
While our process has grown and matured over the years, you definitely do not need to start out at this level to have a successful chicken butchering day. We’re big community people though and having friends to do the work with is more than a “nice to have” it’s a big part of the reason why we do it at all.