When we started our garden adventure we knew we needed to make raised beds. After one or two versions, this is how we made our favorite version of a diy raised garden bed out of cedar. The soil everywhere on our property for hundreds of feet down is clay. Just planting in the ground is not a good option for us. Also we knew we wanted something a little more structured.

The first versions that we built had a few issues. They had weeds and plants growing between the slats and out from around the edges. And after about 10 years of use they were starting to break down.

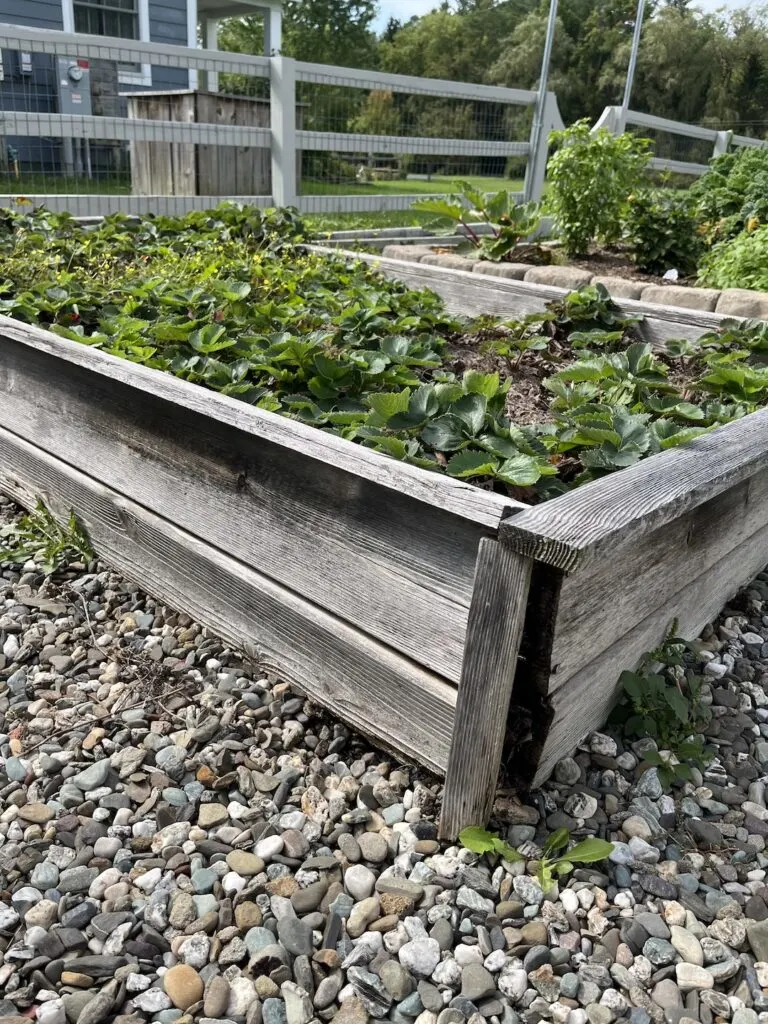
It was time for something new. Something better. When we built the second round of boxes during the garden expansion I realized that I needed to elevate the beds up out of the stone. This would stop soil form flowing out the bottom and making the ideal environment for weeds to grow.

For some reason though I stopped short of doing this evenly on all sides and used some scraps on the short ends. This was probably some misguided cost-savigns measure on my part.
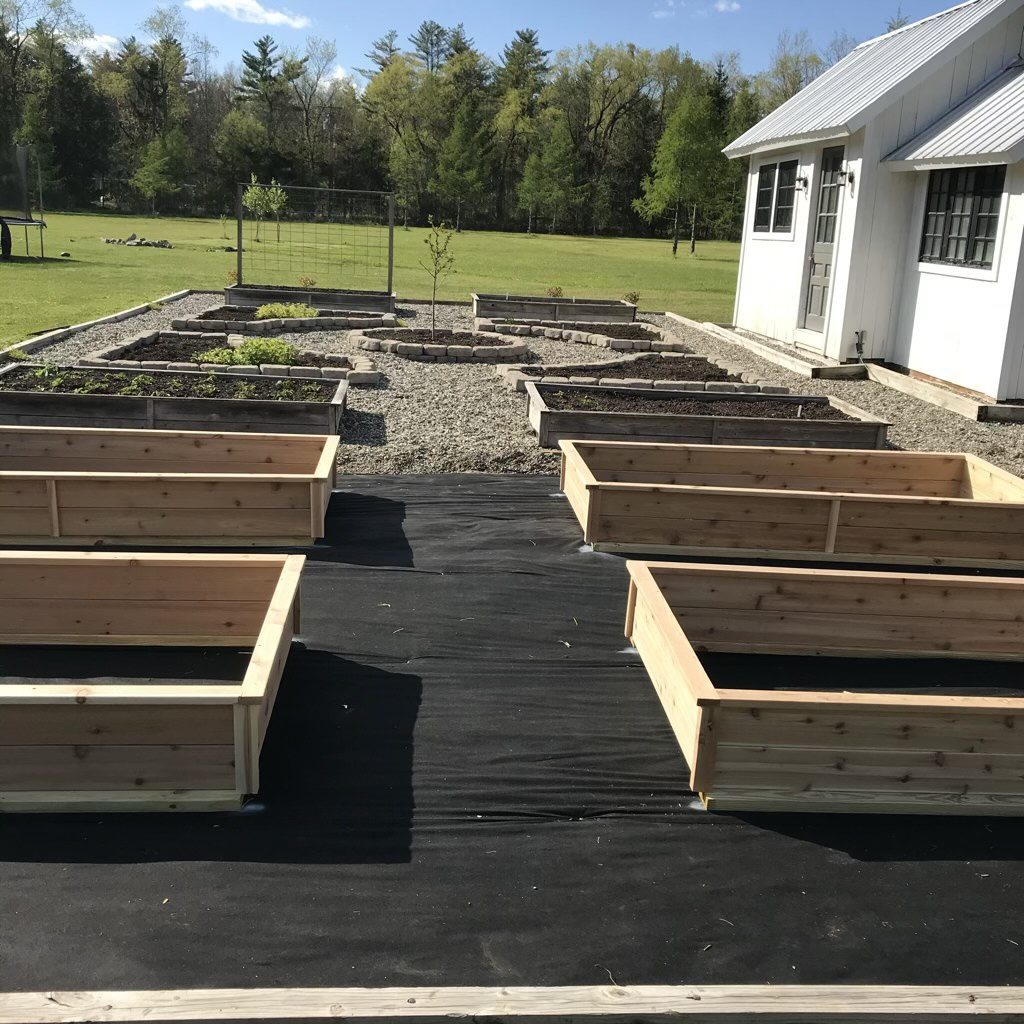
So with 2 versions under my belt, I had the experience necessary to build what will hopefully be my final version.
Materials and tools needed for a DIY raised bed
- 8 @ 8′ Cedar Decking Boards
- 1 @ 1″ x 2″ Cedar Trim Board
- 1 @ 1″ x 4″ Cedar Trim Board
- 3 @ 2″ x 4″ x 8′ Pressure Treated Boards
- Pocket Hole Jig
- Caulk
- Pocket hole screws
- 1 1/2″ Deck Screws
- Drill
- Driver
- Miter saw
- Table saw
- Pocket hole jig
Cuts for making a DIY raised bed
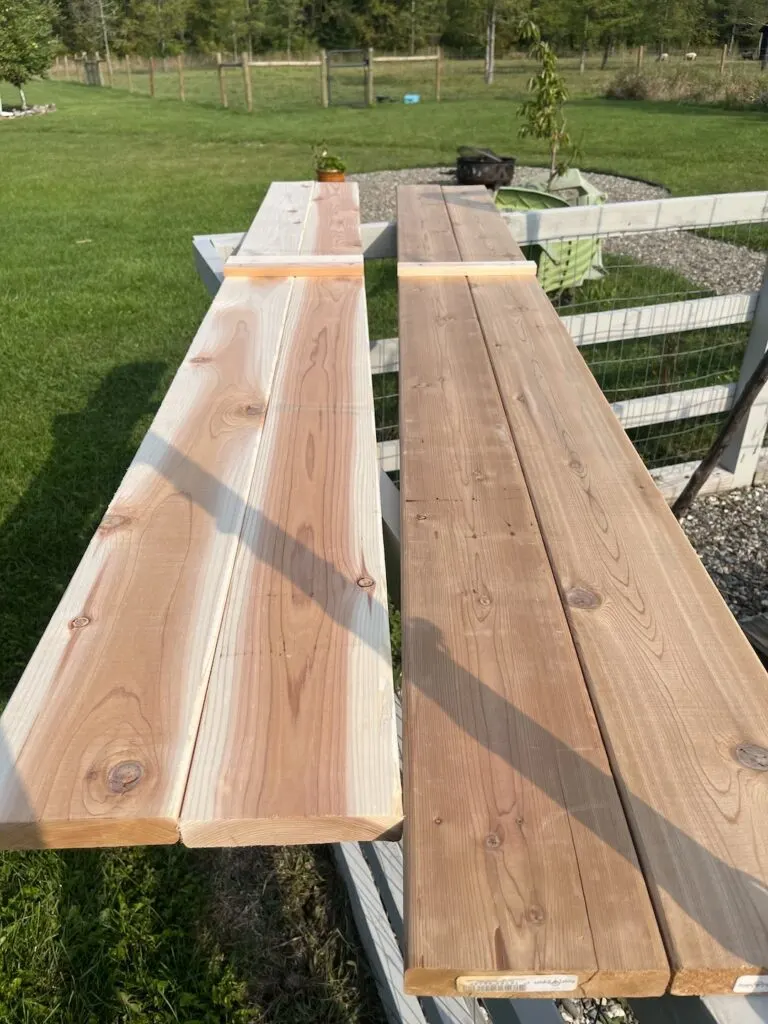
First you want to trim your four side planks down to 8′. Coming from the store they might be up to 1″ off from one another and you need them to all be the same size.

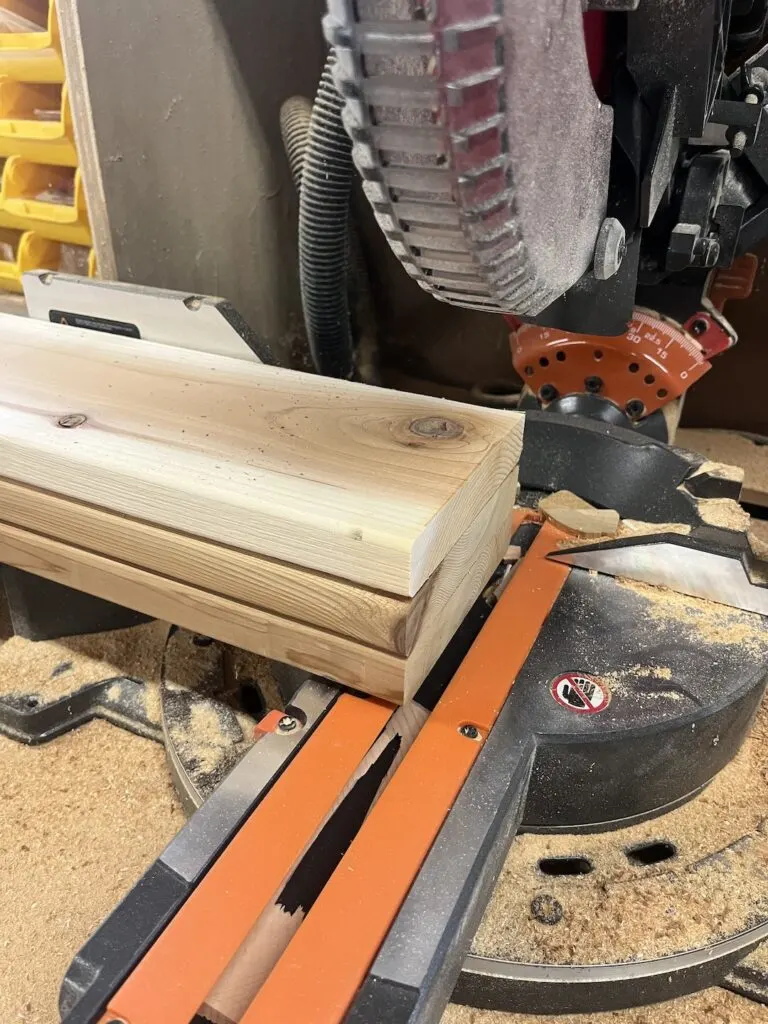
You then want to make your four shorter end pieces. For these I cut them down to 46″. They will go on the ends of the long boards. You don’t want them to be 48″ because you want your top trim piece that is 48″ to overhang on all sides over them and the corner trim. Hopefully that statement makes sense later.
You can also cut your pressure treated boards down. Two at 8′ and two at 4′.

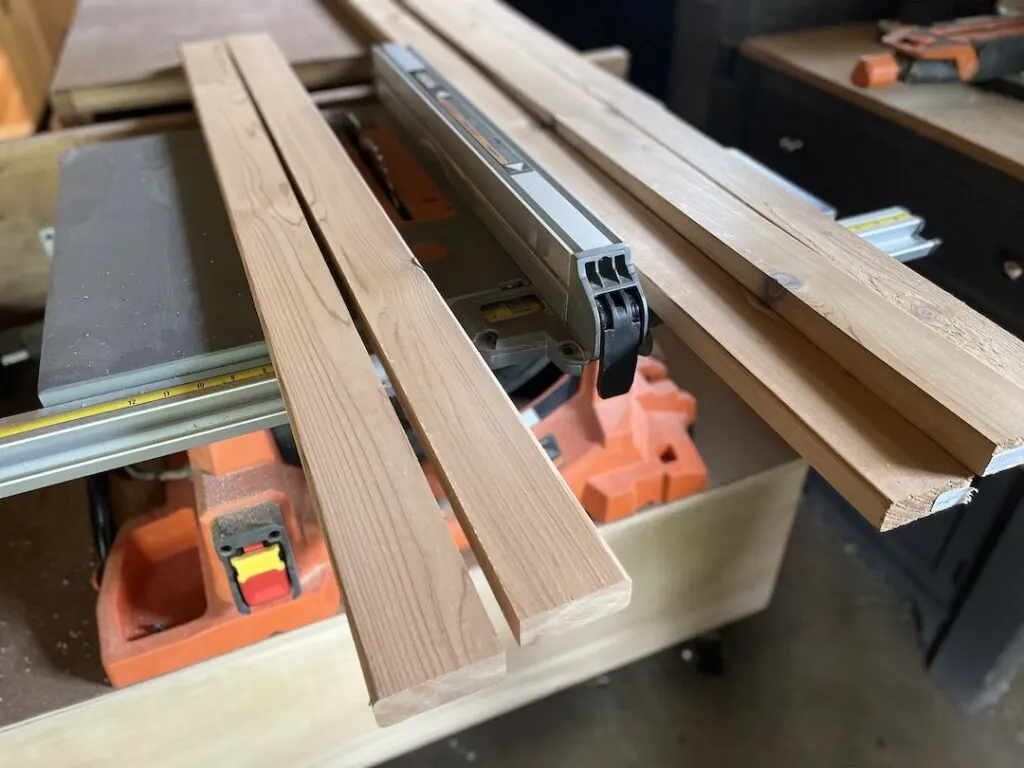

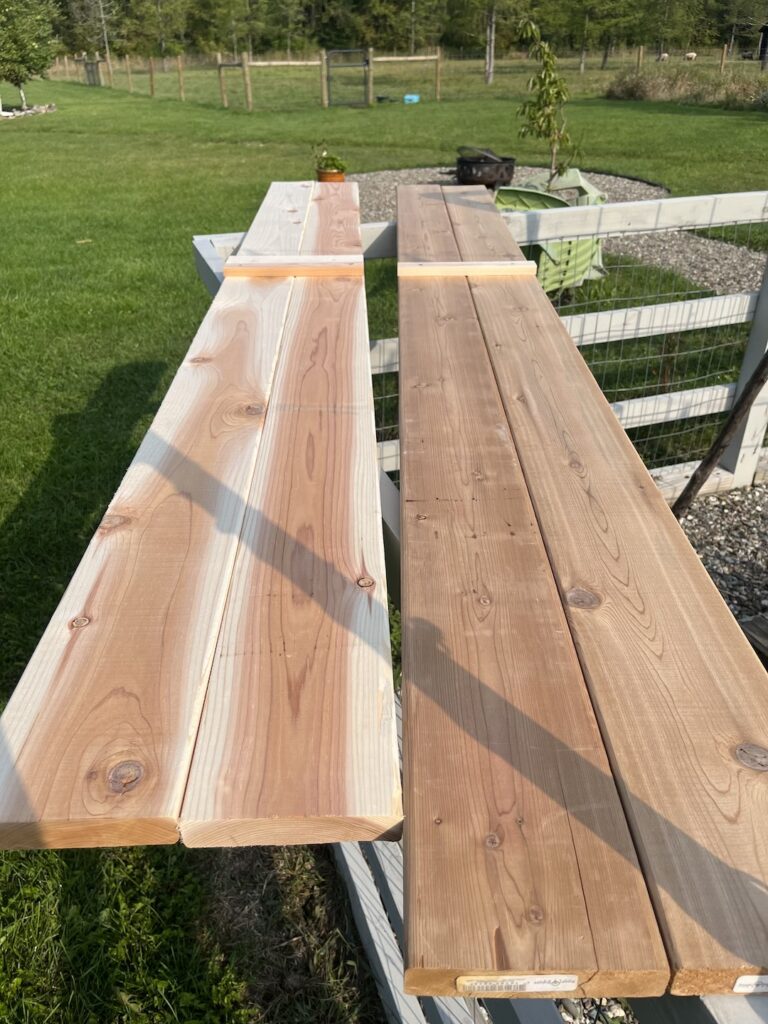
Next rip two of the cedar deck boards in half to make your top trim pieces. These should be 2 at 8′ and 2 at 4′.
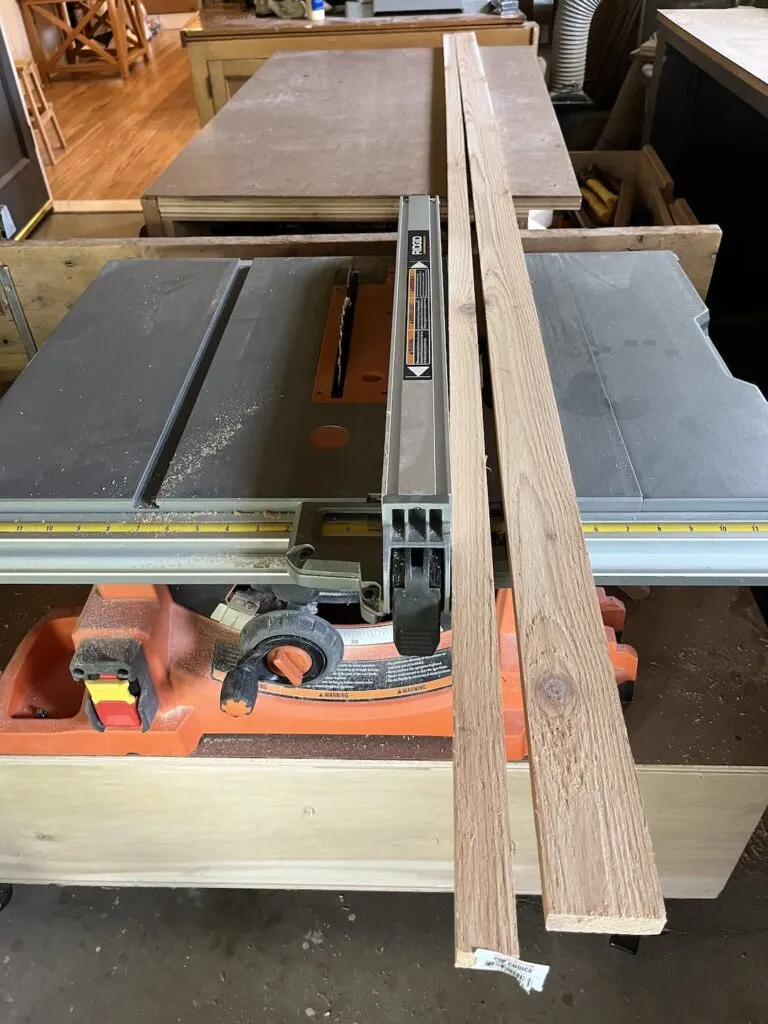
The 1 x 4 boards should be ripped down to 2 1/4″. That will give you even corner peices when combined with 1 1/2″ boards.
Cut 4 of the 1 1/2″ boards and 6 of the 2 1/4″ trim boards at roughly 12″. These will be for the corner and mid-run trim.
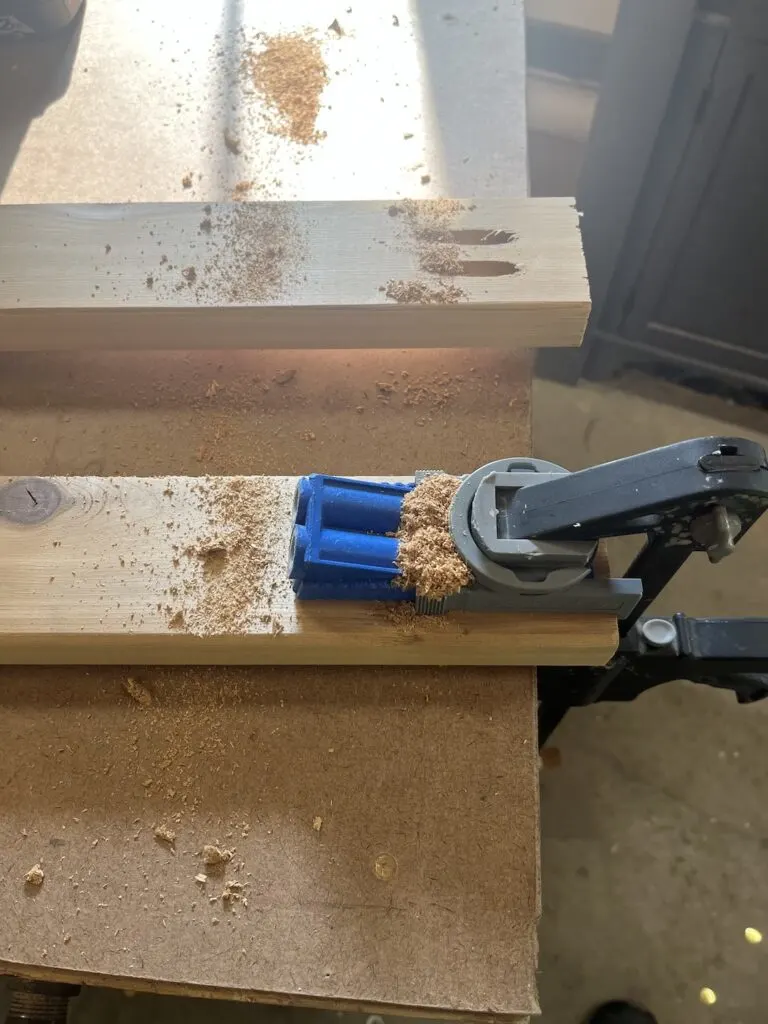
Once everything is cut, you can add pocket holes to the underside of the long trim boards. Sadly I couldn’t use my K4 jig and had to resort to the tiny version of the jig for this.

Assembling a DIY raised garden bed
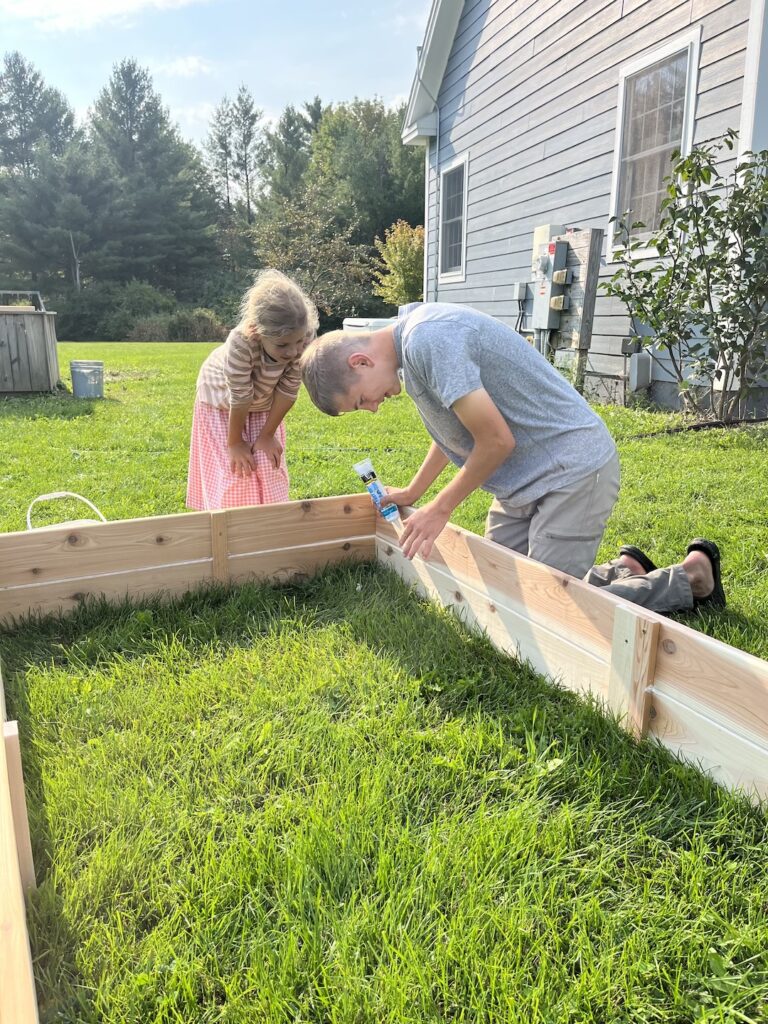
Once you have all your pieces you can drag them and a bunch of children out to the yard to assemble. If you don’t have multiple children of your own handy, you can round up some neighborhood ones or as Ina Garten says store bought is fine.
Add some scrap boards on what will be the inside of the box to keep the initial sides together. There should be plenty left over from the cedar trim boards for this. Do the same with the shorter ends and then screw through the shorter ends into the longer ends to make a box.

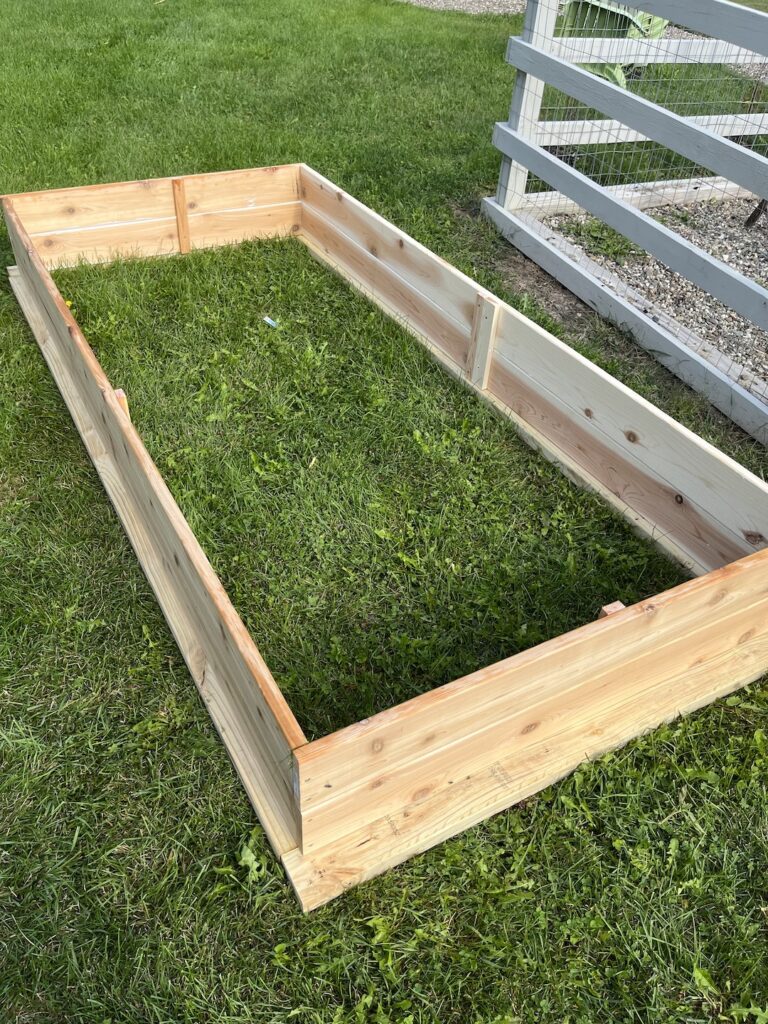
Once the box has been assembled, caulk the space between the boards so that no dirt or weeds can slip through. Then add the 2 x 4 lumber on what will be the bottom make a base that will keep the dirt in and keep the box elevated.

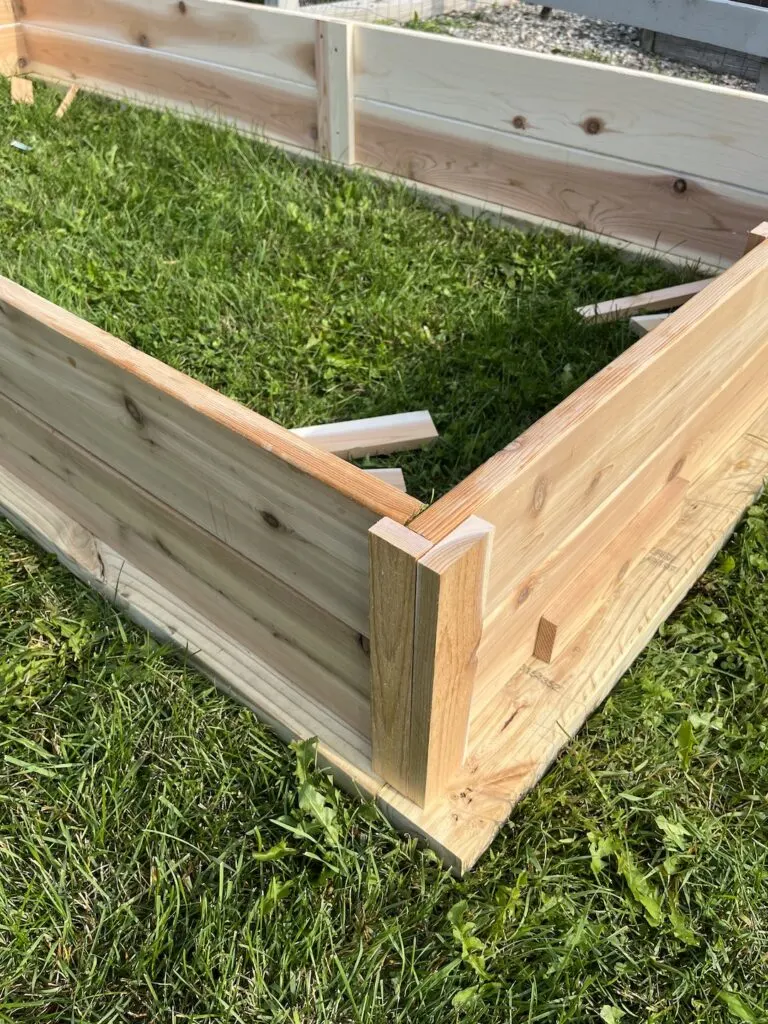
Add the corner trim. One piece of 1 1/2″ trim and one of the 2 1/4″ trim. The other 2 1/4″ trim should be placed about midway down the long boards to help keep them stable and together.
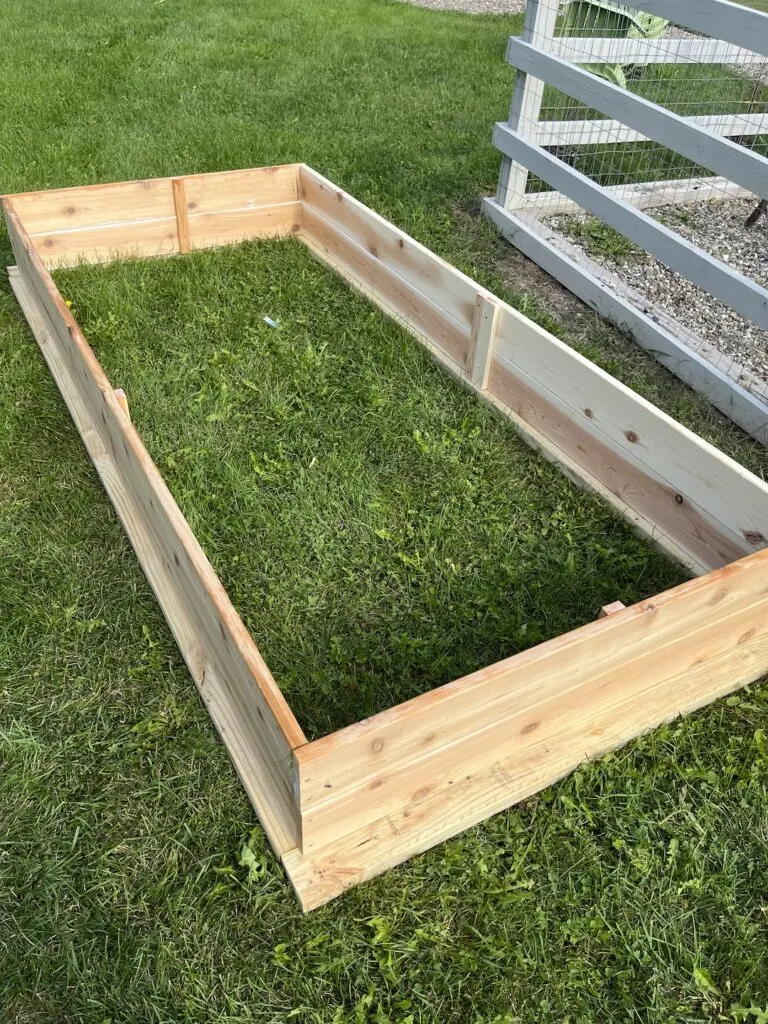
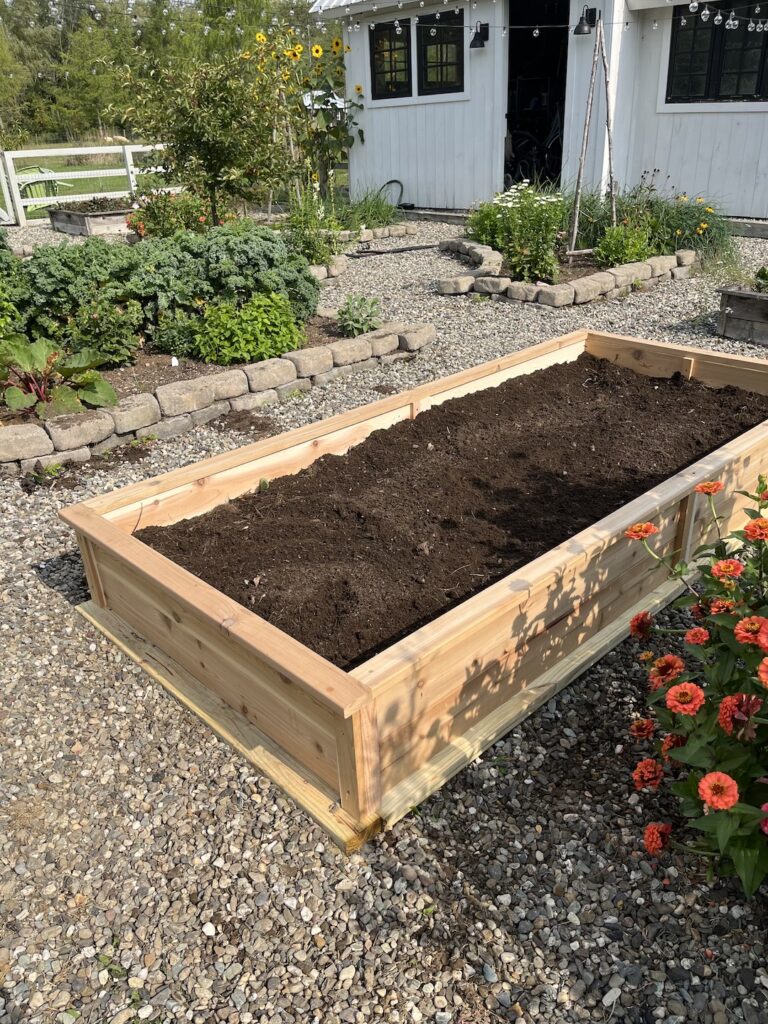
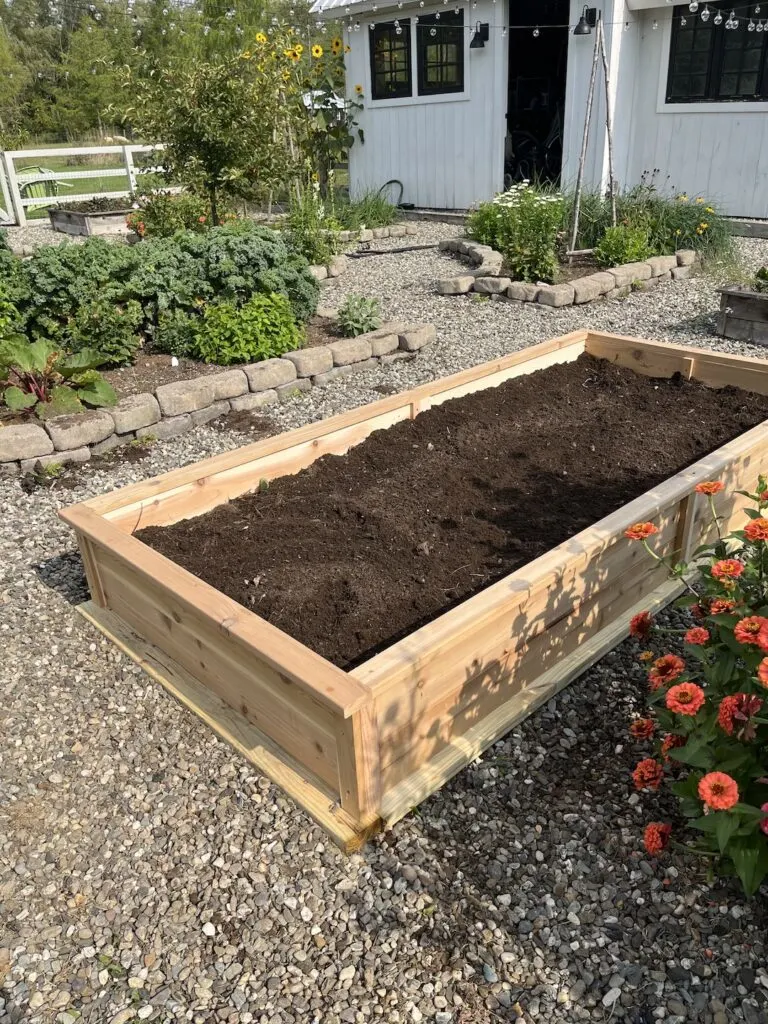
Once that is done, you should move your bed in place and fill with dirt. It becomes much harder to fill with dirt once you put the top on the bed.
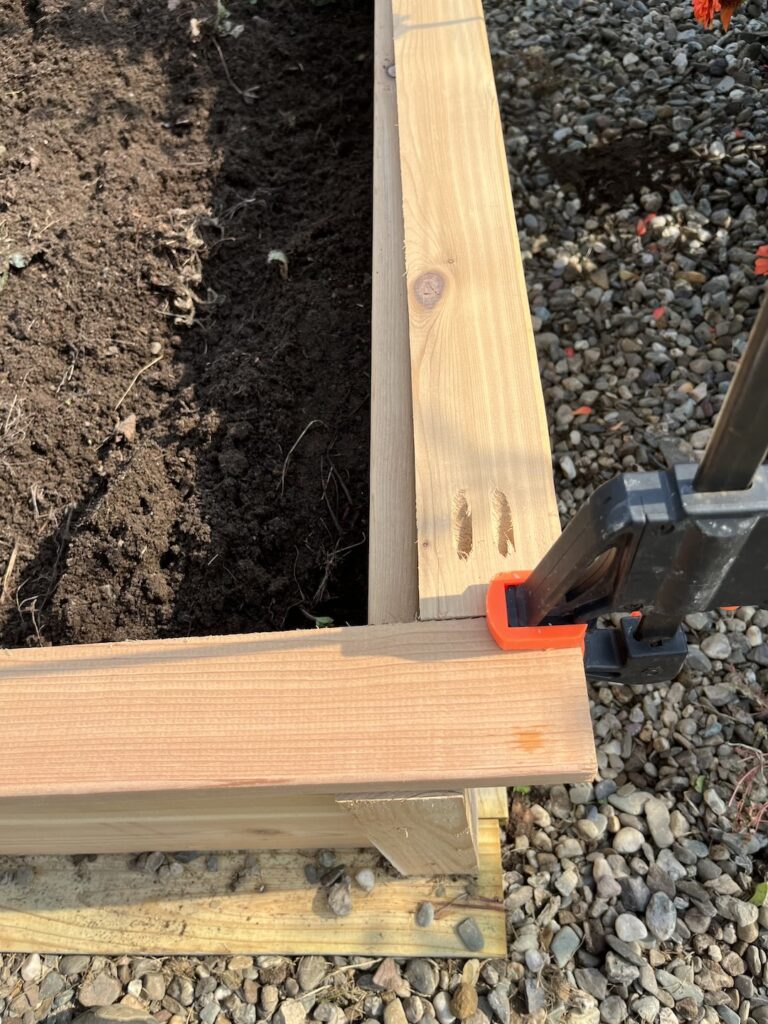
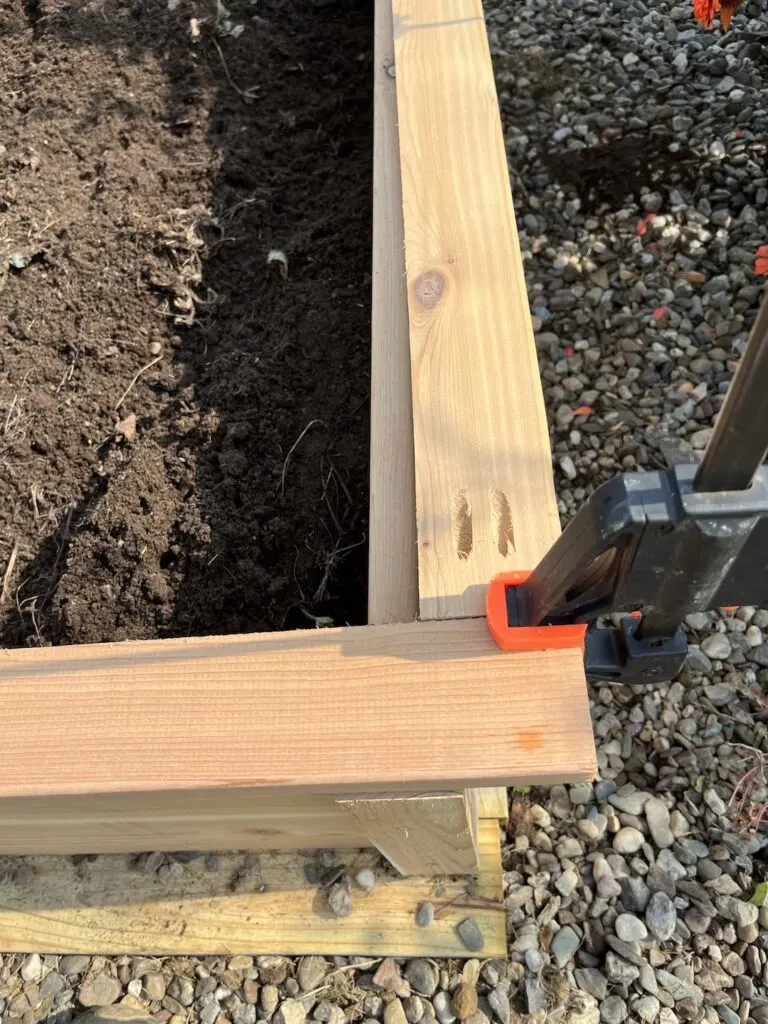
Using a clamp to keep the pieces flush, add the pocket hole screws and make the top trim as one big piece. Then, flip it over and attach with screws through the face.
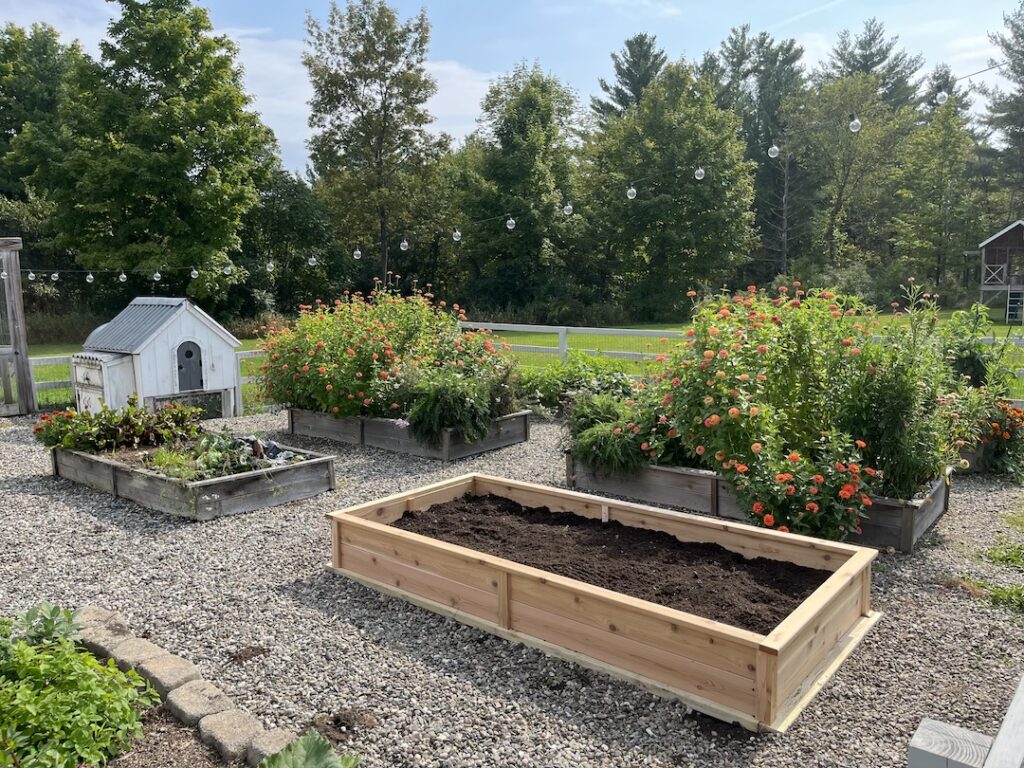
Now that the garden bed is finished, I recommend brushing more stone over the base to give it a more seamless look. Sadly our garden is running a little low on stone and I didn’t quite get the look I was hoping for yet.
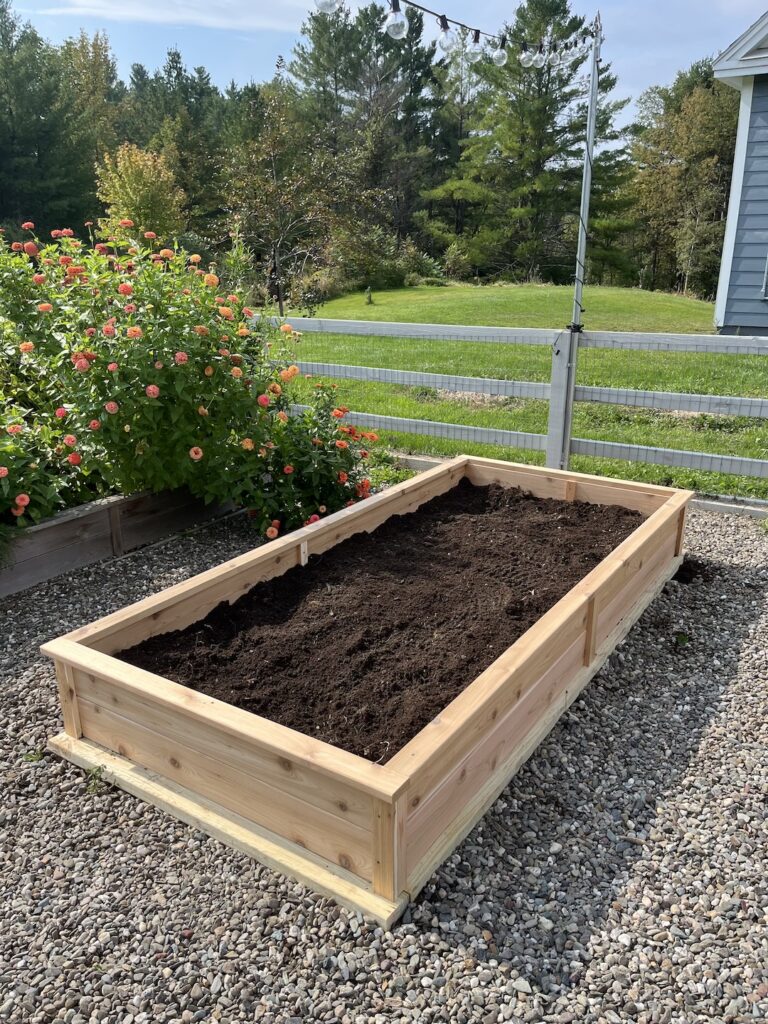

We also ran out of top soil which is when this bed looks a little on the low side.
We built this bed as a replacement at the end of the season so it will get a little bit more love and care in the spring when we normally fill the beds and refresh the stone (if needed) in the garden.
Cyd
Monday 24th of October 2022
Great work! We are going to move and rebuild our beds next spring, so I am going to shoot this to the hubby so we can revamp how we build them.